background image

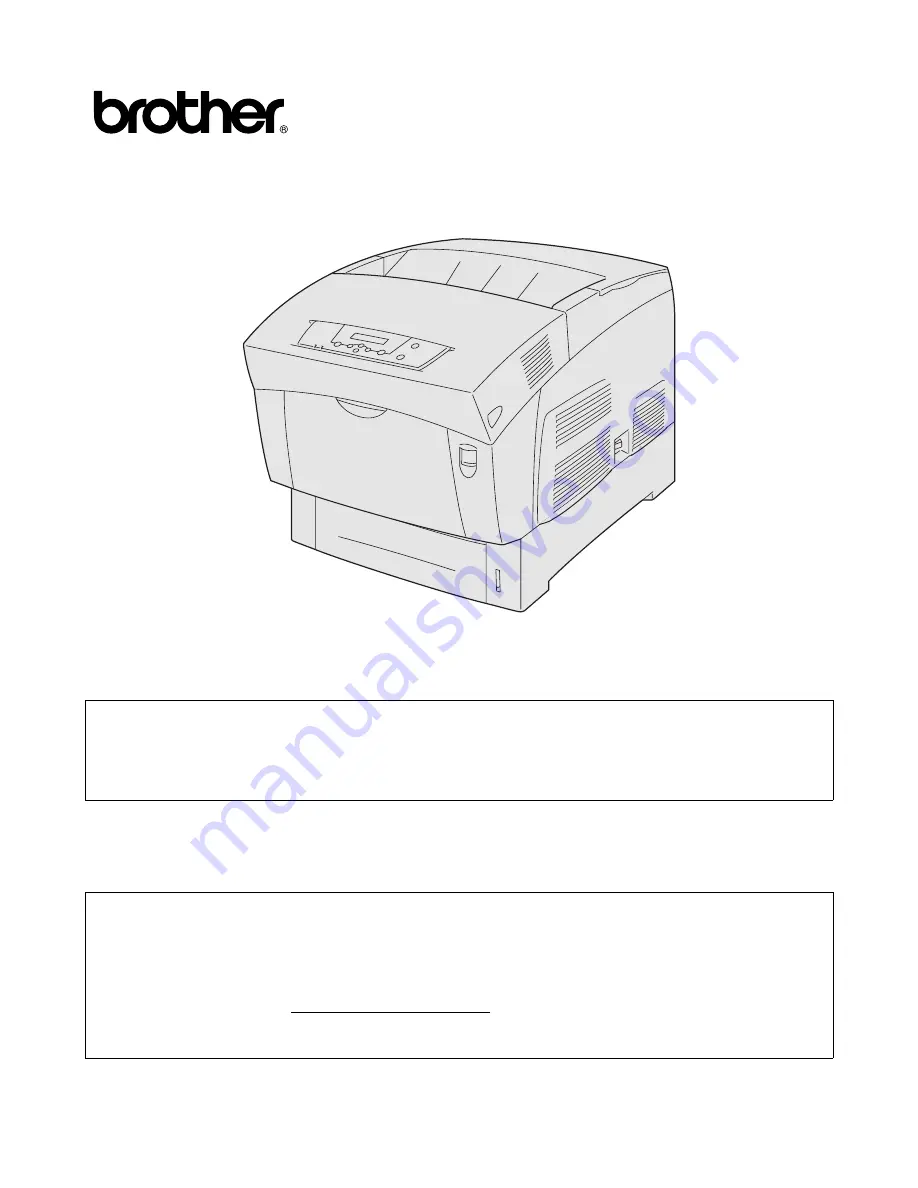
Brother Color Laser Printer

HL-4200CN

User's Guide

Version 0

For visually-impaired users: 

This User’s Guide can be read by Screen Reader ‘text-to-speech’ 
software.

You must set up the hardware and install the driver before you can use the printer.
Please read the Quick Setup Guide to set up the printer. You can find a printed copy in the box or view 
it on the CD-ROM we have supplied.
Please read this User’s Guide thoroughly before you use the printer. 
Keep the CD-ROM in a convenient place so you can use it quickly if you need to. 

Please visit our web site at http://solutions.brother.com where you can get answers to Frequently 
Asked Questions (FAQs), Product Support and Technical Questions, and the latest Driver Updates 
and Utilities.

Summary of Contents for 4200CN - Color Laser Printer

Page 1: ...k Setup Guide to set up the printer You can find a printed copy in the box or view it on the CD ROM we have supplied Please read this User s Guide thoroughly before you use the printer Keep the CD ROM in a convenient place so you can use it quickly if you need to Please visit our web site at http solutions brother com where you can get answers to Frequently Asked Questions FAQs Product Support and...

Page 2: ...lor Registration 1 1 Printing the Color Registration Chart 1 1 Determining values 1 2 Entering Values 1 3 Configuring the Printer on a Network 1 4 Setting an IP Address 1 4 Set the IP address acquisition method to Panel 1 4 Setting the IP Address 1 5 Setting the Subnet Mask 1 6 Setting the Gateway Address 1 7 Setting Protocols 1 8 Changing Protocol Settings 1 8 Confirming Settings 1 9 2 Basic Prin...

Page 3: ...Paper Types and Sizes 3 4 Unsuitable Paper Types 3 5 Storing Paper 3 6 Loading Paper 3 7 Load Paper in the Paper Tray 3 7 Load A5 Paper in the Paper Tray Changing the Paper Size from A5 3 10 Loading A5 Paper 3 10 Changing the Paper Size from A5 3 13 Load Paper into the Multi purpose Tray 3 16 Printing on Envelopes Transparencies and Custom size Long Paper 3 18 Printing on Envelopes 3 18 Printer Dr...

Page 4: ... Protocol 4 11 Report List 4 12 Printer Settings 4 12 Panel Settings 4 12 PCL Font List 4 12 Log Print 4 12 PS PostScript Font List 4 12 Demo Page 4 12 Network 4 13 Ethernet 4 13 TCP IP 4 13 IPX Frame Type 4 14 Protocol 4 14 IP Filter 4 15 Init NVM 4 15 Adobe Protocol 4 15 USB 4 16 Adobe PS Protocol 4 16 5 Troubleshooting 5 1 If it looks like you are unable to fix the problem 5 1 Power Problems 5 ...

Page 5: ...ecautions 7 1 Storage Precautions 7 1 Replacing the Toner Cartridges 7 2 Replacing the Print Head Cartridge PH 12CL 7 5 Print Head Cartridge Handling Precautions 7 5 Handling Precautions 7 5 Storage Precautions 7 6 Replacing the Print Head Cartridge 7 6 Replacing the Transfer Roll Cartridge TR 11CL 7 11 Transfer Roll Cartridge Handling Precautions 7 11 Handling Precautions 7 11 Replacing the Trans...

Page 6: ...P 12CL A 2 Getting Product Support Information A 3 General Specifications A 4 Printer Specifications A 4 Network Specifications A 7 Common Specifications A 7 TCP IP Specifications A 7 NetBIOS Specifications A 7 NetWare Specifications A 7 AppleTalk Specifications A 7 Printable Area A 8 Life Span of Consumable Items A 9 Life span of consumables in printable pages A 9 Adding Expansion Memory A 10 9 I...

Page 7: ... utilities read FAQs and troubleshooting tips and go to the Solutions section to learn how to get the most from your Brother product http solutions brother com You can check here for the Brother driver updates Customer Service In USA 1 877 284 3238 In Canada 1 877 BROTHER In Europe Visit www brother com for contact information on your local Brother office If you have comments or suggestions please...

Page 8: ...nformation to any fax machine Call the number below and follow the recorded instructions to receive a fax about how to use the system and an index of fax back subjects In USA 1 800 521 2846 Internet Addresses Brother Global Web Site http www brother com For Frequently Asked Questions FAQs Product Support and Technical Questions and Driver Updates and Utilities http solutions brother com In USA onl...

Page 9: ...ANTONE and other Pantone Inc trademarks are the property of Pantone Inc Pantone Inc 2006 ENERGY STAR is a U S registered mark All other brand and product names mentioned in this user s guide are registered trademarks or trademarks of respective companies Compilation and Publication Under the supervision of Brother Industries Ltd this manual has been compiled and published covering the latest produ...

Page 10: ... used in accordance with the instructions may cause harmful interference to radio communications However there is no guarantee that interference will not occur in a particular installation If this equipment does cause harmful interference to radio or television reception which can be determined by turning the equipment off and on the user is encouraged to try to correct the interference by one or ...

Page 11: ...emented regulations for laser products manufactured on and after August 2 1976 Compliance is mandatory for products marketed in the United States The label shown on the back of the printer indicates compliance with the FDA regulations and must be attached to laser products marketed in the United States Caution Use of controls adjustments or the performance of procedures other than those specified ...

Page 12: ... be used with the equipment If it is essential that an extension cord has to be used it must be a three pin plug type and correctly wired to provide proper grounding earthing Incorrectly wired extension cords may cause personal injury and equipment damage The fact that the equipment operates satisfactorily does not imply that the power is grounded earthed and that the installation is completely sa...

Page 13: ...BS1362 with the same rating as the original fuse Always replace the fuse cover Never use a plug that does not have a cover Warning This printer must be earthed The wires in the mains lead are coloured in line with the following code Green and Yellow Earth Blue Neutral Brown Live If in any doubt call a qualified electrician ...

Page 14: ...e R TTE Directive 1999 5 EEC 2002 and we declare compliance with the following standards R TTE EN300330 2 V1 1 1 EN301489 3 V1 3 1 CE0682 Safety EN60950 2000 EMC EN55022 1998 Class B EN55024 1998 EN61000 3 2 1995 A14 2000 EN61000 3 3 1995 Year in which CE marking was First Affixed 2003 Issued by Brother Industries Ltd Date 1 July 2003 Place Nagoya Japan Signature Takashi Maeda Manager Quality Mana...

Page 15: ...u read the guide store it in a safe place It will be useful in case you forget how to perform operations or if a problem occurs with the printer This guide is written for users who are familiar with the personal computers operating systems and software compatible with this printer For operational procedures and information regarding these items refer to the documentation provided with the various ...

Page 16: ...r guide such as the Quick Setup Guide Key Indicates a key on the keyboard of your computer Example Press the Enter key bold Indicates a window dialog box or tab element or button displayed on the computer screen Also indicates a menu or value displayed on the printer s control panel Example Click OK in the Properties dialog box Set Enabled on the control panel LCD display font Indicates a message ...

Page 17: ...ll resulting in injuries To prevent injuries this printer should be lifted by at least two people Warning alerts you to situations that could result in serious injury or death Caution alerts you to situations that could cause injury or material damage This symbol alerts you to procedures that require close attention Make sure that you read and follow the instructions carefully This symbol alerts y...

Page 18: ... The diagram below shows the minimum clearances required for normal operation consumables replacement and maintenance ensuring that your printer operates at peak performance When moving the printer be sure to unplug the power cord from the AC power outlet socket Moving the printer with the power cord connected can damage the power cord which could result in a fire or an electric shock When moving ...

Page 19: ...e the printer and deteriorate print quality Do not place the printer directly next to an air conditioner or heater as this affects the temperature inside the printer and can cause damage Do not use the printer when it is tilted at an angle of more than 5 degrees as this may result in damage Precautions for Power and Grounded Earthed Connections Use the printer within the specified power range AC p...

Page 20: ...n cause fire or an electric shock Do not plug or unplug the printer when it is on Unplugging a live connector can deform the plug and cause fire When unplugging the printer grasp the plug instead of the power cord Forcibly pulling the AC power cord can damage it and cause a fire or an electric shock Be sure to turn off and unplug the printer before accessing the interior of the printer for cleanin...

Page 21: ...metal or flammable materials get into the printer they can short circuit internal components and cause a fire or electric shocks If debris metal or liquid gets into the printer turn off and unplug the printer After that call your dealer or Brother Customer Service immediately Operating a debris contaminated printer can cause a fire or electric shocks Never open or remove printer covers that are se...

Page 22: ...or solvents in or around the printer as this can result in fire When removing paper jams make sure that no pieces of paper are left inside the printer as this can cause fire If the paper is wrapped around the fuser or roller or you cannot see the jam that you are trying to clear do not attempt to remove the paper by yourself as this may result in injuries or burns Turn off the printer immediately ...

Page 23: ... aid as follows Eye Contact Flush eyes with plenty of water for a minimum of 15 minutes and seek medical advice Skin contact Wash material off skin with plenty of soap and water Inhalation remove person to fresh air and seek medical attention Ingestion If toner is swallowed get immediate medical attention or advice When you remove the transfer roll cartridge from the printer because the waste tone...

Page 24: ...r System Settings Ready to Print The print screen The printer is ready to print 1 Press the Menu button The menu screen will appear Menu 1 System The menu screen 2 Press the button once Menu 2 Maintenance 3 Press the Form Feed Set or button once 2 Maintenance Init NVM 4 Press the button 5 times 2 Maintenance ColorRegiCorrect 5 Press the Form Feed Set or button once ColorRegiCorrect AUTO 6 Press th...

Page 25: ...can also use the densest colors of the grid to find the straightest lines The colors printed at the highest density are those next to the straightest lines If 0 is the value nearest the straightest line you do not need to adjust the color registration If the value is not 0 follow the steps outlined in Entering Values on page 1 3 1 Straightest line 2 Lattice pattern ...

Page 26: ...s the Form Feed Set or button once Enter Number Y 0 M 0 C 0 4 Press the or button until you reach the value displayed on the chart for example 3 Enter Number Y 3 M 0 C 0 5 Press the button once to move the cursor Enter Number Y 3 M 0 C 0 6 Repeat Steps 4 and 5 to continue setting the color registration Enter Number Y 3 M 1 C 2 7 Press the Form Feed Set button once Correction Chart Ready to Print 8...

Page 27: ...he control panel see Basic Menu Operation on page 4 4 Set the IP address acquisition method to Panel Ready to Print The print screen The printer is ready to print 1 Press the Menu button The menu screen will appear Menu 1 System The menu screen 2 Press the button 4 times Menu 5 Network 3 Press the Form Feed Set or button once 5 Network Ethernet 4 Press the button once 5 Network TCP IP 5 Press the ...

Page 28: ...Back or button once The lower line of the screen returns to Setup IP Address Continued from the previous step TCP IP Setup IP Address 10 Press the button once TCP IP IP Address 11 Press the Form Feed Set or button once IP Address 000 000 000 000 12 Press the or button until the value you want appears for example 192 You can hold down the buttons to change the value in increments of 10 IP Address 1...

Page 29: ... returns to IP address Continued from the previous step TCP IP IP Address 17 Press the button once TCP IP Subnet Mask 18 Press the Form Feed Set or button once Subnet Mask 000 000 000 000 19 Set the subnet mask in the same way as the IP address To set values with the or button you can hold down the button to change the value sequentially Subnet Mask 255 255 255 000 20 Press the Job Cancel Back or ...

Page 30: ...n once TCP IP Gateway Address 22 Press the Form Feed Set or button once Gateway Address 000 000 000 000 23 Set the gateway address in the same way as the IP address To set values with the or button you can hold down the button to change the value sequentially Gateway Address 192 168 001 254 24 At this point restart the printer ...

Page 31: ...PD protocol For port 9100 Port9100 protocol For IPP IPP protocol For NetBIOS transport protocol TCP IP NetBIOS TCP IP protocol For NetBIOS transport protocol NetBEUI NetBIOS NetBEUI protocol For NetWare NetWare protocol For AppleTalk AppleTalk protocol To learn how to operate the control panel see Basic Menu Operation on page 4 4 Changing Protocol Settings Ready to Print The print screen The print...

Page 32: ...tocol LPD 1 Press the Form Feed Set button once XXX indicates the protocol name 6 Press the button once Protocol Port9100 XXX Disabled 7 Press the button once 2 Press the button once Protocol IPP XXX Enabled 8 Press the button once 3 Press the Form Feed Set button once Reboot system to take effect appears for 3 seconds and then the following screen will appear Protocol NetBIOS TCP IP 9 Press the b...

Page 33: ... control the printer 5 Face Down Output Tray Printed documents are output here printed side facedown 6 Paper Stopper Lift to prevent paper from falling when it is printed 7 Exhaust Grille Allows internal heat to dissipate Make sure that the exhaust grilles are never blocked 8 Ventilation Intake Grille Allows air to enter the printer to prevent it from overheating Make sure that the ventilation int...

Page 34: ...xhaust grilles are never blocked 18 Toner Cartridges Insert the black yellow magenta and cyan toner cartridges here 19 Top Cover Face Down Output Tray This is the printer s top cover Remove it to change the toner cartridges It acts as the top cover and the face down output tray of the printer Printed documents are output here printed side face down Do not use the printer without the top cover 20 O...

Page 35: ...e initially created as an electrical charge on the surface of this drum 25 Paper Outlet Cover Open to replace the print head cartridge and fuser unit 26 Paper Rotator With duplex printing it turns the paper over after the front side has been printed 27 Fuser Unit Uses heat to fuse the toner to the paper WARNING The fuser unit gets very hot during printing Do not touch it Touching the fuser unit ca...

Page 36: ...up for 1 or 2 minutes when you turn the printer on 2 Testing appears on the control panel When the display changes from Please Wait to Ready to Print check that the Ready lamp is lit When Please Wait is displayed the printer is preparing to print Printing is not possible while this message is displayed If an error message appears on the display see What to Do When an Error Message Appears on page ...

Page 37: ...l Do not turn the printer off in the following situations Data Wait is displayed on the control panel The Ready lamp is blinking The Alarm lamp is on See The Alarm Indicator is On or Flashing on page 5 22 2 On the printer s right side press the side of the power switch marked O to turn the printer off The printer is now off Ready Ready Alarm Alarm Data Wait ...

Page 38: ...iver Printer driver upgrades are available on the Brother Solutions Center To use the software download it Any connection charges incurred while downloading the software are entirely the customer s responsibility Follow the steps below to install the Windows printer driver upgrade The following is a description in Windows XP How to access dialog boxes and their contents vary depending on the opera...

Page 39: ...riate printer driver 6 To close the Printing Preferences or Properties dialog box click OK You can also use the CD ROM that we provided to access the Brother Solutions Center and download the printer driver The address of the Brother Solutions Center is http solutions brother com Any connection charges incurred while downloading the software are entirely the customer s responsibility ...

Page 40: ...cancel printing see Cancel Printing on page 2 13 Changing default printing functions Default printing functions are preset functions in the printer driver properties dialog box accessed from the Print dialog box Setting default printing functions in advance saves you time because it reduces the number of settings you need to make every time you print Follow the steps below to change the default pr...

Page 41: ... the printer driver See Help when you need to know about printer driver items and settings or need to check different printing methods when problems occur To access Help open the Properties dialog box and select the tab that contains the item in question The example below is for the Paper Output tab in Windows XP To search for an item by keyword 1 click the Index tab 2 type the keyword s you are s...

Page 42: ... 8 6 to Mac OS X The printer is configured as an AppleTalk client For details about how to set up an AppleTalk client see the literature that came with your Macintosh computer It is not possible to use Apple QuickDraw GX on the system when using the printer Installing the Printer Driver To install the Macintosh printer driver see the Quick Setup Guide Upgrading the Printer Driver Printer driver up...

Page 43: ...e General Settings dialog box appears 4 Use the buttons next to General Settings to select the settings that you want to choose Configure the items in each dialog box as necessary For details about the dialog box elements see Balloon Help For details about how to use Balloon Help see Using Balloon Help on Macintosh Mac OS 8 6 9 2 only on page 2 12 Use the General Settings dialog box to adjust the ...

Page 44: ...printer driver Use Balloon Help to find out the functions of individual items To access Balloon Help display the dialog box that contains the item in question The example below is for the General Settings dialog box For details about how to display the Properties dialog box see Printing from Macintosh on page 2 11 1 Click Show Balloons on the Help menu of the menu bar 2 Move the mouse to the item ...

Page 45: ... Printers and Faxes The Printers window opens 2 Double click the appropriate printer The printer window appears 3 Click the document that you want to cancel and press the Delete key on the keyboard Continue to Cancel Printing at the printer s Control Panel On a Macintosh Computer Mac OS 8 6 9 2 1 Double click the printer from the printer list 2 Select the document that you want to cancel and click...

Page 46: ...at the printer finishes printing the current page For details about control panel operations see Basic Menu Operation on page 4 4 Printing LPD Tray 1 The printer is printing 1 Press the Job Cancel Back button once The printer begins to process the printing cancellation Cancelling When the cancellation finishes the print screen reappears Ready to Print The print screen The printer is ready to print...

Page 47: ...ided with the options In the following section it is assumed that the options are already installed Memory expansion In general DIMM must have the following specifications Type 144pin and 64bit output Clock frequency 100MHz or more Capacity 64Mbyte 256Mbyte Dram Type SDRAM 2 Bank The following DIMM sizes can be installed US 64 MB TECHWORKS 12345 0001 128 MB TECHWORKS 12462 0002 256 MB TECHWORKS 12...

Page 48: ...ct the options added to the printer and click OK or Apply On a Macintosh computer Follow the steps below For Mac OS 8 6 9 2 1 Select the Printer icon on your Desktop 2 Select Change Setup on Printing menu 3 Select the options added to the printer and click OK For Mac OS X 10 2 This is not available in Mac OS X 10 1 1 Open Print Center 2 Select the printer from printer list 3 Select Show Info from ...

Page 49: ...Basis weight refers to the weight of one square meter of paper Recommended Paper We recommended the following paper types for this printer Loading Paper and Usable Paper Types Feeding Method Specifications Multi purpose Tray MP Tray Basis weight 64 to 216 g m2 17 to 57 lb Standard Paper Tray tray1 Optional Tray module trays 2 3 Basis weight 64 to 105 g m2 17 to 28 lb Paper Type Europe USA Plain pa...

Page 50: ...stScript driver Paper Type Important Transparencies Do not use full color transparencies a white frame border Label sheets Use label sheets that are uncut with labels covering the whole sheet Envelopes Com 10 Monarch C5 DL Do not use envelopes that have tape seals Printing some types of pre glued envelopes may not be possible depending on the condition of the adhesive We recommend using envelopes ...

Page 51: ... paper thickness For A5 portrait from Tray 1 2 3 you can use up to 350 sheets Standard Paper tray Tray 1 Multi purpose tray MP Tray Optional tray module Tray 2 3 Tray 1 MP tray Tray 2 3 Paper size A4 Letter Legal B5 JIS Executive A5 A4 Letter Legal B5 JIS Executive A5 Envelopes Com 10 Monarch DL C5 User defined size width 90 0 to 215 9 mm 3 5 to 8 5 in length 139 7 to 900 0 mm 5 5 to 35 4 in A4 Le...

Page 52: ...following types of specialty paper print the front surface of all pages first then put the sheets into the multi purpose tray to print on the back surface of the pages Do not print on the back surface of sheets whose front surface was printed using a printer other than the HL 4200CN Paper Type Paper Sizes Plain Paper Basis weight 64 to 105 g m2 17 to 28 lb Thick Paper Basis weight 106 to 162 g m2 ...

Page 53: ...surface Paper printed with ink that cannot withstand temperatures of 155 C 311 F Heat sensitive paper Carbon paper Paper with a rough surface such as textured or fiber form paper Acidic paper that can cause the characters to fade over time Use neutral paper Envelopes with a rough surface or clips attached Paper with staples paper clips tape or ribbons attached Envelopes with sticky adhesive Label ...

Page 54: ...en 10 C and 30 C 50 to 86 F Between 30 and 65 relative humidity In a dry place After opening the package wrap unused sheets in their original package and store in a cabinet or other dry place Store paper on a flat surface Do not lean paper against other objects or place it in an upright position Avoid storing paper in a way that may cause creasing folding or curling Store paper away from direct su...

Page 55: ...o the paper tray Load paper into the optional Tray Module the same way To load A5 paper or to change to a paper size other than A5 you need to install or remove the A5 spacer To install or remove the A5 spacer see Load A5 Paper in the Paper Tray Changing the Paper Size from A5 on page 3 10 1 Gently pull out the paper tray until it stops 2 Hold the paper tray with both hands and then lift the front...

Page 56: ... prevent automatic paper size detection If this occurs move the end paper guide all the way to its outermost position again and then realign it with the appropriate paper size mark 5 Align the four corners of the paper stack and insert the paper print side up under the tab Do not use paper that is folded creased or warped Make sure that all the paper is under the tab Do not overload the paper tray...

Page 57: ...per tray completely back into the printer Do not use excessive force on the paper tray Doing so could damage the paper tray or the inside of the printer There is an indicator next to the paper tray that tells you how much paper remains in the tray Use this meter as a guide for refilling the paper tray 9 When printing A4 or Letter size paper lift the stopper on the top cover ...

Page 58: ... to load A5 paper into the paper tray Load paper into the optional Tray Module the same way 1 Gently pull out the paper tray until it stops 2 Hold the paper tray with both hands as you lift the front slightly and pull it completely out of the printer Place the paper tray on a flat surface 3 Move the side paper guides to their outermost positions ...

Page 59: ...d prevent automatic paper size detection If this occurs move the end paper guide all the way to its outermost position again and then realign it with the appropriate paper size mark 5 Grip the A5 spacer as you gently lift it up while pulling it forward and removing it from the tray 6 Align the A5 spacer with the paper guide slot and push it down until it clicks 7 Align the four corners of the pape...

Page 60: ... it feeds through the printer 9 Hold the paper tray with both hands as you align it with the opening in the printer and gently place it in the printer 10 Push the paper tray completely back into the printer Do NOT use excessive force on the paper tray Doing so could damage the paper tray or the inside of the printer An indicator next to the paper tray tells you how much paper remains in the tray U...

Page 61: ...ize into the paper tray Load paper into the optional Tray Module the same way 1 Gently pull out the paper tray until it stops 2 Hold the tray with both hands as you lift the front slightly and pull it completely out of the printer Place the paper tray on a flat surface 3 Move the side guides to their outermost positions and remove the paper from the tray ...

Page 62: ...per size that you want to load Make sure that the end guide is properly inserted into the holes for the paper size If the end paper guide is not inserted properly into the hole it could prevent automatic paper size detection If this occurs move the end paper guide all the way to its outermost position again and then realign it with the appropriate paper size mark 7 Align the four corners of the pa...

Page 63: ...rough the printer 9 Hold the paper tray with both hands as you align it with the opening in the printer and gently place it in the printer 10 Push the paper tray completely back into the printer Do not use excessive force on the paper tray Doing so could cause damage to the paper tray or the inside of the printer There is an indicator next to the paper tray that tells you how much paper remains in...

Page 64: ...ent sizes into the multi purpose tray at the same time and do not refill the tray before it is empty 1 If closed open the MP tray To avoid damage to the MP tray do not use excessive force or place heavy objects on the tray 2 Adjust the paper guide to the mark for the size that you are about to use When printing on long paper pull out the MP tray extension Printing long paper with the MP tray exten...

Page 65: ...the paper tray When printing on sheets longer than Legal paper 356 mm 14 in load the sheets one at a time Moisture can cause the sheets to stick together causing more than one sheet to go through at one time which can result in malfunction or damage to the printer When feeding long paper support each sheet with your hands to ensure proper feeding 5 When loading paper carefully align the paper guid...

Page 66: ...use Com 10 Monarch C5 and DL envelopes Do not use envelopes with tape seals Printing on some types of pre glued envelopes may not be possible depending on the condition of the adhesive We recommend using envelopes designed for laser printers Do not use envelopes larger than 90 mm 3 5 in wide and 140 mm 5 5 in long Using poor quality envelopes can cause creasing and deteriorate print quality Most e...

Page 67: ...r details about individual printer driver items see Help For details about how to use Help see Using Windows Help on page 2 9 or Using Balloon Help on Macintosh Mac OS 8 6 9 2 only on page 2 12 Tab Item Setting Paper Output Paper Size Com 10 Monarch C5 DL Same as Document Size When the document size is Com 10 Monarch C5 or DL Reverse Print Turn on if necessary Duplex Print No Duplex Paper Tray MP ...

Page 68: ...ncy sheet from the face down output tray as soon as it is printed When transparencies are allowed to accumulate in the face down output tray static electricity can build up and cause jams Transparencies can also be fed from tray 1 2 3 When feeding transparencies from tray 1 2 3 however load plain paper to about 30 mm in height in the tray first and then load transparencies about it In this case up...

Page 69: ...lso print transparencies with paper inserted between the sheets For details about the way to set paper between the sheets and the functions of individual printer driver items see Help For details about how to use Help see Using Windows Help on page 2 9 or Using Balloon Help on Macintosh Mac OS 8 6 9 2 only on page 2 12 Tab Item Setting Paper Output Paper Size A4 or Same as Document Size When the d...

Page 70: ...ing a print command from a program Continue to How to Print In Windows you need to set the user defined size before launching the print command from a program using the following steps The following example is for Windows XP 1 On the Start menu click Printers and Faxes The Printers window opens 2 Choose the appropriate printer click File on the tool bar and select Properties The Properties dialog ...

Page 71: ... paper with your hands while it feeds into the printer Printer Driver Settings for Custom size Long Paper Windows settings Macintosh settings For details about individual printer driver items see Help For details about how to use Help see Using Windows Help on page 2 9 or Using Balloon Help on Macintosh Mac OS 8 6 9 2 only on page 2 12 Tab Item Setting Paper Output Paper Size A paper size selected...

Page 72: ...ce of the paper was printed using this printer For details about the types of paper suitable for duplex printing see Suitable Paper Types on page 3 1 If you use duplex printing frequently in Windows we recommend that you register the necessary settings in the User Settings tab Registering the settings saves you time because you will not need to configure the driver each time you print For details ...

Page 73: ... about these settings For details about how to use Help see Using Windows Help on page 2 9 or Using Balloon Help on Macintosh Mac OS 8 6 9 2 only on page 2 12 When printing on the back of speciality paper make sure that you configure the necessary items in the printer driver when giving the print command from the program If you are using Tab Item Setting a Plain Paper Paper Output Duplex Print Lon...

Page 74: ...ators are lights that show the printer status Control Panel Name Status Description Ready indicator Green Indicates printing status On Indicates that the printer is not receiving data or that it is ready to print Flashing The printer is receiving print data Off Printing is not possible Alarm indicator Red Indicates an error On Indicates a paper jam or other problem that the user can correct Flashi...

Page 75: ... this screen to configure the printer The menu screen appears when you press the Menu button The first screen shows the following For details about the menu screen consulte Basic Menu Operation en la página 4 4 Printer Status Printing Parallel Tray1 Input port Paper tray Name Description Printer status Shows the printer status Example Please Wait Printing Ready to Print Input port Shows the port t...

Page 76: ... menu options buttons Switches to different menu levels and moves the cursor between parameters Pressing the button once in a menu moves the menu one level down Pressing the button moves the menu one level up Form Feed Set button Forces the remaining data to be printed For details see Forcing the Printer to Print Remaining Data When Printing is Halted on page 5 23 Selects menus and menu options Mo...

Page 77: ...m Use this menu to program the energy save mode job log settings and basic printer operation 2 Maintenance Use this menu to reset NV Non Volatile memory to its defaults adjust paper quality to plain paper and set access restrictions to certain menus 3 Parallel Use this menu to configure the parallel interface 4 Report List Use this menu to print the printer configuration list panel settings list P...

Page 78: ...k or button You accidentally pressed the button but you want to return to the preceding screen Press the button You made a mistake and cannot display the preceding screen Press the Menu button and re enter the settings You accidentally pressed the Form Feed Set button and set the wrong option When the parameter is set appears next to it When appears next to an option pressing the Job Cancel Back o...

Page 79: ...ed by certain parts of the printer When the printer is in Energy Save Mode 1 Ready Standby appears on the display When in this state the printer takes slightly more time than usual to start printing when it receives data The table below describes the situations in which the printer will stop being in Energy Save Mode Mode 1 time out default 3 minutes Set a time between 1 and 60 minutes The printer...

Page 80: ...t function Panel Language Use this to set what language appears on the control panel See the Quick Setup Guide for information on how to change your language Auto Log Print If you want the Print Logs to print automatically turn this setting on You cannot change this setting while the printer is processing print data Use the 4 Report List menu to print logs No default The printer does not print log...

Page 81: ...per size resizes the print job then prints Select Nearest The printer selects the nearest paper size does not resize the print job then prints Select Larger The printer selects the next larger paper size does not resize the print job then prints PS Error Report Print the PostScript Error Report when the processing of the PostScript job cannot finish within the time specified by the PS Job Timeout ...

Page 82: ...ing the NV memory resets the printer back to its factory default settings You must restart the printer for this operation to take effect After programming settings be sure to restart the printer NO Does not reset the NV memory and returns to the menu Security When necessary you can set a password to limit access to menus This helps prevent settings from being changed accidentally PanelSetProtect d...

Page 83: ... Auto PHD align When you set up the printer or change the print head cartridge the printer adjusts the Color Registration automatically ON default OFF Deactivates the Auto PDF align function ColorRegiCorrect Use ColorRegiCorrect to print the color registration adjustment chart After setting up or moving the printer print the color registration adjustment chart and adjust the color registration to ...

Page 84: ...Use ECP to configure the ECP communication mode of the parallel interface Enabled default The printer receives data in ECP mode Disabled The printer does not receive data in ECP mode Adobe Protocol To set the Adobe Protocol choose one of the following Auto Standard BCP TBCP default ...

Page 85: ...ration list see Confirming Printer Configuration and Network Settings on page 7 19 Panel Settings Panel Settings is a detailed list of all the settings in the control panel menus PCL Font List PCL Font List is a list of the available PCL data fonts Log Print Log Print is a detailed list of the processed print jobs maximum 22 Use this list to confirm that jobs were printed correctly For an example ...

Page 86: ...TCP IP to make TCP IP settings This menu contains the following Setup IP Address Select how to obtain an IP address Parameters are as follows DHCP default The IP address is obtained from a DHCP server on the network Panel Use this to set the IP address from the control panel IP Address Use this to set the IP address aaa bbb ccc ddd Set aaa bbb ccc and ddd between 0 and 255 You cannot use the follo...

Page 87: ...using TCP IP set LPD to Enabled to print with LPD LPR or to Disabled if you do not want to use this feature Port 9100 default Enabled When using TCP IP set Port 9100 to Enabled to print with port 9100 Raw Data Socket or to Disabled if you do not want to use this feature IPP default Enabled When using TCP IP set IPP to Enabled to print with IPP Internet Printing Protocol or to Disabled if you do no...

Page 88: ...sses assign the addresses in ascending ranges from Filter1 to Filter5 You can also set IP filter settings by connecting to the printer using a web browser For a detailed examples of these settings see the Network User s Guide on the CD ROM we provided For more information about Web Based Management see Confirming Printer Status from Your Computer on page 7 21 Init NVM This resets the non volatile ...

Page 89: ...CONTROL PANEL 4 16 USB Adobe PS Protocol To set the Adobe Protocol choose one of the following TBCP default RAW Standard BCP ...

Page 90: ...ntact your dealer or Brother Customer Service for assistance Do not make any changes or modifications to the equipment as this may cause a fire or an electric shock Turn the printer off and disconnect the power cord from the AC outlet socket before performing maintenance on the printer Failure to turn the printer off and disconnect the power cord may result in an electric shock Troubleshooting WAR...

Page 91: ...orrectly rated outlet socket Connect the printer to an AC power outlet socket that you know works Do not connect any other equipment to the outlet socket Do not connect the printer to an auxiliary power outlet on the back of a computer The printer frequently turns off Is the power cord loose or disconnected Turn the printer off and connect the power cord correctly Turn the printer on again The pri...

Page 92: ...se or disconnected Turn the printer off and check the interface cable If necessary reconnect the cable Is the network card loose Turn the printer off and reinstall the network card into the printer Does the parallel USB or Ethernet interface cable meet the required printer specifications Use only the recommended parallel or USB interface cables for the printer 10Base T and 100Base TX Ethernet inte...

Page 93: ...t Example for Windows XP Does Pause Printing appear in the printer window When printing stops because of an error the printer sometimes switches to the Pause Printing state Follow the steps below to release the printer from the Pause Printing state 1 On the Start menu click Printers and Faxes 2 Double click the appropriate printer 3 In the printer window click the Printer menu 4 On the Printer men...

Page 94: ... on Is the network card loose or disconnected Turn the printer off and reinstall the network card into the printer then turn the printer back on Are the zone and printer names correctly specified The zone or printer names might be incorrect Ask your system administrator for the correct settings Use the printer configuration list to confirm the current printer settings See Confirming Printer Config...

Page 95: ...ead cartridge is old or damaged Replace the print head cartridge See Replacing the Print Head Cartridge PH 12CL on page 7 5 The power supply is defective Contact your dealer or Brother Customer Service Output sheets are completely black The print head cartridge is old or damaged Replace the print head cartridge See Replacing the Print Head Cartridge PH 12CL on page 7 5 The power supply is defectiv...

Page 96: ...a with a recommend size and type and confirm that your printer driver settings are correct See Suitable and Unsuitable Paper Types on page 3 1 The print head cartridge is old or damaged Replace the print head cartridge See Replacing the Print Head Cartridge PH 12CL on page 7 5 Vertical black lines The print head cartridge transfer roll cartridge or fuser unit is old or damaged Check the print head...

Page 97: ...a dry environment Replace the paper See Loading Paper on page 3 7 Shadows appear around areas of dense black printing Is the media suitable Replace the media with a recommend size and type and confirm that your printer driver settings are correct The transfer roll cartridge is old or damaged Replace the transfer roll cartridge See Replacing the Transfer Roll Cartridge TR 11CL on page 7 11 Ghost im...

Page 98: ... size and type and confirm that your printer driver settings are correct Is the transfer roll cartridge or fuser unit properly installed in the printer Make sure that the transfer roll cartridge or fuser unit is properly installed See Replacing the Transfer Roll Cartridge TR 11CL on page 7 11 See Replacing the Fuser unit FP 12CL on page 7 14 Vertical blanks Is the print head cartridge properly ins...

Page 99: ...ype of media that is being used See BTR CurrentAdj on page 4 10 When duplex printing on recommended paper toner appears scattered and the print result is blurred BTR CurrentAdj setting may not be set to 0 for all media types Set the BTR CurrentAdj to 0 for all media types using the control panel See BTR CurrentAdj on page 4 10 When duplex printing on non recommended paper print result appears blui...

Page 100: ...lled in the printer Make sure that the transfer roll cartridge and fuser unit are properly installed See Replacing the Transfer Roll Cartridge TR 11CL on page 7 11 See Replacing the Fuser unit FP 12CL on page 7 14 Slanted printing Incorrectlypositioned printing Are the paper guides in the paper tray set correctly In the paper tray set the side and end guides to their correct positions See Load Pap...

Page 101: ...e Printing on Transparencies on page 3 20 Unsatisfactory envelopes Are the envelopes of a suitable type Use envelopes suitable for use with this printer See Suitable and Unsuitable Paper Types on page 3 1 Is the media properly loaded into the multi purpose tray Make sure the envelopes are properly loaded into the multi purpose tray See Printing on Envelopes on page 3 18 Is the printer driver confi...

Page 102: ...move any tape or adhesive found along the paper path See Clearing Paper Jams on page 6 1 Is the printer level Reposition the printer on a flat stable surface See Safety Precautions on page xvi Is the printer driver paper feed method correctly set Make sure that the printer driver paper feed method is correctly set Also when an optional tray module is present you must reconfigure the printer to use...

Page 103: ...ary reconnect the cable then turn the printer back on Is the printer s Internet address correct Confirm that the printer s Internet address is correct If the problem persists use an IP address to connect to the printer instead Is the printer s IP address correct The IP address might be set incorrectly Ask your system administrator for the correct settings Use the printer configuration list to conf...

Page 104: ...it takes longer than normal to begin printing when the printer receives a print request On the control panel set a longer time out for the energy save mode See List of Menu Items on page 4 6 Unusual noises are coming from the printer Is the printer level Reposition the printer on a flat stable surface See Safety Precautions on page xvi Is the paper tray properly inserted into the printer Push the ...

Page 105: ...at each end of the yellow toner cartridge with your fingers then push down firmly to rotate the levers forward to install the cartridge See Replacing the Toner Cartridges TN 12BK Y M C on page 7 1 CTD Sensor Need Maintenance It is time to check the density sensor Action Remove the transfer roll cartridge and check the cleanliness of the density sensor See Cleaning the Density Sensor on page 5 24 C...

Page 106: ... Press the Form Feed Set button The printer settings may be deleted when you reset the NV memory Print the printer configuration list and the panel settings list to confirm settings See Confirming Printer Configuration and Network Settings on page 7 19 See List of Menu Items on page 4 6 No Paper in All Tray There is no paper in any of the paper trays Action Load paper into the trays See Loading Pa...

Page 107: ...n page 7 14 Reinsert Fuser cartridge The fuser unit is not inserted in the printer or the fuser unit is set improperly Action Push the fuser unit all the way into the printer See Replacing the Fuser unit FP 12CL on page 7 14 No Paper in Tray1 There is no paper in tray 1 Action Load paper into paper tray 1 See Load Paper in the Paper Tray on page 3 7 Load xxxx in N Paper size xxxx is not loaded in ...

Page 108: ...J1 This is a warning message Contact your dealer or Brother Customer Service Close Front Cover The front cover is open Action Make sure that the front cover is properly closed Replace Magenta Toner M The magenta toner cartridge is empty Action Replace the magenta toner cartridge See Replacing the Toner Cartridges TN 12BK Y M C on page 7 1 Reinsert Magenta Toner M There is no magenta toner cartridg...

Page 109: ...used ID error Action Remove the top cover then fit the proper Brother toner cartridge ID error for K toner cart This toner cartridge cannot be used ID error Action Remove the top cover then fit the proper Brother toner cartridge ID error for Fuser unit Meaning This fuser unit cannot be used ID error Action Fit the proper Brother fuser unit ID error Please Press Set A F W firmware error has occurre...

Page 110: ...hen downloading Action Press the Set button Write Error Please Press Set A F W firmware error has occurred when downloading Action Press the Set button Verify Error Please Press Set A F W firmware error has occurred when downloading Action Press the Set button Message Meaning and Action ...

Page 111: ...ify yourself Rectify the problem according to the message displayed on the control panel For detailed information about the meaning of error messages see What to Do When an Error Message Appears on page 5 16 and correct the error as instructed The Alarm Lamp is Flashing When the alarm lamp is flashing it indicates a problem that you cannot rectify yourself Write down the message and error code dis...

Page 112: ...for more information The default job time out is 30 seconds You can set the job time out to between 5 and 300 seconds on the control panel For details about the job time out function see List of Menu Items on page 4 6 Follow the steps below Use the following control panel buttons For details about control panel operations see Basic Menu Operation on page 4 4 The printer is processing 1 Press the F...

Page 113: ...clean it 1 On the printer s right side press the side of the power switch marked O to turn the printer off 2 Push up button A 1 and fully open the front cover 2 3 Grip the orange tabs at both ends of the transfer roll and gently lift it out of the printer Lift the roll carefully to prevent waste toner from spilling out ...

Page 114: ...h the density sensor window Do not use excessive force to clean the window 5 Replace the transfer roll cartridge Grip the orange U shaped tabs as shown 6 Insert the pins at both ends of the transfer roll cartridge into the bearings inside the printer 7 To lock the transfer roll cartridge into the printer push down on the tabs until you hear a click ...

Page 115: ...TROUBLESHOOTING 5 26 8 Close the front cover 9 On the printer s right side press the side of the power switch marked I to turn the printer on ...

Page 116: ... When removing paper jams make sure that no pieces of paper are left inside the printer as this can cause a fire If the paper is wrapped around the fuser or roller or you cannot see the jam you are trying to clear do not attempt to remove the paper by yourself as this may cause injuries or burns Turn the printer off immediately and contact your dealer or Brother Customer Service Never touch an are...

Page 117: ... AC outlet socket and contact your dealer or Brother Customer Service for assistance Remove jammed paper slowly and carefully to avoid tearing it Paper jams can be caused by incorrect printer installation or using unsuitable or low quality paper For details about the types of paper suitable for printing see Suitable and Unsuitable Paper Types on page 3 1 ...

Page 118: ...ollow the procedure below to remove the jammed paper 1 Pull the jammed paper out of the multi purpose tray 2 Push up button A 1 and fully open the front cover 2 Confirm that there are no scraps of paper remaining inside the printer 3 Close the front cover ...

Page 119: ...dule is installed look for the jammed paper sequentially starting with the lowest tray Follow the procedure described in Paper Jams in the 2 Tray Module on page 6 10 1 Slowly completely remove the paper tray from the printer 2 Remove all the jammed and or creased paper from the tray 3 If there is jammed paper remaining inside the printer pull it out carefully to avoid tearing it ...

Page 120: ...side the printer 5 Close the front cover 6 Hold the paper tray with both hands align it with the opening in the printer and gently push it back in the printer 7 Push the paper tray completely back into the printer Do not use excessive force on the paper tray Doing so could damage the paper tray or the inside of the printer ...

Page 121: ...e print head cartridge Follow the procedure below to remove the jammed paper 1 Push up button A 1 and fully open the front cover 2 2 If there is paper jammed around the print head cartridge Illustration A continue following this procedure If there is paper jammed around the fuser unit Illustration B follow the procedure for Paper jams around the fuser unit on page 6 8 1 Fuser Unit 2 Print Head Car...

Page 122: ...the fuser unit levers and remove the jammed paper If the paper is torn remove any scraps of paper remaining inside the printer 4 Be sure to close the fuser unit levers after removing the jammed paper 5 Close the front cover ...

Page 123: ... levers at the ends of the fuser unit and remove the jammed paper If the paper is torn remove any scraps of paper remaining inside the printer During operation the fuser unit heater becomes very hot To prevent burns do not touch it with your bare hands 3 Be sure to close the levers at the ends of the fuser unit after removing the jammed paper 4 Close the front cover ...

Page 124: ...rocedure If the front cover is difficult to open do not force it Turn the printer off immediately and contact your dealer or Brother Customer Service Paper Jams in the Paper Rotator Follow the procedure below to remove the jammed paper 1 Push in button B 1 and fully open the front cover 2 2 Remove the jammed paper If the paper is torn remove any scraps of paper remaining inside the printer 3 Close...

Page 125: ... feeds to the printer from the front of the trays therefore paper jammed in the lower tray can block the upper tray of the module or the paper tray in the printer preventing you from opening them Look for the jammed paper sequentially starting with the lowest tray 2 Remove all the jammed and or creased paper from the tray 3 If there is jammed paper inside the printer pull it out carefully to avoid...

Page 126: ...6 11 PAPER JAMS 4 Push up button A 1 and fully open the front cover 2 Confirm that there are no scraps of paper remaining inside the printer 5 Close the front cover 6 Close all open paper trays ...

Page 127: ... clean toner Static electricity could build up and damage sensors Do not reuse toner cartridges once you have removed them from the printer Loose toner could spill inside the printer and deteriorate print quality To prevent residual toner form spilling avoid shaking or bumping used toner cartridges After moving a toner cartridge from a cold place to a warm place allow 1 hour for the cartridge to a...

Page 128: ...LACEMENT Replacing the Toner Cartridges Follow the procedure below to replace toner cartridges 1 Remove the top cover and place it on a flat surface 2 Grip the levers at the ends of the toner cartridge that you want to replace and pull them up ...

Page 129: ...vent residual toner form spilling avoid shaking or bumping used toner cartridges 4 Select the new toner cartridge that is being replaced and remove it from its packaging 5 Shake the toner cartridge 7 or 8 times as illustrated to distribute toner evenly 6 Align the toner cartridge with the corresponding insertion point in the printer and insert it as illustrated 1 Toner seal DO NOT REMOVE YET ...

Page 130: ...tion 8 Pull the toner seal straight up to remove it Pull the toner seal straight up Pulling the toner seal diagonally may tear the seal If it takes more than five seconds until you remove the toner seal after inserting the toner cartridge in the printer an error message may appear In this case perform step 7 again or turn the printer off once and then on again 9 Replace the top cover ...

Page 131: ...ansfer roll black colored part Scratches dirt or oil from your hands onto the print head or transfer roll will deteriorate print quality Do not expose the print head cartridge to direct sunlight and avoid exposing the print head cartridge to fluorescent indoor light as this may result in dropouts or dirty printing When replacing the print head cartridge work on a desk or other flat surface to avoi...

Page 132: ...s away from direct sunlight under the following conditions Ambient temperature range 0 to 35 C Humidity range 15 to 80 RH no condensation Avoid hot and humid areas Avoid storing near magnetic objects such as CRT screens disk drives or floppy disks Keep out of reach of children Store in a level position Replacing the Print Head Cartridge Follow the procedure below to replace the print head cartridg...

Page 133: ...from falling 4 Open the top of the new print head cartridge box and pull of the top part of the aluminum package Remove the sheet by working inward from the two notches 5 Grip the handle on top of the print head cartridge and gently lift it Place the cartridge onto a flat surface Lift the print head cartridge by the handle Do not allow the cartridge to touch anything when removing it from the box ...

Page 134: ...packing aluminum package and box in case you need to transport the printer over long distances in the future If there is no circle on the end of the seal you can not use this print head cartridge Contact your dealer or Brother Customer Service for assistance 8 Remove the tape from the top of the cartridge 1 hold the protective cover on both sides and remove it from the print head cartridge 2 9 Gri...

Page 135: ...artridge into the printer without correctly aligning the roll with the slots can damage the cartridge Do not allow the surface covered with a protective sheet to come into contact with anything 11 Pull the protective sheet on the cartridge straight up to remove it as illustrated 1 Do not touch the transfer roll Do not touch the transfer roll black part Make sure that nothing touches or scratches t...

Page 136: ...7 10 ROUTINE MAINTENANCE AND CONSUMABLE REPLACEMENT 13 Close the front cover ...

Page 137: ...nsumables see Life Span of Consumable Items on page A 9 Transfer Roll Cartridge Handling Precautions WARNING Never throw a used transfer roll cartridge into a fire It can cause an explosion and injuries Handling Precautions Replace the transfer roll cartridge as soon as the message prompting you to do so appears The printer stops operating if you do not replace the cartridge when required Do not a...

Page 138: ...ransfer roll cartridge 1 Push up button A 1 and fully open the front cover 2 2 Grip the orange tabs at both ends of the transfer roll 1 and gently lift it out of the printer 2 Lift the transfer roll carefully to prevent waste toner from spilling out Lift the transfer roll cartridge carefully to prevent transfer roll from spilling out ...

Page 139: ... grip the orange tabs as shown 4 Insert the pins at both ends of the transfer roll cartridge into the bearings inside the printer and gently push the roll into the printer 5 To lock the transfer roll cartridge into the printer push down on the tabs until you hear a click 6 Close the front cover ...

Page 140: ...onsumables see Introduction to the Optional and Consumable Items on page A 1 For details about when to change consumables see Life Span of Consumable Items on page A 9 Fuser unit Handling Precautions WARNING To avoid burns never touch the area marked CAUTION HOT fuser area To prevent electric shock always turn the printer off and disconnect the power cord from the AC outlet socket before cleaning ...

Page 141: ... off unplug the AC power cord and allow the printer to cool for at least 30 minutes before replace the fuser unit Follow the procedure below to replace the fuser unit 1 Push up button B 1 and fully open the front cover 2 2 Push the lever on left side of the paper outlet cover and open the paper outlet cover ...

Page 142: ... the fuser unit 4 Lift the levers on both sides of the fuser unit 5 Hold the levers on both sides as you remove the fuser unit from the printer carfully 6 Unpack a new fuser unit and lift the levers on both sides 1 Grip the lever and install the fuser unit into the printer gently placing pin into the guides ...

Page 143: ...NCE AND CONSUMABLE REPLACEMENT 7 17 7 Push down the levers on both sides of the fuser unit 8 Push and slide backward the switches on both sides of the fuser unit 9 Close the paper outlet cover 10 Close the front cover ...

Page 144: ...e network settings on the printer See Confirming Printer Configuration and Network Settings on page 7 19 Panel Settings List Use this to check the parameters set with the control panel PCL Font List Use this to find out which fonts are loaded into the printer Print Log This is a report of the last 22 print jobs received by the printer Use it to check whether the jobs were printed normally or not S...

Page 145: ...s about control panel operations see Basic Menu Operation on page 4 4 Ready to Print The print screen The printer is ready to print 1 Press the Menu button The menu screen appears Menu 1 System The Menu screen 2 Press the button 3 times Menu 4 Report List 3 Press the Form Feed Set or button once 4 Report List Printer Settings 4 Press the Form Feed Set button once Printer Settings Ready to Print 5 ...

Page 146: ...print the print log For details about control panel operations see Basic Menu Operation on page 4 4 The print log is printed on A4 paper Set the A4 paper lengthwise into the paper tray Ready to Print The print screen The printer is ready to print 1 Press the Menu button The menu screen appears Menu 1 System The Menu screen 2 Press the button 3 times Menu 4 Report List 3 Press the Form Feed Set or ...

Page 147: ...from a Web browser 1 Turn the computer on and start your Web browser 2 In the address box of your Web browser type the IP address or the Internet address of the printer and press the enter key 3 The Web Based Management screen appears 4 Click Job Print Log The status information about jobs requested from the control panel as well as each protocol is displayed 5 Click View Job Print Log in the tree...

Page 148: ...s Never spray anything directly onto the printer Droplets can enter the printer and cause malfunctions Never use detergents other than neutral detergents Never lubricate the printer with oil The printer does not require lubrication Never use a vacuum cleaner to clean the printer Cleaning the outside of the printer 1 On the printer s right side press the side of the power switch marked O to turn th...

Page 149: ...o your back When carrying the printer keep it level to prevent trays or consumables from falling out Do not tilt it more than 10 degrees in any direction When moving the printer keep the toner cartridges in the locked position and do not remove them from the printer Toner may spill inside the printer and damage it When the optional 2 Tray Module is installed remove it before transporting the print...

Page 150: ...c shock hazard Caution When unplugging the printer grasp the plug instead of the power cord Forcibly pulling the power cord can damage it and cause fire or electric shocks 3 Gently pull out the paper tray until it stops 4 Hold the tray with both hands lift the front slightly and pull it completely out of the printer 5 Remove the paper from the paper tray and store it in a dry dust free place ...

Page 151: ...ardboard spacers in the tray as illustrated 7 Hold the paper tray with both hands align it with the opening in the printer and gently push it in to the printer 8 Push the paper tray completely back into the printer 9 Push up button A 1 and fully open the front cover 2 ...

Page 152: ...rtridge and gently lift it out of the printer Do not touch the transfer roll Black roller Hold the print head cartridge by its handle to prevent the cartridge from falling Wrap the print head cartridge in its aluminum package or thick paper to avoid exposing it to direct sunlight or other strong light 12 Close the paper outlet cover 13 Close the front cover ...

Page 153: ... 27 14 To protect the printer from damage pack it in a box before transporting it After moving the printer to the new location you need to re adjust the color registration For details about this operation see Adjusting Color Registration on page 1 1 ...

Page 154: ...ord interface cable and any other cables WARNING Never touch a power cord with wet hands This constitutes an electric shock hazard Caution When unplugging the printer grasp the plug instead of the power cord Forcibly pulling the power cord can damage it and cause fire or electric shocks 3 Remove the paper from the paper tray and store it in a dry dust free place If the paper proves difficult to re...

Page 155: ...ay be necessary to expand the memory of your printer For the installation procedure see Adding Expansion Memory on page A 10 1 Tray Module LT 41CL This option allows you to attach an additional 1 tray to the printer The tray of the module holds up to 500 sheets of paper When installed the trays become the printer s tray 2 To install the tray module refer to the documentation accompanying the tray ...

Page 156: ...um the developer and the transfer roll For the installation procedure refer to see Replacing the Print Head Cartridge PH 12CL on page 7 5 Transfer Roll Cartridge TR 11CL The transfer roll cartridge consists of a transfer roll and a waste toner collection box For the installation procedure refer to see Replacing the Transfer Roll Cartridge TR 11CL on page 7 11 Fuser unit FP 12CL The fuser unit fixe...

Page 157: ...A 3 APPENDIXES Getting Product Support Information Access our user support web site for the latest drivers and information about your printer URL http solutions brother com ...

Page 158: ... 8 5 14 Legal Executive custom width 90 0 215 9 mm 3 5 8 5 in length 139 7 900 0 mm 5 5 35 4 in Paper Type Paper Tray Plain paper 64 105 g m2 17 to 28 lb Multi purpose Tray Plain paper 64 105 g m2 17 to 28 lb Thick or Thicker paper 106 216 g m2 29 0 57 lb transparencies envelopes labels sheets coated paper Paper Tray Capacity Standard Domestic Paper Paper Tray Standard Tray 1 500 sheets Option 1 T...

Page 159: ...row Helvetica Narrow Obl Helvetica Narrow Bd Helvetica Narrow Bd Obl New Century Schlbk Rm New Century Schlbk It New Century Schlbk Bd New Century Schlbk Bd It Palatino Palatino It Palatino Bd Palatino Bd It Times Rm Times It Times Bd Times Bd It Zapf Chancery Zapf Dingbats Symbol SymbolPS Wingdings PDL Emulation Standard Driver Adobe PostScript 3 Operating Systems Supported by the Printer Driver ...

Page 160: ... allow the printer to clean the interior of the developing unit During cleaning Please Wait is displayed on the operation panel 2 The typefaces and Universal Font Scaling Technology UFST are trademarks or registered trademarks of Agfa Monotype Corporation or the respective holders 3 We recommend that you expand memory up to 128 MB when you use print at 1200 dpi ...

Page 161: ...otocols LPD LPR Port 9100 Available in Windows 95 Windows 98 Windows Me and Windows 2000 XP IPP 1 Available in Windows Me and Windows 2000 XP Management Protocols http SNMP Supported Operating Systems Windows 95 Windows 98 Windows Me Windows NT 4 0 Windows 2000 XP Print Protocols NetBIOS TCP IP NetBIOS NetBEUI Network Operating Systems NetWare 3 X 4 X 5 Frame Type Ethernet_II Ethernet II Ethernet_...

Page 162: ...n using A4 8 5 14 Legal or smaller Printable area refers to the area on a page where printing is possible Non printable area refers to the area the edges on the page where printing is not possible 1 Printable area 2 Non printable area ...

Page 163: ... due to power on off initialization and print quality maintenance operation Consumable Number of printable pages Black toner cartridge About 9 000 pages 5 TN 12BK Yellow toner cartridge About 6 000pages 5 TN 12Y Magenta toner cartridge About 6 000 pages 5 TN 12M Cyan toner cartridge About 6 000 pages 5 TN 12C Print Head Cartridge About 30 000 pages 5 CMYK each PH 12CL Transfer roll cartridge inclu...

Page 164: ... on the interface board located at the back of the printer 3 Hold the two handles on the interface board and slowly pull the interface board towards you then lay it on a desk or table 4 Hold the expansion memory module by the edges and align the notches in the module with the protrusions in the slot 5 Insert the memory module diagonally 1 then tilt it toward the interface board until it clicks int...

Page 165: ...ernet 4 13 Ethernet Interface Connector 2 2 Exhaust Grille 2 1 2 2 F F W Download 4 9 Face Down Tray 2 1 Factory settings 4 9 Faded printouts 5 7 Fonts A 5 Form Feed Set button 4 3 FP 12CL A 2 Front Cover 2 1 Fuser Parts 2 3 A 2 Fuser unit 7 14 G Gateway Address 1 7 4 14 H Hard Disk A 1 Help on Macintosh 2 12 I ID Print 4 7 Init NVM 4 9 4 15 IP Address 1 4 4 13 IP Filter 4 15 IPX Frame Type 4 14 J...

Page 166: ...iver for Windows 2 6 Printer Settings 4 12 Protocol 1 8 PS Error Report 4 8 PS Job Time out 4 8 R Ready indicator 4 1 Ready lamp 5 3 5 4 Reports 7 18 Reset the printer 4 9 S Security 4 9 Specifications A 4 Storing 7 28 Subnet Mask 1 6 4 14 Suitable Paper Types 3 1 Support A 3 T TCP IP 4 13 Text Print 4 8 TN 12BK A 2 TN12 C A 2 TN12 M A 2 TN12 Y A 2 Toner A 2 Toner Cartridges 2 2 7 1 A 2 Top Cover ...

Reviews: