background image

Plena Easy Line SD Tuner BGM source

PLE-SDT

en

Installation and Operation manual

Summary of Contents for PLE-SDT

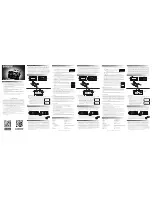
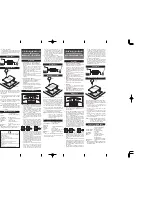
Page 1: ...Plena Easy Line SD Tuner BGM source PLE SDT en Installation and Operation manual ...

Page 2: ......

Page 3: ...rols connectors and indicators 9 3 5 1 Front view 9 3 5 2 Rear view 10 3 5 3 Remote control 11 4 Planning information 13 5 Installation 14 5 1 Source unit connections settings 14 5 2 USB SD 14 5 3 Remote control 14 6 Connections 15 6 1 Front side input sockets 15 6 1 1 USB 15 6 1 2 SD MMC 15 6 2 Rear side input sockets 15 6 2 1 FM tuner antenna 15 6 2 2 USB 15 6 2 3 Mains power socket 16 6 3 Rear ...

Page 4: ...sound 23 8 3 FM tuner 24 8 3 1 Search a FM radio frequency 24 8 3 2 Preset FM radio frequency selection 24 8 3 3 Sequentially FM radio frequency preset selection 24 8 3 4 Manual selection of a FM radio frequency 25 8 3 5 Radio Data System RDS 25 8 3 6 Switch off timer 25 8 3 7 Stereo mono output sound 26 8 3 8 Muting the output sound 26 9 Troubleshooting 27 10 Maintenance 29 10 1 Remote control 29...

Page 5: ...ons are supplied together with all equipment that can be connected to the mains supply Safety precautions The PLE SDT Plena Easy Line SD Tuner BGM source is designed to be connected to the 115 230 Vac public distribution network To avoid any risk of electric shock all interventions must be carried out with disconnected mains supply Interventions with the equipment switched on are authorized only w...

Page 6: ... 3 Intended audience These installation and operation instructions are intended for installers and users of a public address system 2 4 Alerts and notice signs Four types of alerts can be used in this manual The alert type is closely related to the effect that may be caused if it is not observed These alerts from least severe effect to most severe effect are NOTICE Alert containing additional info...

Page 7: ...information Table 2 1 Conversion of units of length Table 2 2 Conversion of units of mass Table 2 3 Conversion of units of pressure Table 2 4 Conversion of units of temperature Imperial Metric Metric Imperial 1 in 25 4 mm 1 mm 0 03937 in 1 in 2 54 cm 1 cm 0 3937 in 1 ft 0 3048 m 1 m 3 281 ft 1 mi 1 609 km 1 km 0 622 mi Imperial Metric Metric Imperial 1 lb 0 4536 kg 1 kg 2 2046 lb Imperial Metric M...

Page 8: ...2x 1 5V size AAA battery 2x 2 pair audio RCA cable 2 0 m 1x Antenna cord including connector 1x SD memory card including free music and this installation and operation manual 3 4 The Plena Source Unit With an USB or SD card memory capacity of up to 32 GB up to 2000 tracks and the option to connect the USB flash memory device either on the front or rear side the USB SD source provides hours of high...

Page 9: ...election 7 FOLDER File selection Refer to Section Selection of folders and search for folders page 22 8 To stop the track replay 9 PROG To switch to the programming mode to compile an individual MP3 track sequence Refer to Section 8 2 4 Making a playlist 10 To switch between track replay and pause 11 To select the repeat and random replay functions Refer to Section 8 2 3 Repeat functions and rando...

Page 10: ...cription Number Rear view Description 24 ANTENNA FM tuner antenna input 75 Ohm socket Refer to Section 6 2 1 FM tuner antenna 25 USB 2 0 4 pin socket Refer to Section 6 Connections 26 TUNER Tuner audio output level control Refer to Section 7 1 1 Tuner audio output level control 27 COMBINED Combined USB SD and FM tuner audio output level control Refer to Section 7 Configuration 28 USB SD USB SD aud...

Page 11: ...EQ Manual selection of FM radio frequency Refer to Section 8 3 4 Manual selection of a FM radio frequency 42 TUNER PRESET Scroll up down radio frequency presets Refer to Section 8 3 FM tuner 7 USB SD FOLDER Scroll up down MP3 folder selection Refer to Section Selection of folders and search for folders page 22 9 USB SD PROG To switch to the programming mode to compile an individual track sequence ...

Page 12: ...no output sound 19 22 TUNER TUNE Every time you press one of the buttons the tuning frequency goes up or down with 50 kHz Press for two seconds to scan up to the next station Refer to Section 8 3 FM tuner 6 USB SD SKIP For track selection and fast forward reverse Refer to Section 8 2 2 Track selection 10 USB SD To switch between track replay and pause Refer to Section 8 2 USB SD source 8 USB SD To...

Page 13: ...nual PLE SDT_OM V1 0 2012 02 4 Planning information Make sure that No liquids can spill into or on the unit The ventilation airflow is not obstructed There is a mains power outlet of sufficient rating close to the intended location And Leave at least 10 cm of free space at the rear of the unit for connectors and wiring ...

Page 14: ...acing up as indicated on the unit s front panel 5 3 Remote control To insert the batteries 2x 1 5V size AAA 1 Remove the battery compartment cover on the rear side of the remote control 2 Insert the batteries as indicated in the battery compartment 3 Close the battery compartment with the cover CAUTION 1 Set the mains power switch 1 on the unit s front side to the Off position 2 Make sure that the...

Page 15: ... Section 8 2 USB SD source 6 2 Rear side input sockets 6 2 1 FM tuner antenna The FM tuner antenna socket 24 must be connected to an antenna or cable network with a COAX cable of 75 Ohm A antenna cord with connector comes with the unit 6 2 2 USB Connect a USB flash memory device maximum 32 GB with MP3 file format stored to the USB 2 0 4 pin socket 25 Refer to Section 8 2 USB SD source NOTICE Conne...

Page 16: ...with the letter N or colored black 3 The wire which is colored brown must be connected to the terminal which is marked with the letter L or colored red 6 3 Rear side audio output sockets The USB SD source and the FM tuner can operate simultaneously on different outputs 1 Connect the outputs R Right channel L Left channel of the source USB SD 31 and TUNER 29 via cables with RCA connectors to the in...

Page 17: ...ut level 7 1 2 Preset radio frequency programming 1 Select the FM tuner source with the remote control button USB SD TUNER 39 The green LED TUNER 21 will light up 2 Select the required FM radio frequency with the buttons 19 and 22 3 Press the button PROG 23 The FM tuner LCD 16 shows the preset number CHxx flashing during this process Maximum 30 presets could be stored 4 Press a button 1 to 10 0 17...

Page 18: ...ut level control to the required amplifier input level The audio output level could be set between mute and 1 5 Vrms It is advised is to set the control in the upper mid position at start 2 Refer to Section 11 Technical Data for output level 7 3 USB SD audio output level control 1 Set the USB SD 28 audio output level control to the required amplifier input level The audio output level could be set...

Page 19: ...t There must be no obstacles between the remote control and the IR receiver lens The button functions of the remote control are identical to the buttons on the source unit front side Refer to Section 3 5 3 Remote control and the following sections Figure 8 1 Remote control 1 First select the source to be controlled by the remote control with the button USB SD TUNER 39 The green LED USB SD 12 or TU...

Page 20: ...ght hand side The LCD 3 upper line left corner will show the selected source USB or CARD 2 Start replay the first track with the button 10 To select another track refer to section Section 8 2 2 Track selection The following additional information will scroll in the LCD upper line File name Track name Artist name Album name Remark If an information is not available the LCD will show NONE instead of...

Page 21: ... 13 or SD 14 if necessary 2 To skip one track or several tracks in forward or reverse direction press the skip button or 6 repeatedly Button To skip to the next track Button To return to the beginning of the track currently playing Each time the button is pressed again the unit will go back one track at a time Fast forward reverse 1 Select the source USB device or SD MMC card with the button USB 1...

Page 22: ...acks in the folder selected will be repeated continuously 4th actuation of button REPEAT ALL All tracks will be repeated continuously 5th actuation of button RANDOM REPEAT All tracks will be replayed continuously in random order 6th actuation of button PLAY ALL Return to basic setting 8 2 4 Making a playlist For replaying a selection of tracks in a certain order a sequence playlist of up to 64 tra...

Page 23: ...k sequence has been programmed 9 To start the track sequence press the button 10 The upper line of the LCD will show MEM memory and the track sequence will be replayed 10 Press the buttons SKIP 6 to select any track of the track sequence or keep the corresponding button pressed to activate the fast forward reverse function within a track 11 The replay will stop after the track sequence has been re...

Page 24: ...ically Or Use the button SEARCH 43 of the remote control to search for a strong FM radio frequency automatically 1 Press the button SEARCH for approx 2 seconds to start the searching 8 3 2 Preset FM radio frequency selection Stored FM radio frequency presets maximum 30 are selected by pressing 1 The button 1 to 10 0 17 for presets 1 to 10 Or 2 The button 1 to 10 0 17 following by the button 10 20 ...

Page 25: ...on SLEEP 40 of the remote control to automatically switch off the FM tuner by the build in timer function The LCD 16 upper line shows SLEEP if the switch off timer is set between 90 10 minutes The switch off timer can be set between Off 90 10 minutes Basic setting Switch off timer off 1st actuation of button Sets the switch off timer to 90 minutes 2nd actuation of button Sets the switch off timer ...

Page 26: ...ereo is set or MONO when mono is set 2 Press the button ST MONO 37 again to switch between mono and stereo 8 3 8 Muting the output sound To mute the audio output sound output 29 of the FM tuner 1 Press the button 4 of the remote control The LCD lower line will show MUTE flashing continuously when the mute function is activated 2 To reactivate the sound press the button 4 once again NOTICE Sometime...

Page 27: ...ted through a USB hub only one of the devices will be recognized Format not supported Use only FAT32 format The connection with the unit has been terminated because an electrical current stronger than allowable was applied to the unit s USB1 or USB2 port Wait several minutes The rating allowable current for this unit is 500 mA or less per USB port Use USB storage devices that meet these standards ...

Page 28: ...ly Check the output control setting on the rear panel The audio output connectors or plugs are dirty Wipe away dust or dirt and reinsert the plug The selected source is currently in the pause or mute mode Press the play mute button The audio output sound is distorted or full of noise The audio output cable has not been properly plugged i n Connect the audio cable to the line input of the amplifier...

Page 29: ... build up start with an interval of at least once a year Periodically check the connectors for corrosion and the screw terminals to make sure that they have not become loosened 10 1 Remote control If the range of the remote control decreases the batteries are exhausted and must be replaced 2x 1 5V size AAA Refer to Section 5 3 Remote control NOTICE If the remote control is not in use for a longer ...

Page 30: ...istortion 1 Total harmonic distortion 1 kHz 0 8 FM frequency range 87 5 MHz 108 MHz Frequency response 50 Hz 12 kHz Channel separation 1 kHz 40 dB Intermediate rejection 70 dB Signal noise ratio 50 dB Intermediate frequency 10 7 MHz FM Input sensitivity 6 μV e m f 2 μV Automatic tuning sensitivity 50 μV Antenna input 75 ohms coaxial Audio output level 1 5 Vrms 1 dB Frequency response 50 Hz 20 kHz ...

Page 31: ...4 in Without brackets 42 x 430 x 250 mm 1 65 x 16 93 x 9 84 in Unit mounting Stand alone 19 rack 19 wide 1U high Unit color Charcoal with silver printing Unit weight Approx 3 6 kg Remote control dimensions H x W x D 20 x 52 x 156 mm 0 80 x 2 05 x 6 14 in Remote control color Charcoal with silver printing Remote control weight without batteries 120 g Operating temperature 0 C to 45 C Storage temper...

Page 32: ......

Page 33: ...Bosch Security Systems B V Kapittelweg 10 4800 RA Breda The Netherlands www boschsecurity com Bosch Security Systems B V 2012 ...

Reviews: