background image

[en] Instruction manual

Built-in oven HBA53B5.0A

Summary of Contents for HBA53B5.0A

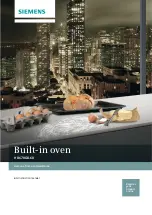
Page 1: ... en Instruction manual Built in oven HBA53B5 0A ...

Page 2: ......

Page 3: ...12 Cleaning agents 12 Detaching and refitting the rails 12 Detaching and attaching the oven door 13 Removing and installing the door panels 13 Troubleshooting 14 Malfunction table 14 Replacing the bulb in the oven ceiling light 15 Glass cover 15 After sales service 15 E number and FD number 15 Energy and environment tips 15 Saving energy 15 Environmentally friendly disposal 15 Tested for you in ou...

Page 4: ...ce door The cable insulation could melt Risk of scalding Never pour water into the hot cooking compartment This will produce hot steam Hot accessories and ovenware Risk of burns Never remove ovenware or accessories from the cooking compartment without an oven cloth or oven gloves Improper repairs Risk of electric shock Improper repairs are dangerous Repairs may only be carried out by one of our tr...

Page 5: ...Selects the timer U cooking time r end time p and clock 0 D Childproof lock Locks and unlocks the control panel A Minus Plus Decreases the set values Increases the set values Setting Use Û Off position The oven switches off 3D hot air For cakes and pastries on one to three levels The fan distributes the heat from the heating ring in the back panel evenly around the cooking compartment Top bottom h...

Page 6: ...ts for your oven in our brochures and on the Internet The availability of special accessories and whether it is possible to order them online may vary depending on your country Please see the sales brochures for more details Not all optional accessories are suitable for every appliance When purchasing please always quote the exact identification number E no for your appliance Setting Meaning Ú Off...

Page 7: ...re easily from the universal pan Slide the univer sal pan into the oven with the sloping edge facing the oven door Profi extra deep pan with insert grid HEZ333000 Ideally suited for preparing large amounts Lid for the Profi extra deep pan HEZ333001 The lid converts the Profi extra deep pan into the Profi roasting dish Glass roasting dish HEZ915001 The glass roasting dish is suitable for pot roasts...

Page 8: ...ou can select the desired type of heating and temperature or grill setting You can select the oven cooking time and end time for your dish Please refer to the section on Setting the time setting options Type of heating and temperature Example in the picture Top bottom heating at 190 C 1 The function selector is used to set the type of heating 2 Set the temperature or grill setting using the temper...

Page 9: ...round the relevant symbol The display shows the value for a few seconds Cooking time The cooking time for your dish can be set on the oven When the cooking time has elapsed the oven switches itself off automatically This means that you do not have to interrupt other work to switch off the oven The cooking time cannot be accidentally exceeded Example in the picture cooking time 45 minutes 1 Use the...

Page 10: ...t the end time to the current time After a few seconds the change is adopted The oven starts If the timer has been set first press the 0 button twice Checking the time settings If several time setting options are set the relevant symbols are illuminated on the display The symbol for the time setting option that is visible in the display is shown in brackets To call up the U timer r cooking time p ...

Page 11: ...reat the self cleaning surfaces with a scouring pad or oven cleaner Making settings Cleaning takes approximately one hour 1 Set the function selector to 3D hot air 2 Set the temperature selector to s 3 Press theu button The u symbol lights up in the display The time at which the cleaning will end appears and the p symbol is in brackets Cleaning will start after a few seconds You will see the time ...

Page 12: ...ect automatic self cleaning Caution Never use abrasive cleaning agents You will scratch or destroy the highly porous coating Never treat the ceramic coating with oven cleaner If oven cleaner accidentally gets onto it remove it immediately with a sponge and plenty of water Cleaning the cooking compartment floor Use a dish cloth and hot soapy water or a vinegar solution If there are heavy deposits o...

Page 13: ... 3 Close the oven door as far as the limit stop With both hands grip the door on the left and right hand sides Close the door a little further and pull it out figure B Attaching the door Reattach the oven door in the reverse sequence to removal 1 When attaching the oven door ensure that both hinges are inserted straight into the opening figure A 2 The notch on the hinge must engage on both sides f...

Page 14: ...ault yourself Malfunction table If a dish doesn t turn out as well as you had hoped refer to the section Tested for you in our cooking studio where you will find plenty of cooking tips and tricks Error messages If an error message with appears press the 0 button The message disappears A time function that has been set is cleared If the error message does not disappear please contact the after sale...

Page 15: ...ician in the event of a malfunction even during the warranty period Please find the contact data of all countries in the enclosed customer service list To book an engineer visit and product advice Trust the expertise of the manufacturer and rest assured that the repair will be carried out by trained service technicians using original spare parts for your domestic appliance Energy and environment t...

Page 16: ... with 3 cake loaf tins at the same time place these on the wire racks as indicated in the picture Baking tins It is best to use dark coloured metal baking tins Baking times are increased when light coloured baking tins made of thin metal or glass dishes are used and cakes do not brown so evenly If you wish to use silicone baking tins use the information and recipes provided by the manufacturer as ...

Page 17: ...rsal pan 2 190 210 55 65 Pizza Baking tray 2 210 230 25 35 Universal pan baking tray 3 1 180 200 40 50 Tarte flambée preheat Universal pan 2 250 270 10 15 Börek Universal pan 2 180 200 40 50 Small baked items Accessories Level Type of heating Temperature in C Cooking time in minutes Biscuits Baking tray 3 140 160 15 25 Universal pan baking tray 3 1 130 150 25 35 2 baking trays universal pan 5 3 1 ...

Page 18: ...highest point If the cocktail stick comes out clean the cake is ready The cake collapses Use less fluid next time or set the oven temperature 10 degrees lower Observe the specified mixing times in the recipe The cake has risen in the middle but is lower around the edge Do not grease the sides of the springform cake tin After baking loosen the cake care fully with a knife The cake goes too dark on ...

Page 19: ...nd leave it to rest for 10 minutes in the oven For roast pork with a rind score the rind in a crossways pattern then lay the roast in the dish with the rind at the bottom Meat Weight Accessories and ovenware Level Type of heating Temperature in C grill set ting Cooking time in minutes Beef Pot roasted beef 1 0 kg covered 2 210 230 100 1 5 kg 2 200 220 120 2 0 kg 2 190 210 140 Fillet of beef medium...

Page 20: ...ng Temperature in C grill set ting Cooking time in minutes Poultry Weight Accessories and ovenware Level Type of heating Temperature in C grill set ting Cooking time in minutes Chicken whole 1 2 kg wire rack univer sal pan 2 1 4 200 220 60 70 Poulard whole 1 6 kg wire rack univer sal pan 2 1 4 190 210 80 90 Chicken halved 500 g each universal pan with grill tray 2 4 220 240 40 50 Chicken portions ...

Page 21: ...ght of the joint Select the next lowest weight from the instructions and extend the time How to tell when the roast is ready Use a meat thermometer available from specialist shops or carry out a spoon test Press down on the roast with a spoon If it feels firm it is ready If the spoon can be pressed in it needs to be cooked for a little longer The roast is too dark and the crackling is partly burnt...

Page 22: ...dish and cover 2 Preheat the cooking compartment as indicated 3 Switch off the oven and place the dough in the cooking compartment and leave it to prove Dish Accessories Level Type of heating Temperature in C Cooking time in minutes Pizza frozen Pizza with thin base Universal pan 2 6 200 220 15 20 Universal pan rack 3 1 180 200 20 30 Pizza with deep pan base Universal pan 2 6 170 190 20 30 Univers...

Page 23: ...Arrange the jars on it so that they do not touch each other 2 Pour litre of hot water approx 80 C into the universal pan 3 Close the oven door 4 Set Bottom heating 5 Set the temperature to between 170 and 180 C Preserving Fruit After approx 40 to 50 minutes small bubbles begin to form at short intervals Switch off the oven After 25 to 35 minutes of residual heat remove the preserving jars from the...

Page 24: ... ready at the same time Apple pie on 1 level Place dark springform cake tins next to each other diagonally on the same level Apple pie on 2 levels Place dark springform cake tins next to each other see illustration Cakes in tinplate springform cake tins Bake on 1 level with Top bottom heating Place the springform cake tin on the universal pan instead of on the wire rack Vegetables with cold cookin...

Page 25: ...ray 3 150 170 20 35 Universal pan baking tray 3 1 140 160 30 45 2 baking trays universal pan 5 3 1 130 150 35 55 Hot water sponge cake preheat Springform cake tin on the wire rack 2 160 170 30 40 Hot water sponge cake Springform cake tin on the wire rack 2 160 170 25 40 Apple pie Wire rack 2 springform cake tins dia 20 cm 1 170 190 80 100 2 wire racks 2 spring form cake tins dia 20 cm 3 1 170 190 ...

Page 26: ......

Page 27: ......

Page 28: ...910210 9000641902 9000641902 Robert Bosch Hausgeräte GmbH Carl Wery Straße 34 81739 München Germany www bosch home com ...

Reviews: