background image

[en] Instruction manual 

Steamer

CDG634B.1B

Summary of Contents for CDG634B.1B

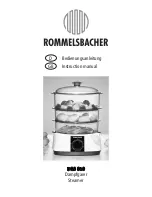
Page 1: ... en Instruction manual Steamer CDG634B 1B ...

Page 2: ......

Page 3: ... 16 Instructions for the dishes 17 Table 17 A Childproof lock 18 Activating and deactivating 18 Q Basic settings 19 Changing the basic settings 19 List of basic settings 19 Power cut 19 Changing the time 19 D Cleaning 20 cleaning agents 20 Descale 21 Removing and fitting the appliance door 22 Removing and installing the door panels 22 Cleaning the rails 23 3 Trouble shooting 24 Rectifying faults y...

Page 4: ...ation Importantsafetyinformation Warning Risk of burns The appliance becomes very hot Never touch the interior surfaces of the cooking compartment or the heating elements Always allow the appliance to cool down Keep children at a safe distance Risk of serious burns Accessories and ovenware become very hot Always use oven gloves to remove accessories or ovenware from the cooking compartment Risk of...

Page 5: ...anel Ovenware Ovenware must be heat and steam resistant Ovenware with areas of rust Do not use any ovenware which displays areas of rust Even the smallest spots of rust can lead to corrosion in the cooking compartment Dripping liquids When steaming with a perforated cooking container always insert the baking tray the universal pan or the solid cooking container underneath Dripping liquid is caught...

Page 6: ...in the tables in the operating instructions Use dark black lacquered or enamelled baking tins They absorb heat particularly well Open the appliance door as infrequently as possible during operation It is best to bake several cakes one after the other The cooking compartment is still warm This reduces the baking time for the second cake You can place two cake tins next to each other in the cooking ...

Page 7: ...ress these buttons to activate them For appliances that do not have a stainless steel front these two button touch fields do not have a pressure point 0 Touch fields There are sensors under the touch fields Simply touch the respective symbol to select the function 8 Rotary selector The rotary selector is fitted so that you can turn it indefinitely to the left or right Press it lightly and move it ...

Page 8: ...ol panel Temperature Selects the temperature in the cooking compartment AutoCook Selects the operating mode for dishes with cooking programmes s Time setting options Select time setting options a Weight Selects the weight for the operating mode for dishes Focus The value in focus can be changed directly with out first being selected After starting an operation either the temperature or the level i...

Page 9: ...e appliance may overheat So that the cooking compartment cools down more quickly after the operation the cooling fan continues to run for a certain period afterwards Note You can change how long the cooling fan continues to run in the basic settings Basic settings on page 19 _Accessories Accessories Your appliance is accompanied by a range of accessories Here you can find an overview of the access...

Page 10: ... the appliance for the first time enquire about the water hardness of your tap water from your water supplier So that the appliance can reliably remind you to decalcify it when required you must correctly set your water hardness range Caution The appliance may become damaged due to the use of unsuitable liquids Do not use distilled water highly chlorinated tap water 40 mg l or other liquids Only u...

Page 11: ...the accessories from the cooking compartment 2 Remove leftover packaging such as polystyrene pellets from the cooking compartment 3 Before calibrating the appliance wipe the smooth surfaces in the cooking compartment with a soft damp cloth Calibrating the appliance and cleaning the cooking compartment Notes The calibration can only be started once the cooking compartment is cold room temperature D...

Page 12: ...off the appliance Any functions that may be running are cancelled The time or if applicable the residual heat indicator appears on the display Note In the basic settings you can set whether the clock should be displayed when the appliance is switched off Basic settings on page 19 Starting the operation You must press the l Start Stop button to start each operation After starting the appliance the ...

Page 13: ...n Changing After starting the appliance the temperature is highlighted When you move the rotary selector the temperature is changed and applied immediately To change the type of heating interrupt the operation beforehand using the l Start Stop button Touch the symbol for the type of heating The type of heating appears with the corresponding default temperature Note When you change the type of heat...

Page 14: ...s Basic settings on page 19 Setting the cooking time You can set the cooking time for your dish on the appliance This means that the cooking time is not unintentionally exceeded and you do not need to interrupt other work in order to end the operation You can set a cooking time for each heating type Applying settings The cooking time can be set in one minute increments up to one hour and then in f...

Page 15: ...in the picture The set cooking time is 45 minutes and you want the dish to be ready at 12 00 p m 1 Set the type of heating and temperature or level 2 Set the cooking time 3 Before starting touch the s field again once The cooking time is highlighted in white in the display 4 Use the rotary selector to set a later end time The value is applied after a few seconds or touch the s field again The end ...

Page 16: ...ing mode to very easily prepare food The appliance chooses the optimal setting for you Applying settings for dishes Using the rotary selector go through all the dishes to see which dishes are available in AutoPilot The cooking time depends on the dish and cannot be changed 1 Touch the field The first dish is highlighted in white in the display 2 Turn the rotary selector to set the required dish 3 ...

Page 17: ... cups or small jars and cover with cling film Place the cups or jars onto the steamer tray and position as indicated in the table After preparation leave the yogurt to cool in the refrigerator Making rice pudding Weigh the rice and add 2 5 times the amount of milk Ensure the level of rice and milk in the accessory is no higher than 2 5 cm Stir after cooking The remaining milk is quickly absorbed M...

Page 18: ... D field does not light up when the appliance is switched off Lentils max 0 55 kg solid steam container 2 Reheat cooked side dishes solid steam container 2 Steam fresh chicken breast Total weight 0 2 1 5 kg perforated solid steam container 3 1 Steam fresh fish fillet max 2 5 cm thick perforated solid steam container 3 1 Steam whole fresh fish 0 3 2 kg perforated solid steam container 3 1 Yogurt in...

Page 19: ... Power cut The changes you make to the settings are saved even after a power cut You only have to reset the settings for the initial use following a long term power cut The appliance can bridge a short term power cut Changing the time If you want to change the time for example from summer to winter time you have to change the basic setting The appliance must be switched off 1 Touch the field for a...

Page 20: ... wash Microfibre cloth The honeycomb microfibre cloth is particularly suitable for cleaning sensitive surfaces such as glass glass ceramic stainless steel or aluminium product no 460 770 also available from our online eShop It removes liquid and greasy deposits in one go Appliance exterior with aluminium front Use soapy water and dry with a soft cloth Mild window cleaning agent wipe over the alumi...

Page 21: ...to make a descaling solution 2 Remove the water tank and fill with descaling solution 3 Fully insert the water tank filled with the descaling solution 4 Close the appliance door 5 Touch the ÿ On Off button 6 Touch the V Descale operating mode The duration of the descaling programme is displayed It cannot be changed 7 Press the l Start Stop button to start The appliance is descaled The time counts ...

Page 22: ...wo locking levers on the left and right figure 3 Close the appliance door as far as it goes With both hands grip the door on the left and right hand side and pull it up and out figure Fitting the appliance door Reattach the appliance door in the opposite sequence to removal 1 When attaching the appliance door ensure that both hinges are inserted straight into the opening figure Place both hinges a...

Page 23: ...th screws back in on the left and right 6 Put the cover back in place and press on it until it clicks audibly into place figure 7 Close the appliance door Caution Do not use the cooking compartment again until the panels have been correctly fitted Cleaning the rails The rails can be removed for cleaning Warning Risk of burning due to hot components in the cooking compartment Wait until the cooking...

Page 24: ... control panel The rotary selector has been accidentally disengaged The rotary selector can be removed Simply place the rotary selector back in its support in the control panel and push it in so that it engages and can be turned as usual The rotary selector can no longer be turned easily There is dirt under the rotary selector The rotary selector can be removed To disengage the rotary selector sim...

Page 25: ... 4 Slide the new seals and the clamping ring onto the glass cover in the right order 5 Screw the glass cover with the seals back on again 6 Connect the appliance to the power supply and carry out commissioning again Replacing the glass cover or seals If the glass cover for the halogen bulb or the seals are damaged they must be replaced A new glass cover can be obtained from the after sales service...

Page 26: ... us please give the full product number E no and the production number FD no so that we can provide you with the correct advice The rating plate bearing these numbers can be found when you open the appliance door To save time you can make a note of the number of your appliance and the telephone number of the after sales service in the space below should it be required Please note that a visit from...

Page 27: ...ys distribute the food evenly in the ovenware It will not cook evenly if the layers are of different depths Pressure sensitive food When layering delicate foods in the steam container do not pile them too high You should ideally use two steam containers Cooking a menu With steam you can cook a whole menu at once without the different flavours mixing Place the food with the longest cooking time in ...

Page 28: ... Ratio Accessories Level Type of heat ing Tempera ture in C Cooking time in min Unpeeled boiled potatoes medium size perforated solid 3 1 Steaming 100 35 45 Boiled potatoes quartered perforated solid 3 1 Steaming 100 20 25 Brown rice 1 1 5 solid Steaming 100 35 45 Long grain rice 1 1 5 solid Steaming 100 20 30 Basmati rice 1 1 5 solid Steaming 100 20 30 Parboiled rice 1 1 5 solid Steaming 100 15 2...

Page 29: ...at ing Tempera ture in C Cooking time in min Wiener sausages perforated solid 3 1 Steaming 80 90 12 18 Bavarian veal sausages perforated solid 3 1 Steaming 80 90 20 25 Food Amount Accessories Height Heating type Tempera ture in C Cooking time in min Sea bream whole 0 3 kg each perforated solid 3 1 Steam 80 90 15 25 Sea bream fillet 0 15 kg each perforated solid 3 1 Steam 80 90 10 20 Fish terrine 1...

Page 30: ...to be collected as it drips down For frozen food that needs to retain liquid when it is cooked e g creamed spinach use the steaming pan with the unperforated base or cookware placed on the wire rack The times specified in the table are intended as a guide They are dependent on the quality freezing temperature 18 C and composition of the food Time ranges are specified Set the shortest time initiall...

Page 31: ...nly use fruit and vegetables which are in perfect condition The following foods cannot be preserved with your appliance Contents of tins meat fish or pastry dough Check preserving jars rubber rings clips and springs Clean rubber rings and jars thoroughly with hot water The Sterilise bottles programme is also suitable for cleaning jars Place the jars into the perforated steam container They must no...

Page 32: ... 25 Salmon fillet perforated solid 3 1 Steaming 80 100 20 25 Broccoli perforated solid 3 1 Steaming 100 6 10 Cauliflower perforated solid 3 1 Steaming 100 5 8 Beans perforated solid 3 1 Steaming 100 6 10 Peas perforated solid 3 1 Steaming 100 5 12 Carrots perforated solid 3 1 Steaming 100 4 6 Mixed vegetables perforated solid 3 1 Steaming 100 6 10 Brussels sprouts perforated solid 3 1 Steaming 100...

Page 33: ...6 ...

Page 34: ...6 ...

Page 35: ...6 ...

Page 36: ...3PCFSU PTDI BVTHFSÉUF NC XXX CPTDI IPNF DPN BSM 8FSZ 4USB F ßODIFO FSNBOZ 9001114463 9001114463 950508 ...

Reviews: