background image

ASMB-LE

Server Management Board

Summary of Contents for ASMB-LE

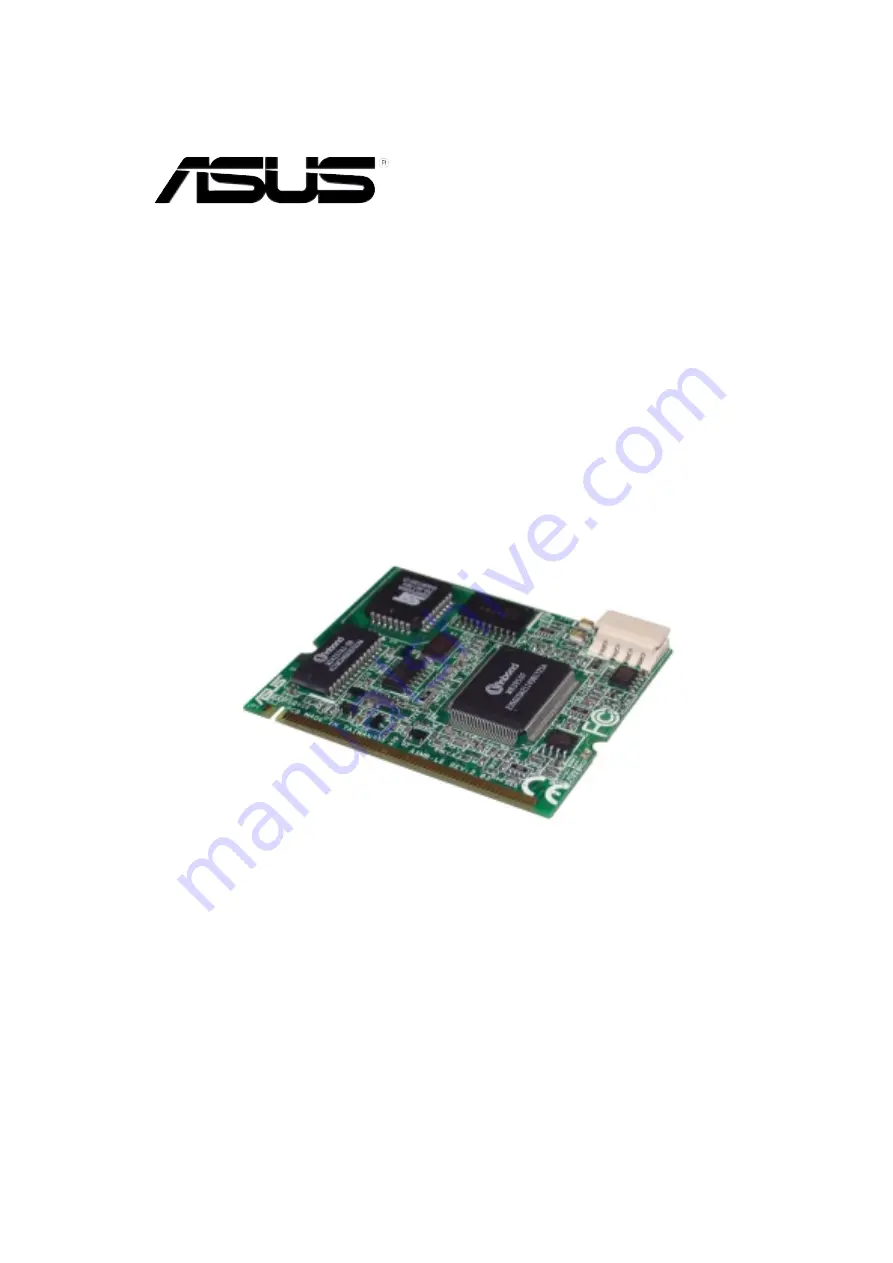
Page 1: ...ASMB LE Server Management Board ...

Page 2: ...S OR IMPLIED INCLUDING BUT NOT LIMITED TO THE IMPLIED WARRANTIES OR CONDITIONS OF MERCHANTABILITY OR FITNESS FOR A PARTICULAR PURPOSE IN NO EVENT SHALL ASUS ITS DIRECTORS OFFICERS EMPLOYEES OR AGENTS BE LIABLE FOR ANY INDIRECT SPECIAL INCIDENTAL OR CONSEQUENTIAL DAMAGES INCLUDING DAMAGES FOR LOSS OF PROFITS LOSS OF BUSINESS LOSS OF USE OR DATA INTERRUPTION OF BUSINESS AND THE LIKE EVEN IF ASUS HAS...

Page 3: ...are installation 2 2 2 3 Network configuration 2 5 2 3 1 Running the ASMC utility 2 5 2 3 2 Configuring the LAN controller 2 6 2 3 3 Updating the ASMC LE firmware 2 8 2 4 Software installation 2 9 2 4 1 Installing the ARC 2 9 2 4 2 Launching ARC 2 10 Chapter 3 Chapter 3 Chapter 3 Chapter 3 Chapter 3 Software support Software support Software support Software support Software support 3 1 ASUS Remot...

Page 4: ...ty 3 15 3 2 2 Command fields 3 16 3 2 3 Initial 3 16 3 2 4 View 3 16 3 2 5 Set 3 19 3 2 6 Monitor 3 20 3 2 7 Help 3 20 Appendix Appendix Appendix Appendix Appendix Reference information Reference information Reference information Reference information Reference information A 1 LAN port for server management A 2 A 2 BMC socket A 4 A 3 Troubleshooting A 7 ...

Page 5: ...encouraged to try to correct the interference by one or more of the following measures Reorient or relocate the receiving antenna Increase the separation between the equipment and receiver Connect the equipment to an outlet on a circuit different from that to which the receiver is connected Consult the dealer or an experienced radio TV technician for help Canadian Department of Communications Stat...

Page 6: ...ct voltage in your area If you are not sure about the voltage of the electrical outlet you are using contact your local power company If the power supply is broken do not try to fix it by yourself Contact a qualified service technician or your retailer Operation safety Operation safety Operation safety Operation safety Operation safety Before installing any component to the server carefully read a...

Page 7: ...hapter 3 Software support This chapter tells you how to use the software applications that the server management board supports Appendix Troubleshooting Appendix Troubleshooting Appendix Troubleshooting Appendix Troubleshooting Appendix Troubleshooting The Appendix lists the common problems that you may encounter when installing or usingthe server management board or any of the bundled utilities W...

Page 8: ...e At the DOS prompt type the command line afudos i filename afudos iP5GD2 ROM DANGER WARNING DANGER WARNING DANGER WARNING DANGER WARNING DANGER WARNING Information to prevent injury to yourself when trying to complete a task CAUTION CAUTION CAUTION CAUTION CAUTION Information to prevent damage to the components when trying to complete a task NOTE NOTE NOTE NOTE NOTE Tips and additional informatio...

Page 9: ...Modem Interface Interface Interface Interface Interface LAN Interface LAN Interface LAN Interface LAN Interface LAN Interface B u s B u s B u s B u s B u s Features Features Features Features Features Software Software Software Software Software support support support support support IPMI 1 5 compliant and supports Auto monitoring sensor and event logging IPMI Host I O interface Receiving and log...

Page 10: ...x x x x x ...

Page 11: ...1 Product introduction This chapter describes the server management board features and the new technologies it supports ...

Page 12: ...through component sensors including CPU s temperature s system temperature fan rotations and power supply voltages The ASMB LE also records each remote server system event for accurate and efficient troubleshooting The ASMB LE comes with a power management feature that allows you to power on off or reset the remote server giving you full control of power in critical situations The server managemen...

Page 13: ...e ASMB LE board Refer to the Appendix section for details L E D L E D L E D L E D L E D N a m e N a m e N a m e N a m e N a m e S t a t u s S t a t u s S t a t u s S t a t u s S t a t u s Description Description Description Description Description LED1 LED1 LED1 LED1 LED1 B M C B M C B M C B M C B M C Blinking ASMB LE firmware is in execution Heartbeat Heartbeat Heartbeat Heartbeat Heartbeat Off T...

Page 14: ...e ASUS Remote Controller ARC Controller ARC Controller ARC Controller ARC Controller ARC Hub or router Hub or router Hub or router Hub or router Hub or router Direct LAN connection Direct LAN connection Direct LAN connection Direct LAN connection Direct LAN connection LAN connection through a network hub LAN connection through a network hub LAN connection through a network hub LAN connection throu...

Page 15: ...2 Installation This chapter provides instructions on how to install the board to the server system and install the utilities that the board supports ...

Page 16: ...antistatic pad or in the bag that came with the component Before you install or remove any component ensure Before you install or remove any component ensure Before you install or remove any component ensure Before you install or remove any component ensure Before you install or remove any component ensure that the power supply is switched off or the power that the power supply is switched off or ...

Page 17: ...g clips snap back and secure the board in place When installed the board appears as shown 5 Re install the server system cover then connect the power plug to a grounded wall socket 6 Insert the LAN cable plug to the LAN port for server management Refer to the Appendix for the location of the LAN port for server management on various server motherboards 7 For direct LAN configuration connect the ot...

Page 18: ...nstallation Chapter 2 Installation Chapter 2 Installation Chapter 2 Installation To uninstall the board 1 Simultaneously press the BMC socket retaining clips outward until the board tilts up 2 Carefully pull the board out from the BMC socket then set aside ...

Page 19: ...pport CD that came with the package To run the ASMC utility 1 Restart the remote server then place the support CD to the optical drive 2 Press 1 FreeDOS command prompt when the screen prompts you to select from available boot options 3 When the A prompt appears type X where X is the drive letter of the optical drive 4 When the X prompt appears type cd asms asmc le dostool then press Enter 5 At the...

Page 20: ... Menu options ASMC Help Menu options ASMC Help Menu options ASMC Help Menu options ASMC Help Menu options Options Options Options Options Options Description Description Description Description Description flash save filename Save the current firmware to a file flash load filename Update the ASMB LE firmware i2c_read bus_num dev_num offset Send the read I2 C command i2c_write bus_num dev_num offse...

Page 21: ...v Fun Vendor Device MAC PSCH LR 01 01 00 8086 1075 00 11 2F 0F A2 21 New BMC MAC 00 11 2F 0F A2 21 A 6 Type asmc bmc_mac asmc bmc_mac asmc bmc_mac asmc bmc_mac asmc bmc_mac on the prompt then press Enter The screen displays the physical address MAC of the remote server Write the MAC address in a piece of paper for reference When finished the utility returns to the DOS prompt Make sure that the ass...

Page 22: ... then save the firmware file to the server 2 Launch the ASWM application If ASWM is not yet installed on your server system use the support CD to install the application 3 Click the Configuration Configuration Configuration Configuration Configuration link then select IPMI Flash IPMI Flash IPMI Flash IPMI Flash IPMI Flash from the menu 4 Click Browse Browse Browse Browse Browse to locate the lates...

Page 23: ...the ARC Installing the ARC Installing the ARC Installing the ARC To install the ARC to the local central server 1 Place the support CD to the optical drive The CD automatically displays the Drivers Drivers Drivers Drivers Drivers menu if Autorun is enabled in your computer If Autorun is NOT enabled in your computer browse the contents of the support CD to locate the file ASSETUP EXE from the BIN f...

Page 24: ...ARC Launching ARC Launching ARC Launching ARC To launch the ARC utility Click Start Start Start Start Start All Programs All Programs All Programs All Programs All Programs ASUS Remote Console ASUS Remote Console ASUS Remote Console ASUS Remote Console ASUS Remote Console ASUS ASUS ASUS ASUS ASUS Remote Console Remote Console Remote Console Remote Console Remote Console from the Windows desktop or...

Page 25: ...3 Software support This chapter tells you how to use the software applications that the server management board supports ...

Page 26: ...enu bar Tool bar Tool bar Tool bar Tool bar Tool bar Navigation Navigation Navigation Navigation Navigation w i n d o w w i n d o w w i n d o w w i n d o w w i n d o w Detail SEL window Detail SEL window Detail SEL window Detail SEL window Detail SEL window Event window Event window Event window Event window Event window Status bar Status bar Status bar Status bar Status bar M e n u M e n u M e n ...

Page 27: ...vent Log SEL Some remote server information such as the SDR contains several sensor groups such as Temperature Temperature Temperature Temperature Temperature Voltage Voltage Voltage Voltage Voltage Fan Fan Fan Fan Fan and Chassis Intrusion Chassis Intrusion Chassis Intrusion Chassis Intrusion Chassis Intrusion Click before the remote server information to display the sensor groups Click before a ...

Page 28: ...rap format and is used is used for IPMI alerting as well as alerts using the ASF specification Status bar Status bar Status bar Status bar Status bar The Status bar located at the bottom of the ARC window displays the connection status to the remote server connection duration IP address of the remote server and the progress of SDR SEL FRU information download Detail SEL window Detail SEL window De...

Page 29: ...w New New New An Add new server Add new server Add new server Add new server Add new server connection connection connection connection connection window appears 2 Type the remote server name and IP address on the fields Click Save Default Save Default Save Default Save Default Save Default to set the remote server connection as the default Otherwise click O K O K O K O K O K to continue or Cancel...

Page 30: ...rmation then select from the list You can also double click a remote server information from the Detail SEL window 5 When prompted enter the default user name adm and password asusadm 6 Set the connection request level authentication and privilege then click O K O K O K O K O K The default connection request level authentication is MD2 MD2 MD2 MD2 MD2 Message Digest Algorithm 2 with Administrator ...

Page 31: ...ures voltages fan speeds chassis intrusion etc The SDR also provides information on the sensor location e g CPU1 CPU2 FAN1 event generation and access information To retrieve a sensor information 1 From the navigation window click before the server name to display the remote server information 2 Click before the SDR SDR SDR SDR SDR to display the sensor groups e g Temperature then click before a s...

Page 32: ...sensor The Information Information Information Information Information tab displays basic sensor information including the sensor name current status current value and sensor type The tab also displays the sensor record ID and SDR version 4 Click the Settings Settings Settings Settings Settings tab to adjust the sensor threshold values Click on the up down arrow button after each threshold value t...

Page 33: ...s Displaying all remote server sensors Displaying all remote server sensors To display all remote server sensors in graphical format 1 From the navigation window click before the server name to open the remote server information 2 Click All Sensors value All Sensors value All Sensors value All Sensors value All Sensors value All remote server sensors are displayed on the Information window in grap...

Page 34: ...ote server For example the FRU feature can display the remote server motherboard name model and serial number You can use this feature when retrieving information on a module or component installed on the remote server The FRU information feature allows you to obtain component or module information even when the remote server is down or off To display the FRU information 1 From the navigation wind...

Page 35: ... time tracking or later retrieval The ARC application can display system events for efficient remote server monitoring and troubleshooting To display the sytem events 1 From the navigation window click before the server connection then click SEL SEL SEL SEL SEL The status bar displays the progress of the SEL download When finished the Detail SEL window displays the system events in chronological o...

Page 36: ...llows you to adjust the remote server monitoring settings including SEL polling SDR reading ASF and PET To adjust the monitoring settings 1 Click Server Server Server Server Server on the menu bar then select Setting Setting Setting Setting Setting from the drop down menu A Server Server Server Server Server Setting Setting Setting Setting Setting window appears 2 Click on the up down arrow button...

Page 37: ...ng the power menu 2 Click Yes Yes Yes Yes Yes when the Confirm Confirm Confirm Confirm Confirm power down power down power down power down power down window appears 3 The remote server is turned off Click O K O K O K O K O K to close the window Use the same instructions as reference when powering up or resetting the remote server Before turning off or resetting the remote server make sure that it ...

Page 38: ... 4 Click the Advanced Advanced Advanced Advanced Advanced tab then click the Settings Settings Settings Settings Settings button 5 On the Services Services Services Services Services tab click the Add Add Add Add Add button to display a Service Service Service Service Service Settings Settings Settings Settings Settings window 6 Type a name on the Description of service field Description of servic...

Page 39: ...1 3 2 1 Installing and launching the ASUS Host Installing and launching the ASUS Host Installing and launching the ASUS Host Installing and launching the ASUS Host Installing and launching the ASUS Host Management Controller Setup utility Management Controller Setup utility Management Controller Setup utility Management Controller Setup utility Management Controller Setup utility To install the AS...

Page 40: ...he System Event Log System Event Log System Event Log System Event Log System Event Log SEL the System Data System Data System Data System Data System Data Record Record Record Record Record SDR and general BMC information 3 2 3 3 2 3 3 2 3 3 2 3 3 2 3 Initial Initial Initial Initial Initial The Initial command allows you to clear the SEL information or exit the utility Go to Initial Initial Initi...

Page 41: ...he data record displayed in the right window pane over the total number of sensor data records in the remote host 2 Use the down arrow key to display the next sensor data record 3 Press Esc to return to the main screen To view the System Event Log SEL To view the System Event Log SEL To view the System Event Log SEL To view the System Event Log SEL To view the System Event Log SEL 1 Select BMC SDR...

Page 42: ...rmation To view the BMC information To view the BMC information To view the BMC information 1 Select BMC Info BMC Info BMC Info BMC Info BMC Info from the View View View View View command option then press Enter A list of BMC information appears on the left pane 2 Use the down arrow button to select a BMC information The BMC information is displayed in the right pane 3 Press Esc to return to the m...

Page 43: ...e PCI Interface PCI Interface PCI Interface Peripheral Component Interconnect 3 When finished press Esc to return to the main screen To set the BMC Timer To set the BMC Timer To set the BMC Timer To set the BMC Timer To set the BMC Timer 1 Select BMC Timer BMC Timer BMC Timer BMC Timer BMC Timer from the Set Set Set Set Set command option then press Enter 2 Set the BMC IPMI timer to the current sy...

Page 44: ...or Monitor command displays real time data on the remote server system and CPU temperatures voltages and fan speeds To display a remote server information To display a remote server information To display a remote server information To display a remote server information To display a remote server information 1 Select a sensor from the Monitor Monitor Monitor Monitor Monitor command options then p...

Page 45: ...e information The Appendix shows the location of the LAN port for server management on several motherboards and presents common problems that you may encounter when installing or using the server management board ...

Page 46: ...st identify and use the LAN port for server management to connect the remote server to the local central host direct LAN connection or to the network hub or router Refer to the illustrations below to identify the LAN port for server management on different server motherboards NCL DS motherboard NCL DS motherboard NCL DS motherboard NCL DS motherboard NCL DS motherboard PCH DR motherboard PCH DR mo...

Page 47: ...SUS Server Management Board ASMB LE A 3 A 3 A 3 A 3 A 3 NCLV D motherboard NCLV D motherboard NCLV D motherboard NCLV D motherboard NCLV D motherboard PSCH SR motherboard PSCH SR motherboard PSCH SR motherboard PSCH SR motherboard PSCH SR motherboard PSCH LR motherboard PSCH LR motherboard PSCH LR motherboard PSCH LR motherboard PSCH LR motherboard ...

Page 48: ...pin module DDR DIMM_B4 64 72 bit 240 pin module mPGA 604 33cm 13in 30 5cm 12in PRI_IDE SCSIB1 FRNT_FAN2 SATA2 ATX12V1 CPU_FAN1 FM_CPU1 PCIX2 64 bit 133MHz 3V PCIX4 64 bit 133MHz 3V PCIX5 64 bit 133MHz 3V Intel ICH5R Adaptec AIC 7902W Intel E7520 MCH BMCCONN1 PSUSMB1 BPSMB1 Intel PXH Intel PXH AUX_PANEL1 HDLED1 SCSI_EN1 USB34 USBPW34 CLRTC1 PCIE3 VGA_EN1 RECPVERY1 LAN1_EN1 LAN2_EN1 Broadcom BCM5721...

Page 49: ... Gigabit LAN BCM5705E COM2 LPT1 BPSMB1 BMCCONN1 AUX_PANEL1 FM_CPU1 CPU_FAN1 FM_CPU2 CPU_FAN2 CLRTC1 8130 LED1 RECOVERY1 HDLED1 USBPW34 USB34 VGA_EN1 LAN_EN2 REAR_FAN2 REAR_FAN1 LAN_EN1 KBPWR1 USBPW12 PSUSMB1 SATA_EN1 CR2032 3V Lithium Cell CMOS Power BMCSOCKET1 Gigabit LAN BCM5721 NCCH DR FLOPPY 8Mbit Flash BIOS SEC_IDE Super I O Intel ICH 6300ESB PRI_IDE ATX12V1 ATXPWR1 mPGA 604 CPU2 PCI3 32 bit ...

Page 50: ...PU_FAN1 FRONT_FAN1 FRONT_FAN2 ATI RAGE XL VGA Controller PCI3 32 bit 33MHz 5V FLOPPY1 SATA1 BMCSOCKET1 ZCRSKT1 SATA2 COM2 USB34 FPSMB1 BPSMB1 35 68 34 1 SCSIA1 CLRTC1 CHASSIS1 BAT1 PSUSMB1 Intel 82547GI Gigabit Ethernet PCI2 32 bit 33MHz 5V SASI_EN1 J6 BUZZER1 PSCH SR SATA_RAID1 SATA_RAID2 SATA_RAID3 SATA_RAID4 Adaptec AIC 8110X COM1 VGA Intel E7210 Canterwood ES MCH Intel 6300ESB Hance Rapid ICH ...

Page 51: ...erly If you have not previously installed the LAN controller driver install the same using the system support CD 3 Make sure the IP address of both the remote and local central servers are on the same subnet 4 Set the remote server IP address and MAC address using the ASUS Host Management Controller Setup See Chapter 2 for details The ARC cannot receive PET The ARC cannot receive PET The ARC canno...

Page 52: ...A 8 A 8 A 8 A 8 A 8 Appendix Reference information Appendix Reference information Appendix Reference information Appendix Reference information Appendix Reference information ...

Reviews: