background image

DE128

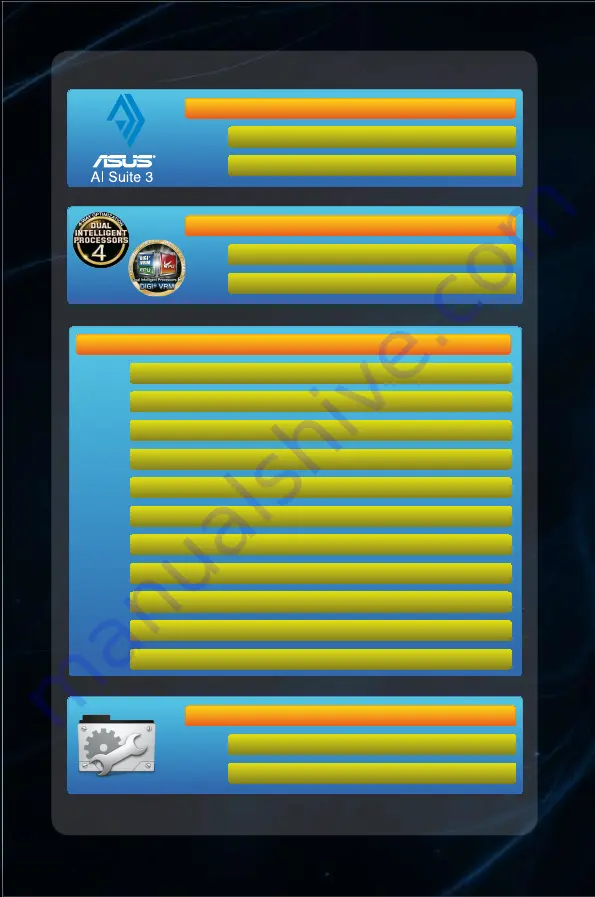
AI Suite 3

Installing AI Suite 3

Launching AI Suite 3

AI Suite 3 Main menu

Dual Intelligent Processors 4

Dual Intelligent Processors 2

AI Suite 3 Utilities

Dual Intelligent Processors 4 with 4-Way Optimization

Dual Intelligent Processors 2 with Performance and Power Saving Utilities

USB 3.0 Boost

USB BIOS Flashback
USB

Wi-Fi Engine
Wi-Fi GO! and Remote GO!
Ai

Network iControl
EZ Update
System Information

System requirements

Wi-Fi GO! and Remote GO!

Wi-Fi GO and NFC Remote app for smart device

AI Suite 3 User Manual Quick Menu

Summary of Contents for Al Suite 3

Page 1: ...gent Processors 4 with 4 Way Optimization Dual Intelligent Processors 2 with Performance and Power Saving Utilities USB 3 0 Boost USB BIOS Flashback USB Charger Wi Fi Engine Wi Fi GO and Remote GO Ai Charger Network iControl EZ Update System Information System requirements Wi Fi GO and Remote GO Wi Fi GO and NFC Remote app for smart device AI Suite 3 User Manual Quick Menu ...

Page 2: ...ll the Wi Fi enabled features of AI Suite 3 ensure that you install the Wi Fi module driver from the bundled support DVD To do this go to Drivers tab ASUS Bluetooth 4 0 Wi Fi Driver and follow the succeeding onscreen instructions To install AI Suite 3 on your computer Windows 7 OS 1 Place the Support DVD into the optical drive 2 In the AutoPlay dialog box click Run ASSETUP exe then select the Util...

Page 3: ...pp on the Start screen Windows 8 OS 1 Place the Support DVD into the optical drive then follow the onscreen instructions 2 From the ASUS motherboard support DVD main menu select the Utilities tab and click or tap AI Suite 3 3 Follow the succeeding onscreen instructions If the ASUS motherboard support DVD main menu does not appear try the following steps a Go to the Start screen then click or tap t...

Page 4: ...launch the menu bar You can access the ASUS utilities from any of these two AI Suite 3 main menu bars Dual Intelligent Processors 4 with 4 Way Optimization and Dual Intelligent Processors 2 with Performance and Power Saving Utilities The AI Suite 3 screenshots in this section are for reference only and can vary depending on motherboard model Dual Intelligent Processors 4 Click or tap to launch AI ...

Page 5: ...3 0 Boost Network iControl Remote GO DIGI VRM Fan Xpert 2 The AI Suite 3 features may vary depending on the motherboard model Visit the ASUS website at www asus com for more information EPU Click or tap to launch AI Suite 3 menu bar Dual Intelligent Processors 2 main menu bar Back to Quick Menu ...

Page 6: ...utomatically tweak the TPU EPU DIGI Power Control and Fan Xpert 2 to their optimal settings Select an advanced power saving mode Click or tap this 4 Way Optimization button to auto detect and tune the best settings for your system DO NOT remove your fan during the tuning process 4 Way Optimization screen The Dual Intelligent Processors 4 is only available in selected Z87 motherboard models Click o...

Page 7: ...ngs based on actual usage Click or tap to start auto tuning Click or tap to go back to the 4 Way Optimization main screen Click or tap to view more settings The system may reboot two or three times during the auto tuning process For Windows 8 OS click or tap Desktop app to monitor the auto tuning process after every system reboot Back to Quick Menu ...

Page 8: ...U Frequency bars show the status of the CPU cores which vary with your CPU model TurboV Processing Unit TPU TPU allows you to manually adjust the CPU frequency CPU cache core frequencies DRAM frequency and related voltages for an enhanced system stability and a performance boost Refer to the CPU documentation before adjusting CPU voltage settings Setting a high voltage may damage the CPU permanent...

Page 9: ... Click or tap or to adjust the CPU VCCSA voltage Click or tap to save the adjustment into a profile Click or tap to load the saved profile Click or tap to apply the adjustments Click or tap to undo the adjustments Click or tap to enable the default settings Back to Quick Menu ...

Page 10: ...nitor and system sleep time Click or tap to select a fan profile Click or tap to apply the adjustments Click or tap to undo the adjustments Click or tap to apply the default settings High Performance Click or tap to apply the adjustments Click or tap to undo the adjustments Click or tap to apply the default settings Tick to enable Away Mode and move the sliders to adjust monitor and system sleep t...

Page 11: ...may decrease the total power delivery to the CPU and affects the CPU performance under a heavy system To restore your system to its default settings reboot your computer Max Power Saving Click or tap to apply the adjustments Click or tap to undo the adjustments Click or tap to apply the default settings Tick to select Voltage Decrement setting Move the slider to adjust the maximum CPU power Tick t...

Page 12: ...ick or tap to apply the default settings Tick to select Voltage Decrement setting Move the slider to adjust the maximum CPU power Click or tap to select a fan profile Click or tap to select a Configured Max CPU Power value Tick to select a USB controller power setting Tick to mute the system s sound Back to Quick Menu ...

Page 13: ...for power efficiency CPU Current Capability CPU Current Capability provides a wider total power range for overclocking A higher value brings a wider total power range and extends the overclocking frequence range simultaneously CPU Power Phase Control Increase the phase number under a heavy system load to get more transient and better thermal performance Reduce the phase number under a light system...

Page 14: ... to apply the changes Click or tap to undo the changes The actual performance boost may vary depending on your CPU specification Ensure that the cooling modules are properly installed in your motherboard to monitor the thermal conditions CPU Voltage Frequency CPU Voltage Frequency affects the VRM transient response and thermal conditions Higher VRM frequency gets a quicker transient response Activ...

Page 15: ...p to set the fan s speed to silent mode Click or tap to set the balanced configuration between the fan s noise level and speed Click or tap to increase the fan s speed for a high cooling capability Click or tap to maximize the fan speed Click or tap to switch between fan screens Click or tap to auto tune the fans to their best settings Click or tap to save the settings into a profile Click or tap ...

Page 16: ...onses based on your system s temperature Click or tap to switch between the CPU and chassis fan screens Click or tap to apply the changes Click or tap to undo the changes Click or tap to go back to the previous screen Click and drag to set the fan s rotation speed Click and drag the sliders to adjust the fan s response Back to Quick Menu ...

Page 17: ...lick or tap to apply the changes Click or tap to undo the changes When the CPU temperature reaches 75o C the fan automatically runs at full speed to protect the CPU Fan Xpert 2 may not be able to detect the fan speed if you install the fan with an external control kit for rotation speed Fan Xpert 2 only supports fans with 4 pin and 3 pin connectors If you install a 2 pin fan it can only run at its...

Page 18: ... to switch between screens Click or tap to apply the changes Click or tap to undo the changes CPU Load line Calibration It allows you to adjust the voltage range to control the CPU Load line Adjust to a high value for system performance or to a low value for power efficiency CPU Current Capability CPU Current Capability provides a wider total power range for overclocking A higher value brings a wi...

Page 19: ...t a quicker transient response while saving the CPU power CPU Power Duty Control CPU Power Duty Control adjusts the current of every VRM phase and the thermal conditions of every phase component Energy Processing Unit EPU EPU is an enery processing utility that allows you to adjust the CPU GPU and Fan Control settings to their power saving conditions Using EPU Auto Tick to enable Away Mode and mov...

Page 20: ... default settings reboot your computer High Performance Click or tap to apply the adjustments Click or tap to undo the adjustments Click or tap to apply the default settings Tick to enable Away Mode and move the sliders to adjust monitor and system sleep time Max Power Saving Click or tap to apply the adjustments Click or tap to undo the adjustments Click or tap to apply the default settings Tick ...

Page 21: ... or disable the Configured Max CPU Power Click or tap to select a Configured Max CPU Power value Click or tap to select a fan profile Tick to mute system s sound Away Mode Click or tap to apply the adjustments Click or tap to undo the adjustments Click or tap to apply the default settings Click or tap to auto tune the EPU Back to Quick Menu ...

Page 22: ... loaded during system bootup Save your overclocking settings as a TPU profile and manually load this profile after system bootup CPU Frequency Tick to enable Group Tuning Click or tap to save the adjustment into a profile Click or tap to load the saved profile Click or tap to apply the adjustments Click or tap to undo the adjustments Set the CPU Core Ratio item in BIOS to Auto before using the CPU...

Page 23: ...reen to select the type of fan that you want to customize Click or tap to set the fan s speed to silent mode Click or tap to set the balanced configuration between the fan s noise level and speed Click or tap to increase the fan s speed for a high cooling capability Click or tap to maximize the fan speed Click or tap to switch between fan screens Click or tap to auto tune the fans to their best se...

Page 24: ...onses based on your system s temperature Click or tap to switch between the CPU and chassis fan screens Click or tap to apply the changes Click or tap to undo the changes Click or tap to go back to the previous screen Click and drag to set the fan s rotation speed Click and drag the sliders to adjust the fan s response Back to Quick Menu ...

Page 25: ... go back to the previous screen When the CPU temperature reaches 75o C the fan automatically runs at full speed to protect the CPU Fan Xpert 2 may not be able to detect the fan speed if you install the fan with an external control kit for rotation speed Fan Xpert 2 only supports fans with 4 pin and 3 pin connectors If you install a 2 pin fan it can only run at its full speed If you change the CPU ...

Page 26: ... the USB 3 0 devices that support UASP For a list of UASP supported USB 3 0 devices visit the ASUS website at www asus com The data transfer speed varies with USB devices For a higher data transfer performance use a USB 3 0 device Click or tap to select a USB device Click or tap to enable the USB device s normal data transfer rate Click or tap to enable UASP or Turbo Mode for a faster data transfe...

Page 27: ... Flashback USB BIOS Flashback is available only in selected motherboard models Scheduling the BIOS download 1 In the Download Setting field tick Schedule days then select the number of days for the BIOS download schedule 2 Click or tap Apply to save the BIOS download schedule Click or tap Cancel to cancel the download schedule Using USB BIOS Flashback Set a schedule for the BIOS Update download Cl...

Page 28: ...tion Rear I O connection of your user manual for more details To download the updated BIOS 1 From the USB BIOS Flashback screen click or tap Check for New BIOS Update Wait for the system to check the latest BIOS version 2 After the utility detects a new BIOS click or tap from the Save to field select the USB flash drive then click or tap Download 3 After the download is complete click or tap OK Ba...

Page 29: ...USB Charger Using USB Charger Ensure to connect your USB device into the USB port that supports this utility Refer to section Rear I O connection of your user manual for more details USB Charger does not support USB hubs USB extension cables and generic USB cables USB Charger may not recognize some ASUS devices due to varying design Click or tap to detect the connected USB device Click or tap to a...

Page 30: ...enu then select Wi Fi Engine Wi Fi Engine is available only in selected motherboard models Click or tap to set up your computer as a wireless access point Using the Client Mode The Client mode allows you to connect your system to a wireless network To use the client mode 1 Click or tap Client Mode to launch Network Connections 2 From the Network Connections window select a network adapter Click or...

Page 31: ... mode allows you to set your system as an access point for other wireless enabled devices To use AP mode click or tap AP Mode on the Wi Fi Engine menu Click or tap to go back to previous screen Click or tap to disable AP mode Click or tap to enable AP mode Click or tap to select a network Key in a network name Key in your password Key in your password for confirmation Back to Quick Menu ...

Page 32: ...oud storage Ensure that all Wi Fi enabled devices are in the same Wi Fi network The user interface of your smart device may vary with the operating system and the screen resolution For details on the Wi Fi GO and Remote GO system requirements refer to section Utilities system requirements Wi Fi GO or Remote GO is available in selected models only Features Utilities Wi Fi GO Remote GO Cloud GO Remo...

Page 33: ...p on the top right corner of the AI Suite 3 main menu then select Remote GO Click or tap to set a password Remote GO menu To access the Wi Fi GO or Remote GO features in your smart device refer to section Wi Fi GO NFC Remote of this user manual for more details To protect your Wi Fi utility from other smart devices click or tap to set your password Ensure that the ASUS AI Suite 3 utility is active...

Page 34: ...want to connect with your smart device When done the Wi Fi GO NFC Remote interface appears on your smart device Wi Fi GO NFC Remote Wi Fi GO NFC Remote allows you to remotely control your computer using your smart device For details on the Wi Fi GO NFC Remote system requirements and supported screen resolutions refer to section Utilities system requirements Wi Fi GO NFC Remote interface of Wi Fi G...

Page 35: ...mputer 1 Click or tap Cloud GO Enter 2 Log in to your cloud accounts then click or tap Sign In To log in to your ASUS Webstorage account key in your user name and password To log in to your Google Drive or Dropbox accounts click or tap Sign in Cloud GO directs you to the Google Drive or Dropbox website to log in to your account Wi Fi GO NFC Remote interface of Remote GO utility DLNA Media Hub Remo...

Page 36: ... other cloud accounts or create a back up to your local drive Tick to select contents Click or tap to go back to Wi Fi GO Remote GO screen Click or tap to sign out Synchronizing cloud contents To synchronize contents 1 Tick the contents that you want to synchronize then click or tap Sync Clouds 2 Tick the cloud storage account then click or tap OK Tick Backup if you want to save a backup in your c...

Page 37: ...ename create folder download delete or refresh your cloud contents Tap to sync your files to other cloud accounts or create a backup to your local drive Synchronizing cloud contents To synchronize contents 1 Tick the contents that you want to synchronize then tap Sync Clouds 2 Tick the cloud storage account then tap OK Tick Backup to PC under C MyFavorite if you want to save a backup in your compu...

Page 38: ...te Desktop 1 On your smart device tap Remote Desktop Enter 2 Wait for the smart device to connect with your computer To operate Remote Desktop in Windows 7 you can select Extended Mode or Main Screen Mode in your smart device Remote Desktop interface for Windows 8 Tap to launch the smart device s keypad Tap to launch the Charms bar Tap to view the cursor Back to Quick Menu ...

Page 39: ...ASUS Z87 Series AI Suite 3 39 Remote Desktop interface for Windows 7 Tap to launch the smart device s keypad Back to Quick Menu ...

Page 40: ...ur DLNA display as a receiver such as DLNA TV ensure to enable the DLNA setting Using DLNA Media Hub in your computer To use DLNA Media Hub in your computer click or tap DLNA Media Hub Enter Click or tap to select media type Click or tap to add or delete files Click or tap to select a receiver Click or tap to refresh media files Click or tap to go back to the previous screen Selecting a receiver T...

Page 41: ... or tap OK Deleting media files To delete media files 1 From the Music Video or Photo screen click or tap 2 Tick the files that you want to delete then click or tap Delete 3 Click or tap OK Using DLNA Media Hub in your smart device To use DLNA Media Hub in your smart device tap DLNA Media Hub Enter Tap to select media type Tap to select a receiver Tap to select playlist Back to Quick Menu ...

Page 42: ... ensure to enable the File Transfer function in your smart device Transferring files from computer to smart device To transfer files from computer to smart device 1 Click or tap File Transfer Enter 2 Click or tap Setting to select the destination for your transferred files Click or tap to apply the changes Click or tap to go back to the previous screen Click or tap browse to select the destination...

Page 43: ...evice to computer To transfer files from smart device to computer 1 Tap File Transfer Enter 2 Tick the files that you want to send to your computer then tap Send If you are using an iOS smart device you can only receive files in PNG BMP JPG GIF and TIFF formats To receive files on your iOS device go to Settings Privacy Photos then turn on the Wi Fi GO NFC Remote Back to Quick Menu ...

Page 44: ... In your computer click or tap Smart Sensor Control Camera Click or tap to take pictures with your smart device Click or tap to record videos with your smart device Click or tap to go back to the previous screen Click or tap to go back to Wi Fi GO screen Your smart device must have a camera to support this feature Ensure to enable the gyroscope or microphone feature in your smart device to enable ...

Page 45: ...also has the gyroscope function that allows you to use your smart device as a remote control for gyroscope enabled apps In your smart device tap Smart Sensor Control Enable on the virtual microphone or gyroscope functions Tap to enable the gyroscope function Tap to select voice quality Tap to enable virtual microphone function Back to Quick Menu ...

Page 46: ...the actions without saving as a profile click or tap Apply You can also set the smart device s motion sensor sensitivity for a quicker response in your computer To do this tap Smart Sensor Control Setting and set a sensitivity option Click or tap to go back to the previous screen Click or tap to go back to Wi Fi GO screen Select actions for each movement gesture Click or tap to apply and save the ...

Page 47: ...e To apply the action without saving as a profile click or tap Apply Your smart device must have a proximity sensor function to support this feature Click or tap to go back to the previous screen Click or tap to go back to Wi Fi GO screen Click or tap to apply and save the settings as a profile Click or tap to apply the settings Back to Quick Menu ...

Page 48: ...te keyboard and mouse for your computer Using Remote Keyboard Mouse To use Keyboard Mouse tap Keyboard Mouse in your smart device then tap Enter Input field Control keys Tick to hold left click function Mouse tap area Tap to mimic right click mouse function Tap to mimic left click function Tap to scroll up or down Back to Quick Menu ...

Page 49: ...n a hot key for capture range Click or tap to go back to the previous screen Click or tap to apply the changes Tick to select the capture range 3 Capture the screenshot using the configured hot key then tap OK Ensure to enable the Capture Send feature in your smart device To do this tap Capture Send then tap Enable 4 In your smart device tap Capture Send then tap Enter 5 Tap the file then select a...

Page 50: ...lected motherboard models Tick to enable or disable Ai Charger Click or tap to apply the selection Ai Charger screen Check the manufacturer if your USB device is a Battery Charging Specification 1 1 BC 1 1 compliant or compatible device Actual charging speeds may vary depending on the charging rate and specifications of your USB device To ensure normal charging function disconnect and reconnect yo...

Page 51: ...ght corner of the AI Suite 3 main menu then select Network iControl Ensure to install the LAN drivers before using this utility Network iControl only supports the onboard LAN The Quick Connection EZ Profile and Info tabs are disabled when the Network iControl is off Using Network iControl EZ Start screen Click or tap to enable Network iControl Click or tap to apply the changes Tick to set the curr...

Page 52: ... select a network profile Click or tap to save the profile settings or rename the profile Click or tap to set the program as High Normal or Low Priority Tick to assign a schedule of your network programs to avoid network congestions Select a program from this list then click or tap to add to your network profile Back to Quick Menu ...

Page 53: ... and select the boot logo that displays during POST Launching EZ Update To launch EZ Update click or tap on the top right corner of the AI Suite 3 main menu then select EZ Update Using EZ Update Click or tap to automatically update your motherboard driver software and firmware Click or tap to search and select the BIOS file Click or tap to select a boot logo Click or tap to update the BIOS Back to...

Page 54: ... tap to search an image file for your boot logo Click or tap to go back to EZ Update main screen Click or tap to proceed the updating BIOS and boot logo After you click or tap BIOS Update button click or tap Flash to update the BIOS and upload the boot logo in your system Back to Quick Menu ...

Page 55: ...g the System Information To launch System Information click or tap on the top right corner of the AI Suite 3 main menu then select System Information Viewing the motherboard information Click or tap the MB tab to view the motherboard s information Viewing the CPU information Click or tap the CPU tab to view the processor s information Back to Quick Menu ...

Page 56: ...56 ASUS Z87 Series AI Suite 3 Viewing the SPD information Click or tap the SPD tab to view the memory s information Back to Quick Menu ...

Page 57: ...le Play If you re using an iOS smart device download the ASUS Wi Fi GO NFC Remote from Apple Store Wi Fi GO NFC Remote app for smart device Screen type Low density 120 ldpi Medium density 160 mdpi High density 240 hdpi Extra high density 320 xhdpi Screen Resolution 1024 x 600 WXGA 1280 x 800 1536 x 1152 2048 x 1536 1024 x 768 1920 x 1152 2560 x 1536 1280 x 768 1920 x 1200 2560 x 1600 Smart device ...

Page 58: ......
Reviews: