background image

®

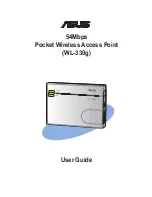
54Mbps

Pocket Wireless Access Point

(WL-330g)

User Guide

Summary of Contents for 54Mbps

Page 1: ... 54Mbps Pocket Wireless Access Point WL 330g User Guide ...

Page 2: ... A PARTICULAR PURPOSE IN NO EVENT SHALL ASUS ITS DIRECTORS OFFICERS EMPLOYEES OR AGENTS BE LIABLE FOR ANY INDIRECT SPECIAL INCIDENTAL OR CONSEQUENTIAL DAMAGES INCLUDING DAMAGES FOR LOSS OF PROFITS LOSS OF BUSINESS LOSS OF USE OR DATA INTERRUPTION OF BUSINESS AND THE LIKE EVEN IF ASUS HAS BEEN ADVISED OF THE POSSIBILITY OF SUCH DAMAGES ARISING FROM ANY DEFECT OR ERROR IN THIS MANUAL OR PRODUCT SPEC...

Page 3: ...ottom view 1 4 1 3 3 Rear view 1 4 1 4 LED indicators 1 5 1 5 Recommended network settings 1 6 1 5 1 Access Point mode 1 6 1 5 2 Ethernet adapter mode 1 7 Chapter 2 Hardware installation 2 1 System requirements 2 2 2 2 Device installation 2 2 2 2 1 Before you proceed 2 2 2 2 2 Using DC power 2 3 2 2 3 Using USB bus power 2 4 2 3 Placement 2 5 Wall mounting 2 5 2 4 Operating range 2 5 2 4 1 Range 2...

Page 4: ...P IP settings 3 10 3 3 2 Launching the Web Configuration utility 3 12 3 3 3 Changing the access point AP configuration 3 13 3 3 4 Changing the Ethernet adapter configuration 3 23 3 4 Firmware Restoration 3 36 Chapter 4 Using the device 4 1 Using the device in a local network 4 2 4 2 Replacing the computer Ethernet cables 4 2 4 3 Replacing the cable connections of other devices 4 3 4 4 Sharing Inte...

Page 5: ...unications However there is no guarantee that interference will not occur in a particular installation If this equipment does cause harmful interference to radio or television reception which can be determined by turning the equipment off and on the user is encouraged to try to correct the interference by one or more of the following measures Reorient or relocate the receiving antenna Increase the...

Page 6: ... no liability for any damage or violation of government regulations arising from failing to comply with these guidelines CAUTION To maintain compliance with FCC s RF exposure guidelines this equipment should be installed and operated with minimum distance 20cm between the radiator and your body Use on the supplied antenna Unauthorized antenna modification or attachments could damage the transmitte...

Page 7: ...ll be used in such a manner that the potential for human contact during normal operation as a mobile or portable device but use in a body worn way is strictly prohibit When using this device a certain separation distance between antenna and nearby persons has to be kept to ensure RF exposure compliance In order to comply with the RF exposure limits established in the ANSI C95 1 standards the dista...

Page 8: ...Pocket Wireless AP using the utilities available from the support CD Chapter 4 Using the device This chapter provides instructions on how to use the ASUS Pocket Wireless AP on various network setups Appendix Troubleshooting The Appendix features a troubleshooting guide for solving common problems you may encounter when using the ASUS Pocket Wireless AP Conventions used in this guide To make sure t...

Page 9: ...USA Fax 1 510 608 4555 E mail tmd1 asus com Web site usa asus com Technical Support Telephone General 1 502 995 0883 Notebook 1 510 739 3777 Support fax 1 502 933 8713 Support e mail tsd asus com ASUS COMPUTER GmbH Germany and Austria Address Harkort Str 25 D 40880 Ratingen Germany Telephone 49 2102 95990 Fax 49 2102 959911 Online contact www asuscom de sales Technical Support Telephone 49 2102 95...

Page 10: ... Outdoors 11Mbps LOS 1000 ft 310 m Outdoors 54Mbps LOS 200 ft 60 m Compatibility Compatible with IEEE 802 11b and 802 11g devices Power requirement DC power using the supplied power cable and plug or USB bus powered Dimensions 86mm x 62mm x 17mm Supported OS Windows 98SE Me 2000 SP4 XP SP1 Antenna Two internal 3D Inverted F antennas Mounting options Desktop or wall mount installation Software supp...

Page 11: ...Chapter 1 This chapter describes the physical features of the ASUS Pocket Wireless AP This part presents the package contents LED indicators and recommended network settings Product introduction ...

Page 12: ... network configuration including AP Infrastructure and Ad hoc modes giving you flexibility on your existing or future wireless network configurations To provide efficient security to your wireless communication ASUS Pocket Wireless AP comes with a 64 bit 128 bit Wired Equivalent Privacy WEP encryption and Wi Fi Protected Access WPA features With these and many more ASUS ASUS Pocket Wireless AP is ...

Page 13: ...als through radio waves on the 2 4 GHz band Here are other ASUS Pocket Wireless AP features Reliable data transfer rates of up to 54Mbps Secure data transmission via Wired Equivalent Privacy WEP and WiFi Protected Access WPA encryptions Operating distance of up to 130ft 40m indoors and 1000 ft 310m outdoors Dual power mode DC or USB bus powered Equipped with a mounting hook for wall installation S...

Page 14: ...han five seconds to connect to the first saved wireless connection in the profile table See page 3 15 for the reset button function in Ethernet mode 1 3 2 Bottom view Mounting hook Use the mounting hook to install the device on concrete or wooden surfaces using a roundhead screw Air vents These vents provide ventilation to the device Mode switch Allows you to switch the device from AP mode to Ethe...

Page 15: ...ice is off or not connected to an Ethernet network Wireless On AP The device is on and ready On EA The device is associated with an AP or other wireless device Off AP The device is off Off EA The device is not associated with an AP or other wireless device Blinking AP EA The device is transmitting or receiving data Power On AP EA The device in on and ready Off AP EA The device is off or performing...

Page 16: ...evice connects to 1 A wireless device s Ad hoc mode or 2 An access point Infrastructure network type Determine your network settings before installing the ASUS Pocket Wireless AP to avail all its features The following network settings are recommended 1 5 1 Access Point mode When in access point AP mode the ASUS Pocket Wireless AP connects WLAN enabled computers and or devices to a wired or wirele...

Page 17: ...a wired network In this setup the ASUS Pocket Wireless AP connects to an AP using a single or multiple IP to establish connection to a wired or wireless LAN MODE Station 1 Station 2 1 5 2 Ethernet adapter mode Ad hoc network When in Ad hoc network the ASUS Pocket Wireless AP connects to another wireless device No access point AP is present in this wireless environment WL 330g Internet ADSL Modem A...

Page 18: ...ort certain applications and devices such as Xbox and PlayStation game consoles that use the MAC address to communicate with other devices MAC cloning allows the ASUS Pocket Wireless AP to to communicate with other devices in a wireless network using the MAC address of the host computer instead of its own Multiple IP bridge environment Internet ADSL Modem Access Point WL 330g Hub MODE Access point...

Page 19: ...Chapter 2 This chapter provides information on how to install the ASUS Pocket Wireless AP Hardware installation ...

Page 20: ...fore installing the ASUS Pocket Wireless AP The length of the Ethernet cable that connects the device to the network hub ADSL cable modem router wall patch must not exceed 100 meters Place the device on a flat stable surface as far from the ground as possible Keep the device clear from metal obstructions and away from direct sunlight Keep the device away from transformers heavy duty motors fluores...

Page 21: ...e to a network hub switch router or wall patch Ethernet port 3 Connect the power adapter plug to the WL 330g DC IN socket 4 Connect the WL 330g power adapter to a wall socket 5 Connect the network hub switch or router power adapter plug to the DC IN socket of the device 6 Connect the network hub switch or router power adapter to a wall socket 5 2 1 6 4 Switch Wall socket WL 330g 3 ...

Page 22: ...wall patch panel 3 Insert one end of the supplied USB cable to the DC IN socket of the device 4 Insert the other end of the USB cable to any available USB port on your computer notebook network hub switch or router 5 Turn on your computer notebook or connect the network hub switch or router power adapter to a wall socket 6 Connect the power adapter of the network hub switch or router to a wall soc...

Page 23: ...f the screw is too loose 2 4 Operating range 2 4 1 Range The ASUS Pocket Wireless AP range is dependent on the operating environment Every home or office layout varies in obstacles barriers or wall types which may reflect or absorb radio signals For example two 802 11b devices in an open space may achieve an operating distance of up to 1000 meters while the same devices may only achieve up to 300 ...

Page 24: ...uninterrupted connection to the network This is called roaming Multiple ASUS Pocket APs connected to a common Ethernet network form an Extended Service Set ESS All members of an Extended Service Set are configured with an ID known as the SSID or ESSID Wireless clients must be configured with the same SSID as that of the ASUS Pocket APs on the network since it can only roam between ASUS Pocket APs ...

Page 25: ...Chapter 3 This chapter provides information on how to configure the ASUS Pocket Wireless AP using the utilities available from the support CD Configuration ...

Page 26: ...ption to uninstall the ASUS Pocket Wireless AP utilities from your system Run Wireless Setting Utility Click this option to run the Wireless Setting Utility Read Install Quick Start Guide and User s Manual Click to view the installation and quick setup guides in PDF format Explore this CD Click this option to explore the support CD contents Browse our Web Site Click this option to visit the ASUS w...

Page 27: ...pport CD To launch the Wireless Setting Utility from the support CD 1 Insert the support CD to the optical drive 2 Click the Run Wireless Setting Utility option when the installation window appears Refer to the illustration on the previous page 3 The Wireless Setting Utility window appears From the Windows desktop 1 Install the device utilities following the steps in section 3 1 2 From the Windows...

Page 28: ...mode 1 The utility auto detects and displays the WL 330g SSID channel encryption MAC and IP address Click Configure to change these settings 2 Log on to the configuration window using the password admin check the Remember my password option then click OK Checking the Remember my password option allows the utility to auto fill the password everytime you enter the Wireless Setting configuration Refe...

Page 29: ...ttings as that of the WL 330g 4 Set the WL 330g encryption settings Click the Advanced tab to adjust the WL 330g network settings Otherwise click OK to finish setting up the AP 5 If necessary adjust the WL 330g network settings then click OK to finish the setup Otherwise click the Web Configuration Utility button to launch the web based configuration utility Check the Obtain an IP address automati...

Page 30: ...3 6 Chapter 3 Configuration 7 After applying the settings the utility displays the WL 330g access point information Click Finish to close the utility 6 The specified settings are applied to the device ...

Page 31: ...device as an Ethernet adapter Make sure that you switched the WL 330g to Ethernet adapter mode before launching the Wireless Setting Utility Use the mode switch to change the device operating mode 3 Select a wireless network from the Available Networks field then click Configure Each wireless network is preceded by an icon for easy identification Refer to the table on the next page for icon indica...

Page 32: ...yption the wireless network is an access point with enabled encryption the WL 330g is connected to this access point with no encryption the WL 330g is connected to this access point with enabled encryption the wireless network is a wireless device with no encryption the wireless network is a wireless device with enabled encryption the WL 330g is connected to this wireless device with no encryption...

Page 33: ...s the WL 330g status when connection is established Click Finish to close the utility If the selected network has enabled encryption use the Encryption tab to set the WL 330g encryption settings the same with the selected network The encryption settings of the network and the WL 330g must be the same to establish connection ...

Page 34: ...68 1 1 and the Subnet Mask is 255 255 255 0 To access the configuration utility assign a different IP address to the network adapter where the ASUS Pocket Wireless AP is connected To adjust the TCP IP settings of the network adapter 1 Right click the My Network Places icon in the Windows desktop then select Properties from the pop up menu The Network and Dial up Connections window appears 2 Right ...

Page 35: ...he Use the following IP address option then enter the IP address for the network adapter The IP address must be 192 168 1 X X can be any number between 2 and 254 that is not used by another device 5 Set the Subnet Mask to 255 255 255 0 Click OK when finished Changing the TCP IP settings may require system restart Switch on the WL 330g immediately after rebooting ...

Page 36: ...b Configuration utility from the Wireless Setting Utility when the device is in AP mode Switch the device to AP mode using the mode switch before launching the Wireless Setting Utility To launch the Web Configuration utility using the Wireless Setting Utility 1 Click Start All Programs ASUS Utility Wireless AP Wireless Setting 2 Click Configure when the Wireless Setting Utility window appears 3 Lo...

Page 37: ...cking this option hides the SSID to prevent other wireless devices from recognizing and connecting to the device 3 3 3 Changing the access point AP configuration Simple Setup page The Simple Setup page displays the default AP settings of the WL 330g Use this page to set the AP channel operation mode and security Clicking the button displays available options for that field If you wish to load the ...

Page 38: ...rence Refer to page 3 21 for channel information Operation Mode You can adjust the WL 330g operating mode to support wireless devices using IEEE 802 11b or IEEE 802 11g standards Setting the operating mode to mixed allows the WL 330g to support both wireless standards Transmit Rate This option allows you to specify the data transmission rate for both IEEE 802 11b and IEEE 802 11g devices Select fr...

Page 39: ...ryption settings specify a 64 bit or a 128 bit WEP key A 64 bit encryption contains 10 hexadecimal digits or 5 ASCII characters A 128 bit encryption contains 26 hexadecimal digits or 13 ASCII characters Authentication Method This option allows you to select the encryption method for securing your wireless communication Refer to the table below for details The following fields allow you to configur...

Page 40: ...10 hexadecimal digits 0 9 a f A F or 5 ASCII characters in each of the four WEP keys For 128 bit encryption enter 26 hexadecimal digits 0 9 a f A F or 13 ASCII characters in each of the four WEP keys Automatic Generation Type a combination of up to 64 letters numbers or symbols in the Passphrase field The Web Configuration utility uses an algorithm to generate four WEP keys based on the typed comb...

Page 41: ... Wireless AP Enable DHCP When enabled the Dynamic Host Configuration Protocol DHCP server automatically assigns the IP address Subnet Mask and Default Gateway of the ASUS Pocket Wireless AP Use the following IP setting Select this option to manually assign the IP address Subnet Mask and Default Gateway the ASUS Pocket Wireless AP Click Apply after configuring the network settings Otherwise click R...

Page 42: ...clients allowed to establish connection to the WL 330g 1 Click then select the Only allow Stations with MAC listed below to access this device option The MAC address fields are activated Selecting the Accept association requests from any station option allows all wireless clients operating within the WL 330g range to establish connection 2 Type the MAC address es of the wireless clients allowed to...

Page 43: ...e log on password The Power LED blinks continuously when the firmware is corrupted or when the firmware upgrade fails To upgrade the firmware 1 Download and save the latest firmware from the ASUS website 2 Launch the Web Configuration Utility then go to the Firmware Upgrade page 3 Click the Browse button to locate the new firmware file 4 Click Upgrade A Firmware Upgrading message appears The brows...

Page 44: ...n operation is specified as 2 4 GHz to 2 497 GHz For each supported regulatory domain all channels marked with Yes are supported The channel center frequencies and CH ID numbers are shown on the next page Use your new password when launching both the Wireless Setting configuration window and Web Configuration utilities To change the log on password 1 Type the new password in the New Password and R...

Page 45: ...s Yes 13 2472 MHz Yes Yes 14 2484 MHz Yes Table 3 5 DSSS PHY frequency channel plan In a multiple cell network topology overlapping and or adjacent cells using different channels can operate simultaneously without interference if the distance between the center frequencies is at least 30 MHz Channel 14 is specifically for operation in Japan Country Regulating body Allowed channels Unites States FC...

Page 46: ...onds Parameter Default value Wireless Interface SSID AP_XXXXXX Response to broadcast SSID requests Enabled Channel Channel 1 Operation mode mixed Transmit Rate Auto Preamble Long Authentication Method Open System or Shared Key Encryption None Ethernet Interface Enable DHCP No Disabled IP Address 192 168 1 1 Subnet Mask 255 255 255 0 Default Gateway Blank Access Control Accept association requests ...

Page 47: ...Identifier This field allows you to specify the SSID of the ASUS Pocket Wireless AP in Ethernet adapter mode Operating Mode This field allows you to select the operating mode for the Ethernet adapter In an Infrastructure mode the ASUS Pocket Wireless AP connects to an available AP In Ad hoc mode the ASUS Pocket Wireless AP connects to other wireless devices in the wireless network Select Ad hoc mo...

Page 48: ...e See page 3 16 Default Key See page 3 16 MAC cloning MAC cloning allows the ASUS Pocket Wireless AP to use the MAC address of the host computer in communicating with other wireless devices MAC cloning supports certain software applications and devices such as Xbox and PlayStation 2 game consoles Using the Button Scan Mode feature The Button Scan Mode allows you to use the reset button to connect ...

Page 49: ...etwork by their sequence in the Profile Table Press the reset button once to connect to the first wireless connection in the Profile Table Press again to connect to the second wireless connection and so on For example if you have three saved profiles in the profile table the ASUS Pocket Wireless AP automatically connects to the first profile Press the reset button to connect to the second saved pr...

Page 50: ...se information when you connect to an available wireless connection in the Site Survey table Site Survey The Site Survey table lists the available wireless networks within the device range The table displays the following wireless network information BSSID The Basic Service Set Identifier BSSID is the IEEE MAC address of the wireless network SSID SSID refers to the service set identifier of the wi...

Page 51: ...o an available wireless network with known SSID and disabled encryption 1 From the Site Survey table select the wireless network you intend to join Take note of the icon preceding the wireless network for easy identification Refer to page 3 8 for details on wireless network icons 2 Click to select the number of the wireless network you intend to join then click the Join button A message appears in...

Page 52: ... encryption you intend to join 2 Click to select the number of the wireless network you intend to join then click the Join button A message appears in the browser indicating that you have successfully joined the wireless network 3 Click OK when this window appears 4 Enter the SSID of the wireless network in the SSID field then click Apply Inquire the wireless network SSID with the network administ...

Page 53: ...d encryption you intend to join 2 Click to select the number of the wireless network you intend to join then click the Join button 3 Click OK when this window appears 4 Enter the SSID of the wireless network then select the Authentication Method and Encryption When done enter the encryption keys in the key fields then click Apply Inquire the wireless network SSID and encryption settings with the n...

Page 54: ... with a known SSID and enabled encryption 1 From the Site Survey table select the wireless network with a known SSID and enabled encryption you intend to join 2 Click to select the number of the wireless network you intend to join then click the Join button 3 Click OK when this window appears Inquire the wireless network encryption settings with the network administrator ...

Page 55: ...the Authentication Method and Encryption of the wireless network you intend to join then enter the encryption keys in the key fields Click Apply when finished A message appears in the browser indicating that you have successfully joined the wireless network ...

Page 56: ...cation Refer to page 3 8 for wireless network icon indications Profile Table The Profile Table allows you to view or delete saved wireless networks The table displays the saved wireless network SSID channel security settings and network type Click the Profile Table link to view the Profile Table ...

Page 57: ...t the wireless network you intend to join 2 Click to select the number of the selected wireless network then click the Join button 3 When the ASUS Pocket Wireless AP is associated with the wireless network click the Save button 4 The Profile Table appears with the saved wireless network Click Back to return to the previous page ...

Page 58: ...presents the sequence of the saved wireless networks in the profile table Refer to page 3 24 to 3 25 for details on the Button Scan Mode feature To delete a wireless network from the Profile Table 1 Open the Profile Table by clicking the Profile Table link 2 Select the wireless network you intend to delete then check the Delete box opposite it 3 Click the Delete button The browser displays the Pro...

Page 59: ...alues by pressing the reset button for more than five seconds Parameter Default value Wireless Interface SSID ANY Operating Mode Infrastructure Mode Channel Auto Station Mode 802 11b g Transmission Rate Automatic Preamble Long Authentication Method Open System Encryption None MAC Cloning Disabled Button Scan Mode Enable Buttong Scanning Enabled Scan Mode Find the connection with the strongest link...

Page 60: ...re 1 Visit the ASUS website to download the latest firmware for the device 2 Launch the Firmware Restoration utility from the Windows desktop by clicking Start All Programs ASUS Utility Wireless AP Firmware Restoration 3 The Firmware Restoration window appears If you have problems uploading a firmware while using a network hub try connecting your computer directly to the LAN port 4 Click the Brows...

Page 61: ...Chapter 4 This chapter provides instructions on how to use the ASUS Pocket Wireless AP on various network setups Using the device ...

Page 62: ... the IP configuration of the computer to establish connection to the local network Verify your connection 4 2 Replacing the computer Ethernet cables You can use the WL 330g to replace your wireless LAN enabled computer cable connection to an ADSL or cable modem To do this 1 Switch the WL 330g to AP mode Default SSID AP_xxxxxx then turn on the device 2 Connect one end of the supplied RJ 45 cable to...

Page 63: ... port 4 Set the IP address of the Xbox PlayStation 2 or set top box to establish connection to the local network Verify your connection Make sure the WL 330g MAC cloning feature is enabled when using the device in this setup Use the Wireless Setting Utility to enable MAC cloning See page 3 24 for details on MAC cloning 4 4 Sharing Internet connection with other computers Refer to the typical netwo...

Page 64: ...Then set the IP of Number of allowed connection is other computer s Internet connections xDSL1 with dynamic IP ISP automatically assigns Depends on the Internet PPPoE2 account the IP using PPPoE dial up Service Provider ISP xDSL with static IP to the provided static IP Depends on the Internet Service Provider ISP xDSL Cable with a The DHCP server Depends on the DHCP router and enable automatically...

Page 65: ...Appendix The Appendix features a troubleshooting guide for solving common problems you may encounter when using the ASUS Pocket Wireless AP Troubleshooting ...

Page 66: ...dress Check if the cables have the proper pin outs and connectors You may also use another LAN cable Make sure the hub switch or computer connected to the ASUS Pocket Wireless AP supports 10Mbps or 100Mbps speed Do this by check the ASUS Pocket Wireless AP and the Hub LEDs When you connect the ASUS Pocket Wireless AP to a 10 100 Mbps hub both the Hub LED and the ASUS Pocket Wireless AP Ethernet LE...

Page 67: ...e devices The ASUS WLAN card may be out of range of the ASUS Pocket Wireless AP Check if the ASUS Pocket Wireless AP and the ASUS WLAN card have the same SSID When encryption is enabled check if the ASUS Pocket Wireless AP and the ASUS WLAN card have the same encryption settings Check if the Wireless LED of the ASUS Pocket Wireless AP is on When the Access Control table is enabled check if the MAC...

Page 68: ...does not match that of the ASUS Pocket Wireless AP The default IP address of the ASUS Pocket Wireless AP is 192 168 1 1 In special cases when the ASUS Pocket Wireless AP in Ethernet adapter mode joins an AP network with the same IP address reset the ASUS Pocket Wireless AP to access the Web Configuration utility again I can not access the ASUS Pocket Wireless AP web configuration page The throughp...

Page 69: ...o restore the ASUS Pocket Wireless AP firmware Use the Firmware Restoration utility to restore or update the ASUS Pocket Wireless AP firmware A wireless client wants to connect to the ASUS Pocket Wireless AP but can not get the correct IP from the DHCP server The ASUS Pocket Wireless AP has an enabled DHCP Make sure the DHCP server is working properly Some DHCP servers can only assign one IP addre...

Page 70: ...A 6 Appendix ...

Reviews: