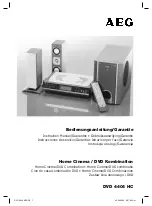
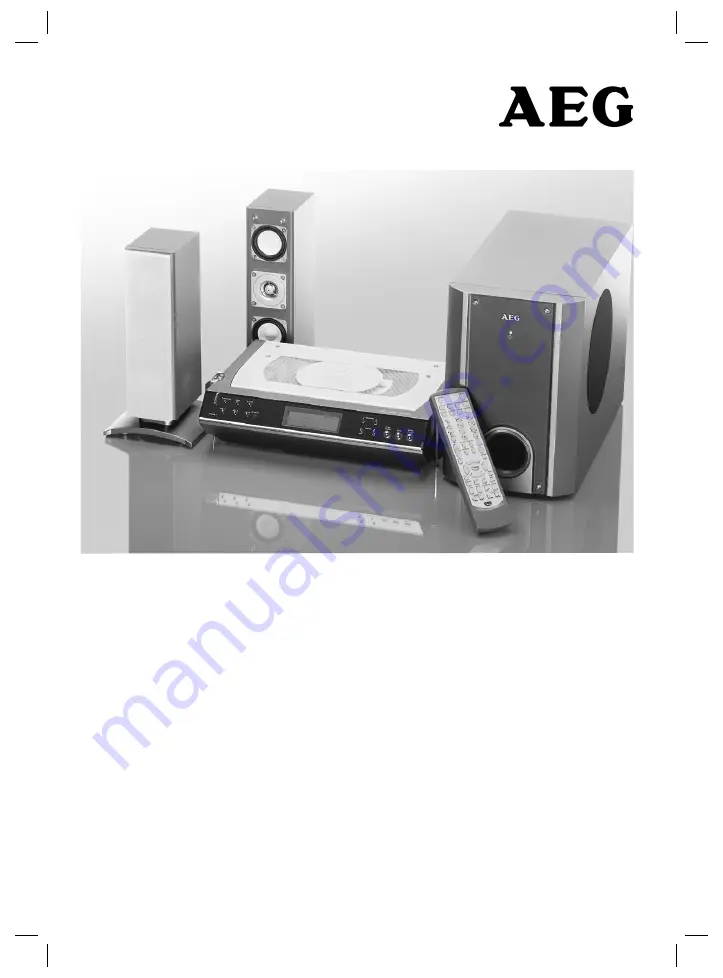
background image

DVD 4404 HC

Home Cinema / DVD Kombination

Home Cinema/DVD Combination • Home Cinema/DVD combinatie

Cine de casa/combinación DVD • Home Cinema/DVD Combinazione

Zestaw kina domowego i DVD

Bedienungsanleitung/Garantie

Instruction Manual/Guarantee • Gebruiksaanwijzing/Garantie

Instrucciones de servicio/Garantía • Istruzioni per l’uso/Garanzia

Instrukcja obsługi/Gwarancja

DVD 4404 AEG D2   1

02.09.2004, 9:27:54 Uhr

Summary of Contents for DVD 4404 HC

Page 1: ... de casa combinación DVD Home Cinema DVD Combinazione Zestaw kina domowego i DVD Bedienungsanleitung Garantie Instruction Manual Guarantee Gebruiksaanwijzing Garantie Instrucciones de servicio Garantía Istruzioni per l uso Garanzia Instrukcja obsługi Gwarancja DVD 4404 AEG D2 1 02 09 2004 9 27 54 Uhr ...

Page 2: ...DVD 4404 AEG D2 2 02 09 2004 9 27 57 Uhr ...

Page 3: ...verzicht bedieningselementen Pagina 35 36 Garantie Pagina 44 ESPAÑOL Indice Instrucciones de servicio Página 46 Vista de conjunto Elementos de mando Página 49 50 Garantia Página 58 ITALIANO Indice Istruzioni per l uso Pagina 60 Descrizione dei singoli pezzi Pagina 63 64 Garanzia Pagina 72 JE ZYK POLSKI Spis tres ci Instrukcja obsługi Strona 74 Przegląd elemetów obsługi Strona 77 78 Gwarancja Stron...

Page 4: ...tbarem Laserlicht ausgesetzt wird wenn das CD Fach geöffnet ist Diese Sicherheitsschalter sollten auf keinen Fall überbrückt oder manipuliert werden sonst besteht die Gefahr dass Sie sich dem Laser Licht aussetzen Vorsichtsmaßnahmen Bitte lesen Sie diese Vorsichtsmaßnahmen sorgfältig durch bevor Sie dieses Gerät benutzen Schutz des Netzkabels Um Fehlfunktionen des Gerätes zu vermeiden und zum Schu...

Page 5: ...chtig funktioniert In diesem Falle schalten Sie den Strom aus und warten Sie ca eine Stunde bis die Feuchtigkeit verdunstet ist Wenn es zu störenden Geräuschen im Fernseher kommt während eine Sendung empfangen wird Je nach den Empfangsbedingungen können im Fern sehbildschirm Störungen erscheinen während Sie eine Fernsehsendung ansehen und das Gerät eingeschaltet ist Dies ist keine Fehlfunktion des...

Page 6: ...chtigkeit mit einem weichen trockenen fusselfreien Tuch ab bevor Sie die CD benutzen Inkorrekte CD Lagerung Sie können die CD beschädigen wenn Sie sie an folgen den Orten aufbewahren direktem Sonnenlicht ausgesetzt feuchten oder staubigen Orten Orten die einer unmittelbaren Hitzequelle oder Hei zung ausgesetzt sind Wartung Vergewissern Sie sich dass Sie vor jeder Wartung das Gerät ausschalten und ...

Page 7: ...14 TUNING I SKIP Taste vorwärts 15 II PLAY PAUSE Taste 16 STOP Taste 17 OPEN CLOSE Taste Rückseite 1 AUDIO Ausgang R 2 AUDIO Ausgang L 3 COAXIAL Ausgang 4 VIDEO Ausgang 5 S VIDEO Ausgang 6 12V DC Eingang 7 FM Antennen Anschluss 8 AM Antennen Anschluss 9 OPTICAL OUT Rückseite Subwoofer 1 BASS Regler 2 TREBLE Regler 3 AUX Eingang R 4 AUX Eingang L 5 Lautsprecheranschluss R 6 Lautsprecheranschluss L ...

Page 8: ... Taste 16 RESUME Taste 17 MUTE Taste 18 SLOW Taste 19 CHANNEL Taste 20 CHANNEL Taste 21 TUNING Taste 22 TUNING Taste 23 STOP Taste 24 II PLAY PAUSE Taste 25 N P Taste 26 L R Taste 27 MENU Taste 28 Pfeiltaste 29 Pfeiltaste 30 ENTER Taste 31 ZOOM Taste 32 VOL Taste 33 A B Taste 34 VOL Taste 35 REPEAT Taste 36 Zahlentasten 0 9 und 10 37 SUBTITLE Taste 38 ANGLE Taste 39 MEMORY Taste 40 FM MODE Taste 4...

Page 9: ...r Anschluss des DVD Players sicherstellen dass vor dem Anschließen eines Ge rätes alle Geräte der Anlage ausgeschaltet sind und nicht am Stromnetz angeschlossen sind Bitte beachten Sie ebenfalls die Bedienungsanleitung Ihres Fernsehgerätes Schließen Sie das 12V Verbindungskabel an den DC Ausgang des Subwoofers und den 12V Eingang des DVD Players an Verbinden Sie nun mit einem Cinchkabel den VIDEO ...

Page 10: ...inweis Bei MP3 wird die Suchfunktion nicht unter stützt Zahlentasten 0 9 und 10 Mit den Zahlentasten können Sie direkte Eingaben in Menüfelder machen oder im CD Betrieb eine Lied nummer direkt anwählen Bei Titelnummern größer 10 betätigen Sie zuerst die 10 Taste und dann die entspre chende Zahlentaste MUTE Während der Wiedergabe die MUTE Taste drücken um den Ton stumm zu schalten Zwecks Rückkehr z...

Page 11: ...gen der L R Taste im DVD Betrieb schalten Sie zwischen AUDIO 01 und AUDIO 02 um Bei AUDIO 02 hören Sie nur Musik und nicht mehr die Sprache Diese Funktion ist abhängig von der DVD N P Mit der N P Taste können Sie zwischen dem Farbsystem PAL oder NTSC auswählen oder Sie stellen Ihr Gerät auf AUTO ein STEP Während der Wiedergabe von VCD s oder DVD s können Sie mit jedem Tastendruck der STEP Taste ei...

Page 12: ...eit unterbrochen wurde schaltet das Gerät automatisch die Funktion Bildschirmschoner ein Dann wird der Fernsehschirm schwarz nur das DVD Logo bewegt sich über den Schirm Diese Funktion schützt den Fernsehschirm so dass dieser auch bei langer Einschaltzeit keinen Schaden nimmt SPEAKER SETUP Lautsprecher Einstellung DOWNMIX LT RT Wenn die wiedergebene Disk mit PROLOGIC DOLBY stereo aufgenommen wurde...

Page 13: ...näle COMPRESSION Dämpfung Dynamischer Dämpfungsbereich Über den Bereich der dynamischen Dämpfung werden Lautstärkeänderungen reduziert indem Sie den Unter schied zwischen lauten und leisen Tönen festlegen Mit den Pfeiltasten Auf Ab den dynamischen Dämp fungsbereich zwischen 2 8 und FULL Voll einstellen bzw diesen ausschalten OFF dann zum Bestätigen die ENTER Taste drücken Um den vollen Bereich der...

Page 14: ...ren kann Wenn die Disk zum Beispiel über Englisch und Deutsch verfügt können Sie aus den beiden Formaten wählen In diesem Menü wählen Sie die Standardsprache aus mit der Ihre Disk gestartet wird Dies ist allerdings nur möglich wenn die eingestellte Sprache auf der Disk vorhanden ist SUBTITLE Untertitel Die Untertitel werden am Bildschirm angezeigt und hängen ebenfalls von der wiedergegeben Disk ab...

Page 15: ...le Funktionen wieder auf die ursprünglichen Werkseinstellungen des Gerätes eingestellt Radiobetrieb 1 Drücken Sie die FUNCTION Taste um in den Tuner modus zu gelangen 2 Danach können Sie mit der BAND Taste FM oder AM anwählen 3 Im FM Band können Sie mit der FM MODE Taste zwischen Mono und Stereo umschalten 4 Mit der TUNING oder Taste stellen Sie nun die gewünschte Frequenz ein 5 Die Lautstärke kön...

Page 16: ...enbon an Ihren Händler Schäden an Zubehörteilen führen nicht automatisch zum kostenlosen Umtausch des kompletten Gerätes Wenden Sie sich in desem Fall bitte an unsere Hotline Glasbruchschäden bzw Brüche von Kunststoffteilen sind grundsätzlich kostenpflichtig Sowohl Defekte an Verbrauchszubehör bzw Verschleiß teilen z B Motorkohlen Knethaken Antriebsriemen Ersatzfernbedienung Ersatzzahnbürsten Säge...

Page 17: ...17 DEUTSCH DVD 4404 AEG D2 17 02 09 2004 9 28 10 Uhr ...

Page 18: ...t in safety switches should prevent the user being exposed to dangerous laser light which is invisible to the human eye when the CD compartment is opened Under no circumstances should these safety switches be bypassed or manipulated as this could result in a danger of exposure to the laser light Precautions Please read these precautions carefully before using the device Protection of the Mains Lea...

Page 19: ...ease turn off the power and wait for approximately one hour until the moisture has evapo rated What to do if there is television interference while you are watching a programme Depending on the reception conditions there may be interference to the television picture when you are wat ching a television programme and the device is switched on This is not a malfunction of the device or television Swi...

Page 20: ...free of fluff before inserting the CD Incorrect CD Storage You may damage the CD if you store it in the following locations exposed to direct sunlight damp or dusty locations locations exposed to a direct source of heat or hea ting Maintenance Please ensure that before any maintenance is carried out the device is switched off and the plug removed from the power supply Wipe the device with a dry so...

Page 21: ...ton 14 TUNING I forward SKIP button 15 II PLAY PAUSE button 16 STOP button 17 OPEN CLOSE button Rear 1 AUDIO output R 2 AUDIO output L 3 COAXIAL output 4 VIDEO output 5 S VIDEO output 6 12 V DC input 7 FM aerial connection 8 AM aerial connection 9 OPTICAL OUT Subwoofer Rear 1 BASS control 2 TREBLE control 3 AUX input R 4 AUX input L 5 Loudspeaker connection R 6 Loudspeaker connection L 7 DC output...

Page 22: ... 16 RESUME button 17 MUTE button 18 SLOW button 19 CHANNEL button 20 CHANNEL button 21 TUNING button 22 TUNING button 23 STOP button 24 II PLAY PAUSE button 25 N P button 26 L R button 27 MENU button 28 Arrow button 29 Arrow button 30 ENTER button 31 ZOOM button 32 VOL button 33 A B button 34 VOL button 35 REPEAT button 36 Number buttons 0 9 and 10 37 SUBTITLE button 38 ANGLE button 39 MEMORY butt...

Page 23: ...30 from the remote sensor Connections Before connecting the DVD player Before connecting a device please ensure that all devices are switched off and not connected to the mains power supply Please also note the operating instructions of your television set Connect the 12V connection cable to the DC output of the subwoofer and the 12V input of the DVD play er Now use a cinch cable to connect the VI...

Page 24: ...umber buttons it is possible to put numbers into the menu fields directly or select a track directly du ring CD operation In the case of track numbers greater than 10 please press the 10 button first and then the corresponding number button for the units MUTE During playback the MUTE button can be pressed to switch off the sound Press the MUTE button again to switch the sound back on VOL VOL With ...

Page 25: ...ith AUDIO 02 you hear only music but no spoken language this function depends on the DVD N P With the N P button you can switch between the PAL and the NTSC colour system or turn your device to AUTO STEP During the playback of VCDs or DVDs it is possible to move one picture forward with each press of the STEP button Arrow Buttons Use the arrow buttons to move the cursor within a menu PBC If your d...

Page 26: ...n will become black only the DVD patten move on the screen This function is protect the TV screen long time display will be hurt SPEAKER SETUP DOWNMIX LT RT When the playback disc with the PROLOGIC DOLBY stereo select this item through this unit s de code system you can enjoy effect in your room similiar the movie theater with two front speaker STEREO When sources is two channel the audio output i...

Page 27: ...amic Range Compression reduces volume change by letting you adjust the difference between soft and loud sounds Press up down button to set Dynamic Range Com pression to 2 8 through FULL or to turn it OFF then press ENTER To hear the full range of range of sounds as recorded choose OFF or a lower ratio such as 2 8 To minimize the difference in volume between lound segments and quiet scenes choose a...

Page 28: ...e the disc have English and German two FOR MATS you can select the English or German is decide the disc In this menu you can select the standard language with which your disc is to start However this is only possible if the language that has been set is available on the disc SUBTITLE Subtitle is the words of the disc play audio as same the audio set up must the disc support the subtitle just can w...

Page 29: ...l functions are returned to the original factory settings of the device Radio Operation 1 Press the FUNCTION button to access the tuner mode 2 Then select FM or AM with the BAND button 3 In the FM band you can select mono or stereo with the FM MODE button 4 Use the TUNING or button to set the desired frequency 5 The volume can be set with the VOL or button 6 In order to switch off radio operation ...

Page 30: ...the guarantee any fault of the device or its accessories ascribable to material or manufacturing defects will be eliminated free of charge by repairing or at our discretion by replacing it The guarantee services do not entail an extension of the life of the guarantee nor do they give rise to any right to a new guarantee Proof of the guarantee is provided by the proof of purchase Without proof of p...

Page 31: ...ENGLISH 31 5 05 DVD 4404 AEG GB 31 02 09 2004 9 29 48 Uhr ...

Page 32: ...nzichtbaar laserlicht wanneer het CD vak geopend is Deze veiligheidsschakelaars mogen in geen geval over brugd of gemanipuleerd worden omdat u anders gevaar loopt aan het laserlicht te worden blootgesteld Veiligheidsmaatregelen Lees a u b deze veiligheidsmaatregelen zorgvuldig door voordat u het apparaat gebruikt Bescherming van de netkabel Om storingen van het apparaat te voorkomen en ter bescher...

Page 33: ...n dit geval schakelt u de stroomtoevoer naar het apparaat uit en wacht ongeveer een uur totdat het vocht verdampt is Er treden storende geluiden in de televisie op tijdens de ontvangst van een programma Al naargelang de ontvangstomstandigheden kunnen op het televisiescherm storingen optreden wanneer u een programma bekijkt en het apparaat is ingeschakeld Dit is géén storing van het apparaat of de ...

Page 34: ...achte droge pluisvrije doek voordat u de CD gebruikt Incorrecte opslag van CD s kunt de CD s beschadigen wanneer u ze op de volgende plaatsen bewaart blootgesteld aan direct zonlicht vochtige of stoffige plaatsen plaatsen die constant zijn blootgesteld aan een direc te hittebron of verwarming Onderhoud Waarborg dat het apparaat voor ieder onderhoud is uitgeschakeld en het apparaat niet op het stro...

Page 35: ...TUNING I SKIP toets vooruit 15 II PLAY PAUSE toets 16 STOP toets 17 OPEN CLOSE toets Achterzijde 1 AUDIO uitgang R 2 AUDIO uitgang L 3 COAXIAL uitgang 4 VIDEO uitgang 5 S VIDEO uitgang 6 12 V DC ingang 7 FM antenneaansluiting 8 AM antenneaansluiting 9 OPTICAL OUT Achterzijde subwoofer 1 BASS regelaar 2 TREBLE regelaar 3 AUX ingang R 4 AUX ingang L 5 Luidsprekeraansluiting R 6 Luidsprekeraansluitin...

Page 36: ...5 STEP toets 16 RESUME toets 17 MUTE toets 18 SLOW toets 19 CHANNEL toets 20 CHANNEL toets 21 TUNING toets 22 TUNING toets 23 STOP toets 24 II PLAY PAUSE toets 25 N P toets 26 L R toets 27 MENU toets 28 pijltoets 29 pijltoets 30 ENTER toets 31 ZOOM toets 32 VOL toets 33 A B toets 34 VOL toets 35 REPEAT toets 36 Cijfertoetsen 0 9 en 10 37 SUBTITLE toets 38 ANGLE toets 39 MEMORY toets 40 FM MODE toe...

Page 37: ...nsor worden gebruikt Aansluitingen Vóór de aansluiting van de DVD speler Waarborg dat vóór het aansluiten van een apparaat alle apparaten van de installatie uitgeschakeld en niet op het stroomnet aangesloten zijn Let eveneens op de gebruiksaanwijzing van uw televisietoestel Sluit de 12V verbindingskabel aan op de DC uitgang van de subwoofer en de 12V ingang van de DVD speler Verbind nu met een cin...

Page 38: ... kunt u handmatig in de menuvelden invoeren of in de CD modus een liednummer direct kiezen Bij liednummers boven de 10 drukt u eerst de 10 toets in en vervolgens de desbetreffende cijfertoets MUTE Druk tijdens de weergave op de MUTE toets om het ge luid uit te schakelen Door het nogmaals indrukken van de MUTE toets wordt het geluid weer ingeschakeld VOL VOL Met deze beide toetsen kunt u het volume...

Page 39: ... 02 Bij AUDIO 02 hoort u alleen muziek en niet meer het gesprokene Deze functie is afhankelijk van de DVD N P Met de N P toets kunt kiezen tussen de kleursystemen PAL of NTSC of uw toestel op AUTO instellen STEP Tijdens de weergave van VCD s of DVD s kunt u met elke keer indrukken van de STEP toets een beeld vooruit springen Pijltoets Met de richtingtoetsen kunt u de cursor in een menu bewegen PBC...

Page 40: ... liging in Daarna wordt het televisiescherm zwart alleen het DVD logo beweegt over het scherm Deze functie beschermt het televisiescherm zodat dit ook bij een lange inschakelduur niet wordt beschadigd SPEAKER SETUP Luidsprekerinstelling DOWNMIX LT RT wanneer de weergegeven disk is opgenomen met PROLOGIC DOLBY stereo selecteert u dit punt zodat u op grond van de decoder in het apparaat in uw kamer ...

Page 41: ...n de geluidssterkte verminderd doordat u het verschil tussen harde en zachte geluiden vastlegt Stel met de pijltoetsen omhoog omlaag het dynami sche dempingsbereik tussen 2 8 en FULL vol in of schakel deze uit OFF en bevestig vervolgens met de ENTER toets Om het volle bereik van de opgenomen geluids breedte te horen selecteert u OFF of een lagere demping zoals bijv 2 8 Om het verschil in geluids s...

Page 42: ...er een disk bijvoorbeeld over Engels en Duits beschikt kunt uit de beide formaten kiezen In dit menu selecteert u de standaardtaal waarmee uw disc gestart wordt Dit is echter alleen mogelijk wanneer de ingestelde taal op de disc beschikbaar is SUBTITLE Ondertiteling De ondertitels worden op het beeldscherm weergegeven en zijn eveneens afhankelijk van de weergegeven disk U kunt alléén de ondertitel...

Page 43: ...terkte instellen met de VOL of toets 6 Om de radiomodus weer uit te schakelen drukt u op de FUNCTION of de POWER STANDBY toets Radiozenders opslaan 1 Stel met de TUNING toetsen een frequentie in 2 Druk nu op de MEMORY toets Op het display wordt 00 3 Kies nu met de cijfertoetsen het nummer waar u het station wilt opslaan 4 Druk opnieuw de MEMORY toets in om het station op te slaan 5 Om een opgeslag...

Page 44: ...ijs Zonder dit bewijs kan geen kosteloze reparatie of vervanging plaatsvinden Geef in garantiegevallen het complete apparaat in de originele verpakking samen met de kassabon af bij uw handelaar Schade aan onderdelen leidt niet automatisch tot kosteloze vervanging van het complete apparaat Neem in dit geval contact op met onze hotline De reparatie van glasbreuk of breuk van kunststofonderdelen word...

Page 45: ...45 NEDERLANDS DVD 4404 AEG NL 45 02 09 2004 9 44 02 Uhr ...

Page 46: ...ados sirven para impedir que el usuario esté expuesto a luz láser invisible peligrosa para la vista del usuario cuando está abierto el compartimiento del CD Bajo ningún concepto se ha de hacer un puenteado sobre estos interruptores de seguridad ni deben ser manipulados De hacerlo existe el peligro de que Vd esté expuesto a la luz láser Medidas de precaución Se ruega antes de utilizar este aparato ...

Page 47: ...onecte la corriente y espere aprox una hora hasta que la humedad se haya evaporado Si se detectan perturbaciones en la televisión al reci bir un reportaje Dependiendo de las condiciones de recepción pueden aparecer en la pantalla de televisión perturbaciones mientras que usted esté viendo un reportaje y el aparato esté conectado Esto no significa una función errónea del aparato o de la televisión ...

Page 48: ... quite la humedad con un paño suave seco y sin pelusa Almacenamiento incorrecto del disco compacto Puede estropear el CD almacenando éste en siguientes sitios Directamente expuesto a los rayos solares En sitios húmedos y polvorosos Sitios expuestos directamente a una fuente de calor o a una calefacción Mantenimiento Antes de cada mantenimiento se debe asegurar que haya desconectado el aparato y qu...

Page 49: ...vance de un capítulo pista 15 II PLAY PAUSE Botón de reproducción del disco pausa 16 Botón STOP 17 Botón OPEN CLOSE Panel trasero 1 Salida de AUDIO R 2 Salida de AUDIO L 3 Salida COAXIAL 4 Salida VIDEO 5 Salida S VIDEO 6 Entrada 12V DC 7 Conexión de Antena FM 8 Conexión de Antena AM 9 OPTICAL OUT Panel Trasero Subwoofer 1 Regulador BASS 2 Regulador TREBLE 3 Entrada AUX R 4 Entrada AUX L 5 Conexión...

Page 50: ...ón STEP 16 Botón RESUME 17 Botón MUTE 18 Botón SLOW 19 Botón CHANNEL 20 Botón CHANNEL 21 Botón TUNING 22 Botón TUNING 23 Botón STOP 24 Botón II PLAY PAUSE 25 Botón N P 26 Botón L R 27 Botón MENU 28 Tecla de Flecha 29 Tecla de Flecha 30 Botón ENTER 31 Botón ZOOM 32 Botón VOL 33 Botón A B 34 Botón VOL 35 Botón REPEAT 36 Botones de cifras 0 9 y 10 37 Botón SUBTITLE 38 Botón ANGLE 39 Botón MEMORY 40 B...

Page 51: ... de conectar el reproductor de disco versátil digital asegúrese que todos los equipos del reproductor de disco versátil digital estén apagados y no estén conectados con la red eléctrica Asimismo observe por favor el manual de usuario de su televisión Conecte el cable 12V con la salida DC del subwoofer y con la entrada 12V del reproductor de disco versátil digital Conecte entonces la salida video d...

Page 52: ...oporta da Botones de cifras 0 9 y 10 Si reproduce un CD podrá seleccionar opciones en el menú o elegir un título directamente con los botones de cifras Con títulos mayores que 10 primero pulse el botón 10 y después el correspondiente botón de cifras MUTE Para bloquear la salida del audio pulse el botón MUTE durante la reproducción Para regresar al sonido pulse el botón MUTE otra vez VOL VOL Con es...

Page 53: ... el botón L R en el modo DVD puede intercalar entre AUDIO 01 y AUDIO 02 Si selecciona AUDIO 02 sólo escuchará música y ya no el lenguaje Esta función depende del DVD N P Con el botón N P puede elegir los sistemas PAL o NTSC o ajustar el aparato a AUTO STEP Durante la reproducción de VCD s o DVD s puede saltar una imagen adelante cada vez que pulse el botón STEP Teclas de flecha Con los botones de ...

Page 54: ...terrumpe durante cierto tiempo el aparato seleccionará automáticamente la función Protector de Pantallas La pantalla del tele visor se pone en color negro solamente el logo DVD se mueve sobre la pantalla Esta función protege la pantalla del televisor para que también después de un largo período de marcha el aparato no se dañe SPEAKER SETUP Regulación del Altavoz DOWNMIX LT RT Si el disco a reprodu...

Page 55: ...voces delanteros por ejemplo en el caso de lenguaje separado MIX MONO para la reproducción mixta de ambos canales COMPRESSION amortiguación Área de amortiguación dinámica Mediante el área de la amortiguación dinámica se redu cen las alteraciones por haber fijado la diferencia entre los sonidos altos y bajos Con las teclas de flecha arriba abajo ajuste el área de amortiguación dinámica entre 2 8 y ...

Page 56: ... que pueda funcionar el ajuste de audio Si el disco por ejemplo dispone de los idiomas inglés y alemán puede elegir de ambos formatos En este menú puede elegir el lenguaje estándard con lo que inicia su disco Esto solamente es posible si el lenguaje elegido está disponible en el disco SUBTITLE Subtítulos Los subtítulos se indicarán en la pantalla de televisión y también dependen del disco a reprod...

Page 57: ...lantado Si elije RESET todas las funciones serán ajustadas de nuevo a los originarios ajustes en fábrica Funcionamiento de la Radio 1 Pulse el botón FUNCTION para llegar al modo Tuner 2 Entonces puede seleccionar FM o AM con el botón BAND 3 En la opción FM puede intercalar entre Mono y Esté reo con el botón FM MODE 4 Con el botón TUNING o seleccione la frecuencia deseada 5 Puede ajustar el volumen...

Page 58: ...mos con una garantía de 24 meses a partir de la fecha de compra factura de compra Durante el período de garantía nos encargamos gratuíta mente de los defectos del aparato y de los accesorios que se hayan originado por defectos del material o de la fabricación Dependiendo de nuestra estimación se realizará una reparación o un cambio Los servicios de garantía no prolangan la garantía ni se incia por...

Page 59: ...59 ESPAÑOL DVD 4404 AEG E 59 02 09 2004 9 54 58 Uhr ...

Page 60: ...zza integrati hanno lo scopo di impedire che l utente venga esposto alla luce non visibile del laser pericolosa per l occhio umano aprendo lo scomparto per i CD Questi interruttori di sicurezza non devono mai essere cavallottati né manipolati perché altrimenti sussiste il rischio di esposizione alla luce del laser Precauzioni Prima di utilizzare questo apparecchio leggere attenta mente le seguenti...

Page 61: ...i più corretta mente In questo caso staccare la spina e attendere ca un ora finché l umidità è evaporata Se ci sono fruscii durante una trasmissione A seconda delle condizioni di ricezione nello schermo televisivo possono presentarsi disturbi mentre si guarda una trasmissione televisiva e l apparecchio è acceso Questo non è un cattivo funzionamento dell apparecchio o del televisore Se si desidera ...

Page 62: ...rivo di peluzzi Custodia scorretta dei CD I CD possono riportare danni se vengono conservati nei seguenti luoghi esposizione diretta alla luce del sole luoghi umidi o polverosi luoghi esposti ad una fonte diretta di calore o radia tori Manutenzione Prima di ogni operazione di manutenzione accertarsi che l apparecchio venga spento e non sia collegato alla corrente di rete Pulire l apparecchio con u...

Page 63: ...NG I Tasto SKIP avanti 15 II Tasto PLAY PAUSE 16 Tasto STOP 17 Tasto OPEN CLOSE Retro 1 Uscita AUDIO R 2 Uscita AUDIO L 3 Uscita COAXIAL 4 Uscita VIDEO 5 Uscita S VIDEO 6 Entrata 12V DC 7 Collegamento antenna FM 8 Collegamento antenna AM 9 OPTICAL OUT Retro subwoofer 1 Regolatore BASS 2 Regolatore TREBLE 3 Entrata AUX R 4 Entrata AUX L 5 Collegamento altoparlanti R 6 Collegamento altoparlanti L 7 ...

Page 64: ...TEP 16 Tasto RESUME 17 Tasto MUTE 18 Tasto SLOW 19 Tasto CHANNEL 20 Tasto CHANNEL 21 Tasto TUNING 22 Tasto TUNING 23 Tasto STOP 24 II Tasto PLAY PAUSE 25 Tasto N P 26 Tasto L R 27 Tasto MENU 28 Tasto freccia 29 Tasto freccia 30 Tasto ENTER 31 Tasto ZOOM 32 Tasto VOL 33 Tasto A B 34 Tasto VOL 35 Tasto REPEAT 36 Tasti numerici 0 9 e 10 37 Tasto SUBTITLE 38 Tasto ANGLE 39 Tasto MEMORY 40 Tasto FM MOD...

Page 65: ...petto al sensore remoto Collegamenti Prima di collegare il lettore DVD prima di collegare un apparecchio accertarsi che tutti gli apparecchi dell impianto siano spenti e non siano collegati alla rete elettrica Osservare anche le istruzioni d uso del televisore Collegare il cavo di collegamento 12V all uscita DC del subwoofer e all entrata 12V del lettore DVD Ora con un cavo chinch collegare l usci...

Page 66: ...tasti numerici si possono fare immissioni dirette nei campi menu o selezionare direttamente un numero di canzone nel funzionamento CD Per i numeri dei titoli superiori a 10 azionare prima il tasto 10 e poi il corris pettivo tasto numerico MUTE Premendo il tasto MUTE durante la riproduzione si sospende il volume Per riattivare il volume premere di nuovo il tasto MUTE VOL VOL Con questi due tasti si...

Page 67: ...usica e non si sente più il parlato Questa funzione dipende dal DVD N P Con il tasto N P si può selezionare tra il sistema di colori PAL o NTSC oppure si può impostare l apparecchio su AUTO STEP Durante la riproduzione di VCD o DVD ogni volta che si preme il tasto STEP si avanza di un immagine Tasti freccia Con i tasti freccia si può muovere il cursore all interno di un menu PBC Se il vostro disco...

Page 68: ...a interrotta per un po di tempo l apparecchio passa automaticamente alla funzione Screen saver Il televisore diventa nero e sullo schermo si muove solo il logo DVD Questa funzione protegge il televisore in modo che non consegua danni anche nel caso rimanga acceso a lungo SPEAKER SETUP Impostazione altoparlanti DOWNMIX LT RT Se il disco riprodotto è stato registrato con PRO LOGIC DOLBY selezionare ...

Page 69: ...e Zona dinamica di attenuazione Mediante la zona di attenuazione dinamica si riducono le variazioni di volume fissando la differenza tra toni alti e bassi Con i tasti freccia su giù accendere la zona dinamica di attenuazione tra 2 8 e FULL pieno oppure speg nere OFF poi premere il tasto ENTER per conferma re Per ascoltare tutta la zona della larghezza di banda per il suono registrata selezionare O...

Page 70: ...onare Se il disco dispone per esempio di inglese e tedesco si può scegliere tra questi due formati In questo menu si seleziona la lingua standard con cui avviare il disco Questo tuttavia è possibile solo se la lingua impostata è presente sul disco SUBTITLE Sottotitoli I sottotitoli vengono visualizzati sullo schermo e dipen dono altresì dal disco riprodotto Si può visualizzare la lingua dei sottot...

Page 71: ...eziona RESET tutte le funzioni vengono riportate alle impostazioni originarie di stabilimento Funzionamento radio 1 Premere il tasto FUNCTION per entrare nel modo tuner 2 Poi con il tasto BAND si può selezionare FM o AM 3 In FM Band si può passare tra mono e stereo con il tasto FM MODE 4 Con TUNING o con il tasto impostare ora la frequenza desiderata 5 Si può impostare il volume con i tasti VOL o ...

Page 72: ...a noi ci impegniamo ad eliminare gra tuitamente i guasti dell apparecchio o degli accessori dovuti a difetti di materiale o di fabbricazione riparandoli o a nostra discrezione sostituendoli Le prestazioni in garanzia danno luogo a una proroga della garanzia né danno diritto ad una nuova garanzia Per la garanzia è sufficiente lo scontrino di acquisto Senza questo scontrino non sussiste il diritto n...

Page 73: ...73 ITALIANO DVD 4404 AEG I 73 02 09 2004 9 59 09 Uhr ...

Page 74: ...czasie otwierania kieszeni odtwarzacza płyt kompaktowych został poddany niebezpiecznemu dla ludzkich oczu oddziaływaniu niewidocznego światła lasera Wyłącznika tego nie należy w żadnym wypadku zmostkować lub też przy nim manipulować ponieważ grozi to niebezpieczeństwem że użytkownik poddany zostanie oddziaływaniu niebezpiecznego dla ludzkich oczu niewidocznego światła lasera Przepisy bezpieczeństw...

Page 75: ...ypadkach należy wyłączyć prąd i odczekać około 1 godziny do momentu odparowania wilgoci Przy pojawieniu się przeszkadzających dźwięków w telewizorze podczas oglądania programu W zależności od warunków odbioru przy włączonym odtwarzaczu możliwe jest powstawanie zakłóceń ekra nu podczas oglądania programu telewizyjnego Nie oznacza to błędnego funkcjonowania odtwarzacz czy też telewizora Przy oglądan...

Page 76: ...rzechowywanie płyt CD Można doprowadzić do uszkodzenia płyt CD przechowując je w miejscach takich jak bezpośrednio nagrzewane promieniami słonecznymi zawilgoconych lub zakurzonych narażonych na bezpośrednie oddziaływanie źródeł ciepła lub grzejników Konserwacja Przed każdą konserwacją zapewnić wyłączenie odtwarzacza i odłączenie od zasilani sieciowego Odtwarzacz obmywać suchą miękką szmatką W przy...

Page 77: ...d 15 Przycisk II PLAY PAUSE 16 Przycisk STOP 17 Przycisk OPEN CLOSE Tył 1 Wyjście AUDIO R prawe 2 Wyjście AUDIO L lewe 3 Wyjście COAXIAL koncentryczne 4 Wyjście VIDEO 5 Wyjście S VIDEO 6 Wejście 12V DC 7 Złącze do anteny FM 8 Złącze do anteny AM 9 OPTICAL OUT Tył subwoofer 1 BASS regulacja niskich tonów 2 TREBLE regulacja wysokich tonów 3 Wejście AUX R 4 Wejście AUX L 5 Złącze do zewnętrznego zest...

Page 78: ... 16 Przycisk RESUME 17 Przycisk MUTE 18 Przycisk SLOW 19 Przycisk CHANNEL 20 Przycisk CHANNEL 21 Przycisk TUNING 22 Przycisk TUNING 23 Przycisk STOP 24 Przycisk II PLAY PAUSE 25 Przycisk N P 26 Przycisk L R 27 Przycisk MENU 28 przycisk strzałkowy 29 przycisk strzałkowy 30 Przycisk ENTER 31 Przycisk ZOOM 32 Przycisk VOL 33 Przycisk A B 34 Przycisk VOL 35 Przycisk REPEAT 36 Przyciski numeryczne 0 9 ...

Page 79: ...rów w kierunku prostolinijnym Poza tym wewnątrz obszaru poziomego kąta do 30 na czujnik Remote Złącza Przed podłączeniem odtwarzacza DVD lub innego urządzenia upewnij się czy wszyst kie urządzenia w zestawie są wyłączone i czy są odłączone od sieci elektrycznej Uwzględnij wskazówki zawarte w instrukcji obsługi odbiornika TV Podłącz kabel 12V do wyjścia DC subwoofera i wejścia 12 V odtwarzacza DVD ...

Page 80: ...rmalnie Dla kontynuacji odtwarzania nacisnąć przycisk PLAY Uwaga funkcja wyszukiwania nie działa w trybie MP3 Przyciski numeryczne 0 9 i 10 Przyciskami numerycznymi można bezpośrednio wprowadzać liczby w polach menu a w trybie CD bezpośrednio wybierać numer utworu Jeżeli numer utworu jest większy niż 10 należy najpierw nacisnąć przycisk 10 a potem odpowiednim przycisk nume ryczny MUTE Aby wyciszyć...

Page 81: ...nu płyty zależnie od tego czy takie menu jest nagrane na płycie CD DVD L R Przy odtwarzaniu płyt CD VCD naciskając kolejno przycisk L R można wybrać odt warzanie Stereo Mono Left tylko lewy kanał lub Mono Right tylko prawy kanał Przy odtwarzaniu płyt DVD naciśnięcie przycisku L R przy odtwarzaniu płyt DVD powoduje przełączanie trybów audio AUDIO 01 i AUDIO 02 W trybie AUDIO 02 słychać tylko muzykę...

Page 82: ...cji zależy od rodzaju nośnika włożonego do odtwarzacza SCREEN SAVER Wygaszacz ekranu Jeżeli przy ustawieniu ON w odtwarzaczu nie ma płyty lub odtwarzanie zostało na pewien czas przerwane odtwarzacz automatycznie włącza funkcję wygaszac za ekranu Ekran zaciemnia się całkowicie i po całym ekranie przesuwa się znak firmowy Logo DVD Funkcja ta służy do ochrony ekranu telewizyjnego tak że nawet przy dł...

Page 83: ... w dekoder systemu Dolby Digital DUAL MONO STEREO z podziałem odtwarzania na dwa kanały jak stereo L MONO lub R MONO jeżeli lewy lub prawy kanał dźwiękowy ma być odtwarzany przez oba przednie głośniki np przy osobno nagranym tekście MIX MONO przy zmiksowanym odtwarzaniu obu kanałów COMPRESSION Nastawianie tłumienia Zakres dynamicznego tłumienia Poprzez zakres dynamicznego tłumienia realizu je się ...

Page 84: ...ze w systemie PAL wybrać sygnał wyjściowy PAL 2 W przypadku systemu NTSC wybrać sygnał wyjściowy NTSC 3 Można też wybrać opcję AUTO i odtwarzacz będzie automatycznie rozpoznawać system TV AUDIO Funkcja Audio zależna jest od płyty wspierającej format języka tylko przy wspieraniu możliwe jest funk cjonowanie nastawienia audio Jeżeli płyta zawiera np angielski i niemiecki wtedy wybór języka ograniczo...

Page 85: ...mieniu 3308 DEFAULTS Ustawienie fabryczne Przy wybraniu RESET następuje powrotne ustawienie wszystkich funkcji do wartości ustawień fabrycznych Tryb radioodbiornika 1 Naciśnij przycisk FUNCTION aby włączyć tryb tunera 2 Następnie przyciskiem BAND możesz wybrać pas mo FM lub AM 3 W paśmie FM przyciskiem FM MODE możesz wybrać odbiór Mono lub Stereo 4 Przyciskiem TUNING lub ustaw pożądaną częstotliwo...

Page 86: ...wania fabrycznego ryzyko uszkodzenia sprzętu podczas transportu do i z miejsca zakupu ponosi reklamujący Naprawa gwarancyjna nie dotyczy czynności przewid zianych w instrukcji obsługi do wykonania których zobowiązany jest użytkownik we własnym zakresie i na własny koszt Gwarancja nie obejmuje mechanicznych termicznych chemicznych uszkodzeń sprzętu i wywołanych nimi wad uszkodzeń powstałych w wynik...

Page 87: ...87 JE ZYK POLSKI niezgodności towaru z umową Gwarancja oraz zawarte w niej warunki obowiązują na terenie Rzeczpospolitej Polskiej DVD 4404 AEG PL 87 02 09 2004 10 08 33 Uhr ...

Page 88: ...ufdatum Händlerstempel Unterschrift Koopdatum Stempel van de leverancier Handtekening Dated achat cachetdurevendeur signature Fechadecompra Sellodel vendedor Firma Data de compra Carimbo do vendedor Assinatura Data dell aquisto timbro del commerciante firma Purchase date Dealer stamp Signature Kjøpsdato stempel fra forhandler underskrift Data kupna Pieczątka sklepu Podpis Datum koupě Razítko prode...

Reviews: