background image

A18CHS14

ACS18B

Original instructions

Summary of Contents for A18CHS14

Page 1: ...A18CHS14 ACS18B Original instructions ...

Page 2: ...2 2 Important It is essential that you read the instructions in this manual before assembling operating and maintaining the product Subject to technical modifications ...

Page 3: ...3 3 x 1 x 1 x 1 x 1 x 1 x 1 A18CHS14 ...

Page 4: ...4 4 C TE SC x 1 ACS18B x 1 x 1 x 1 ...

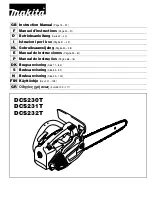
Page 5: ...HER BAR MOUNTING NUTS CHAIN COVER SCABBARD CHAIN GUIDE BAR FRONT HANDLE FRONT HAND GUARD CHAIN BRAKE SCRENCH TOOL TRIGGER RELEASE REAR HANDLE BATTERY PACK BELT HOOK CHAIN LUBRICANT TANK CAP CHAIN TENSIONING SCREW THROTTLE TRIGGER ...

Page 6: ...6 6 8 21 20 14 USING THE CHAIN BRAKE INSTALLING AND REMOVING THE SCABBARD ADJUSTING THE CHAIN TENSION CLEANING THE PRODUCT ...

Page 7: ...7 7 START STOP 15 10 22 19 12 13 OPERATING THE PRODUCT USING THE BELT HOOK INSTALLING AND REMOVING THE BATTERY PACK ADDING CHAIN AND BAR OIL STORING THE PRODUCT REPLACING THE CHAIN AND BAR ...

Page 8: ...8 8 3 4 1 2 ADJUSTING THE CHAIN TENSION NOT is 3 the 1 2 ...

Page 9: ...9 9 5 FLATS APPROX 3 4 mm click 6 7 NOTE The chain tension is correct when the gap is 3 4 mm Check the chain tension regularly as the chain stretches when it heats up ...

Page 10: ...10 10 3 4 1 2 ADDING CHAIN AND BAR OIL 1 2 ...

Page 11: ...11 11 click 5 6 7 1 2 ...

Page 12: ...12 12 click 1 2 2 1 INSTALLING AND REMOVING THE BATTERY PACK OP ...

Page 13: ...13 13 START STOP OPERATING THE PRODUCT ...

Page 14: ...14 14 BRAKE ON BRAKE OFF USING THE CHAIN BRAKE RE NOTE The product does not turn on while the chain brake is engaged ...

Page 15: ...15 15 4 1 2 3 REPLACING THE CHAIN AND BAR ...

Page 16: ...16 16 5 6 7 CHAIN DRIVE LINKS BAR GROOVE NOTE Always properly dispose of used chain and bar NOTE For replacment chain and bar part numbers see page 26 NOT is 3 the ...

Page 17: ...17 17 8 9 10 FLATS APPROX 3 4 mm NOTE The chain tension is correct when the gap is 3 4 mm Check the chain tension regularly as the chain stretches when it heats up 1 2 ...

Page 18: ...18 18 12 11 click US ...

Page 19: ...19 19 1 2 USING THE BELT HOOK ...

Page 20: ...20 20 INSTALLING AND REMOVING THE SCABBARD CL NOT brus NOT ...

Page 21: ...21 21 1 2 3 CLEANING THE PRODUCT NOTE Clean the the product with a with a soft bristle brush or with a soft dry cloth NOTE Do not use water to clean the product ...

Page 22: ...22 22 1 2 3 4 STORING THE PRODUCT NOT tank NOT ven the gard the 1 2 ...

Page 23: ...he oil tank before storing the product NOTE Store the product in a cool dry and well ventilated area that is inaccessible to children Keep the product away from corrosive agents such as garden chemicals and de icing salts Do not store the product outdoors 1 2 ...

Page 24: ...24 24 2 1 1 3 2 5 cm 2 in 5 cm 2 in 1 2 1 3 2 3 30 30 30 30 30 30 30 30 30 30 Fig 1 Fig 6 Fig 2 Fig 7 Fig 3 Fig 8 Fig 4 Fig 9 Fig 5 Fig 10 30 30 30 30 ...

Page 25: ...25 25 2 1 2 3 1 3 30 30 30 Fig 11 Fig 12 Fig 13 Fig 14 30 ...

Page 26: ...count the times when the tool is switched off or when it is running but not actually doing the job This may significantly reduce the exposure level over the total working period Identify additional safety measures to protect the operator from the effects of vibration such as maintain the tool and the accessories keeping the hands warm and organizing work patterns und Att pre Kee Acc limb can Ass a...

Page 27: ...iate conditions will reduce personal injury Prevent unintentional starting Ensure the switch is in the off position before connecting to power source and or battery pack picking up or carrying the tool Carrying power tools with your finger on the switch or energising power tools that have the switch on invites accidents Remove any adjusting key or wrench before turning the power tool on A wrench o...

Page 28: ... the chainsaw make sure the saw chain is not contacting anything A moment of inattention while operating chainsaws may cause entanglement of your clothing or body with the saw chain Always hold the chainsaw with your right hand on the rear handle and your left hand on the front handle Holding the chainsaw with a reversed hand configuration increases the risk of personal injury and should never be ...

Page 29: ...chainsaw by making simple cuts on securely supported wood Practice making cuts whenever you have not operated the saw for some time To reduce the risk of injury associated with contacting moving parts always stop the motor apply the chain brake remove the battery pack and make sure all moving parts have come to a stop before cleaning or clearing a blockage before leaving the product unattended bef...

Page 30: ... horizontal cut into the buttress first followed by the vertical cut Remove the resulting loose section from the work area Follow the correct tree felling procedure after you have removed the large buttress roots Bucking a log See Fig 9 11 Bucking is cutting a log into lengths It is important to make sure your footing is firm and your weight is evenly distributed on both feet When possible the log...

Page 31: ...ide bars Generally guide bars with small radius tips have somewhat lower potential for kickback Use a guide bar and matching chain which is just long enough for the job Longer bars increase the risk of loss of control during sawing Regularly check the chain tension When cutting smaller branches less than the full length of the guide bar the chain is more likely to be thrown off if the tension is n...

Page 32: ... with insulating non conductive caps or tape Do not transport batteries that are cracked or leaking Check with the forwarding company for further advice MAINTENANCE WARNING Use only original manufacturer s replacement parts accessories and attachments Failure to do so can cause possible injury can contribute to poor performance and may void your warranty WARNING Servicing requires extreme care and...

Page 33: ...he product to rain or damp condition Moving direction of the chain Marked under the chain cover Hold and operate the saw properly with both hands Do not operate the saw using only one hand Remove the battery pack before starting any work on the product Set the chain brake to the RUN position Rotate to adjust chain tension Tighten the chain Loosen the chain Set the chain brake to the BRAKE position...

Page 34: ......

Page 35: ......

Page 36: ...verley VIC 3149 Australia Techtronic Industries N Z Limited Unit C 70 Business Parade South Highbrook Auckland 2013 New Zealand www aegpowertools com au www aegpowertools co nz AEG is a registered trade mark used under license from AB Electrolux publ 960087555 03 ...

Reviews: