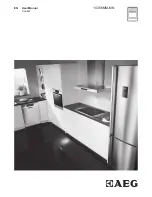
background image

EN

User Manual

Cooker

10366MM-MN

Summary of Contents for 10366MM-MN

Page 1: ...EN User Manual Cooker 10366MM MN ...

Page 2: ...at help make life simpler features you might not find on ordinary appliances Please spend a few minutes reading to get the very best from it Visit our website for Get usage advice brochures trouble shooter service information www aeg com webselfservice Register your product for better service www registeraeg com Buy Accessories Consumables and Original spare parts for your appliance www aeg com sh...

Page 3: ...pervision or instruction concerning the use of the appliance in a safe way and understand the hazards involved Do not let children play with the appliance Keep all packaging away from children and dispose of it appropriately Keep children and pets away from the appliance when it operates or when it cools down Accessible parts are hot Children shall not carry out cleaning and user maintenance of th...

Page 4: ...surface which may result in shattering of the glass Metallic objects such as knives forks spoons and lids should not be placed on the hob surface since they can get hot WARNING The appliance and its accessible parts become hot during use Care should be taken to avoid touching heating elements Children less than 8 years of age shall be kept away unless continuously supervised Always use oven gloves...

Page 5: ...its with the same height Do not install the appliance adjacent to a door or under a window This prevents hot cookware to fall from the appliance when the door or the window is opened Make sure to install a stabilizing means in order to prevent tipping of the appliance Refer to Installation chapter 2 2 Electrical Connection WARNING Risk of fire and electrical shock All electrical connections should...

Page 6: ...the acceptance of the installation and be provided with the completion certificate You should only sign the acceptance of the installation when the installation is completed to your satisfaction Note that your invoice is required if you wish to make a guarantee claim Important information for the installer This appliance may only be installed by a gas installer registered with the South African qu...

Page 7: ...ays lift these objects up when you have to move them on the cooking surface Provide good ventilation in the room where the appliance is installed Use only stable cookware with the correct shape and diameter larger than the dimensions of the burners Make sure the flame does not go out when you quickly turn the knob from the maximum to the minimum position Use only the accessories supplied with the ...

Page 8: ...e with any kind of detergent Do not clean the burners in the dishwasher 2 6 Internal light The type of light bulb or halogen lamp used for this appliance is only for household appliances Do not use it for house lighting WARNING Risk of electrical shock Before replacing the lamp disconnect the appliance from the power supply Only use lamps with the same specifications 2 7 Disposal WARNING Risk of i...

Page 9: ... burner 2 Semi rapid burner 3 Semi rapid burner 4 Rapid burner 3 3 Accessories Wire shelf For cookware cake tins roasts Baking tray For cakes and biscuits Turnspit For roasting larger joints of meat and poultry Storage compartment The storage compartment is below the oven cavity To use the compartment lift the lower front door then pull it down WARNING The storage compartment can become hot when t...

Page 10: ... Always light the burner before you put on the cookware WARNING Be very careful when you use open fire in the kitchen environment The manufacturer declines any responsibility in case of the flame misuse The spark generator can start automatically when you switch on the mains after installation or a power cut It is normal In the absence of electricity you can ignite the burner manually Ignition of ...

Page 11: ...ouple if applicable 5 3 Turning the burner off To put the flame out turn the knob to the off position WARNING Always turn the flame down or switch it off before you remove the pans from the burner 6 HOB HINTS AND TIPS WARNING Refer to Safety chapters 6 1 Cookware WARNING Do not put the same pan on two burners WARNING Do not put unstable or damaged pots on the burner to prevent from spill and injur...

Page 12: ...water rings fat stains shiny metallic discoloration Clean the hob with a moist cloth and non abrasive detergent After cleaning wipe the hob dry with a soft cloth To clean the enamelled parts cap and crown wash them with warm soapy water and dry them carefully before you put them back on 7 3 Cleaning the spark plug This feature is obtained through a ceramic ignition candle with a metal electrode Ke...

Page 13: ...a safety thermostat which interrupts the power supply The oven activates again automatically when the temperature drops 8 3 Cooling fan When the appliance operates the cooling fan activates automatically to keep the surfaces of the appliance cool 8 4 Oven functions Symbol Oven function Application Off position The appliance is off Conventional Cooking To bake and roast food on one shelf position B...

Page 14: ...ced upwards Tray Do not push the baking tray all the way to the back wall of the cavity This prevents the heat from circulating around the tray The food may be burnt especially in the rear part of the tray Push the tray or deep pan between the guide bars of the shelf support Make sure it does not touch the back wall of the oven 10 2 Using the turnspit WARNING Be careful when you use the turnspit T...

Page 15: ...or the oven functions to the turnspit position 11 Set the necessary temperature 12 Make sure that turnspit rotates 13 Close the oven door The turnspit does not stop if you open the oven door When meat is ready turn the knobs for the oven functions and temperature to the off position Turn off the grill Install the turnspit handle Carefully remove the turnspit and the roasting pan from the oven 11 O...

Page 16: ...ature setting The differences equalize during the baking procedure With longer baking times you can deactivate the oven approximately 10 minutes before the end of the baking time and then use the residual heat When you cook frozen food the trays in the oven can twist during baking When the trays become cold again the distortions are gone 11 3 Baking cakes Do not open the oven door before 3 4 of th...

Page 17: ...king 200 220 45 55 2 1 Preheat the oven for 10 minutes Meat Poultry Food Quantity kg Oven function Temper ature C Time min Shelf po sition Sheep 1 5 2 5 True Fan Cooking 200 90 120 2 Chicken 1 0 1 8 Conventional cooking 230 90 1001 2 Duck 1 8 2 5 True Fan Cooking 220 90 120 2 Goose 2 5 3 0 True Fan Cooking 220 100 160 2 Rabbit 1 0 1 5 True Fan Cooking 180 90 120 2 Beef 1 2 1 8 True Fan Cooking 250...

Page 18: ... Calzone 1 1 4 1 5 True Fan Cooking 170 30 35 1 Bread sticks 0 5 0 7 Light Cooking 190 210 50 60 2 1 Preheat the oven for 10 minutes Cakes Food Quantity kg Oven function Tempera ture C Time min Shelf po sition Flat cake 1 0 6 1 0 True Fan Cooking 180 25 30 3 Flat cake 1 1 2 2 0 True Fan Cooking 150 40 45 2 and 4 Sponge cake 1 0 1 5 True Fan Cooking 150 90 95 2 Feter Mshal ted 1 1 0 1 5 True Fan Co...

Page 19: ... 3 0 5 Grilling 5 6 4 Toast Hawai 1 0 5 1 0 Grilling 15 20 3 1 Preheat the oven for 5 minutes Revolving frying Food Quantity kg Oven function Time min Shelf position Sheep on skewer 1 5 2 0 Grilling with Turnspit 100 120 Turnspit Chicken on skewer 1 2 1 8 Grilling with Turnspit 95 100 Turnspit 12 OVEN CARE AND CLEANING WARNING Refer to Safety chapters 12 1 Notes on cleaning Clean the front of the ...

Page 20: ...ve cleaning agents soap or other cleaning agents This will damage the catalytic surface Spots or discolouration of the catalytic surface have no effect on catalytic properties WARNING Keep children away when you clean the oven at a high temperature The oven surface becomes very hot and there is a risk of burns Before activating the catalytic cleaning remove all the accessories from the oven The wa...

Page 21: ...om its seat 4 Put the door on a soft cloth on a stable surface 5 Use a screwdriver to remove 2 screws from bottom edge of door 1 1 6 Use a spatula made of wood or plastic or equivalent to open the inner door Hold the outer door and push the inner door against the top edge of the door Lift the inner door 2 2 3 7 Clean the oven door with water and soap Clean inner side of the door Dry the oven door ...

Page 22: ... cover 3 Replace the lamp with a suitable 300 C heat resistant lamp 4 Install the glass cover 13 TROUBLESHOOTING WARNING Refer to Safety chapters 13 1 What to do if Problem Possible cause Remedy There is no spark when you try to activate the spark gen erator The hob is not connected to an electrical supply or it is connected incorrectly Check if the hob is correctly connected to the electrical sup...

Page 23: ...n for too long Do not leave the dishes in the oven for longer than 15 20 minutes after the cooking process ends The oven does not heat up The necessary settings are not set Make sure that the settings are correct The turnspit does not rotate The turnspit is not correctly installed into the turnspit hole Refer to Using the turn spit It takes too long to cook the dishes or they cook too quickly The ...

Page 24: ...ion mm A 400 Dimension mm B 650 C 150 14 2 Technical data Voltage 220 240 V Frequency 50 60 Hz Appliance class 1 Dimension mm Height 885 915 Width 600 Depth 600 14 3 Other technical data LPG G30 2 8 3 0 kPa Natural Gas G20 2 0 kPa 14 4 Bypass diameters BURNER Ø BYPASS 1 100 mm Auxiliary 29 30 Semi rapid 32 Rapid 42 14 5 Gas burners for NATURAL GAS G20 2 0 kPa BURNER NORMAL POWER kW REDUCED POWER k...

Page 25: ...e applied when it can not get hotter than room temperature higher than 30 C it is not longer than 1500 mm it has no narrowing anywhere it is not twisted or tighten it does not get in touch with sharp edges or corners it s conditions can be easily checked When checking the flexible pipe make sure it does not show cracks cuts marks of burnings on the two ends and on its full length the material is n...

Page 26: ...ors when you change the gas type 1 Remove the pan supports 2 Remove the caps and crowns of the burner 3 Remove the injectors with a socket spanner 7 4 Replace injectors with the ones necessary for the type of gas you use 5 Replace the rating plate it is near the gas supply pipe with the one for the new type of gas supply You can find this plate in the bag supplied with the appliance If the supply ...

Page 27: ... Daily use chapter 5 Turn the knob for the hob to the minimum position 6 Remove the knob for the hob again 7 Screw on slowly the bypass screw till the flame becomes minimum and stable 8 Put the knob for the hob back on 14 12 Levelling CAUTION Remove all the accessories from the oven 1 Disassemble the pan supports and all the burner assemblies 2 Put the appliance on the sidewall on a clean and smoo...

Page 28: ... can tilt Your appliance has the symbol shown on the picture if applicable to remind you about the installation of the anti tilt protection 1 Install the anti tilt protection 325 330 mm down from the top surface of the appliance and 110 115 mm from the side of the appliance into the circular hole on a bracket Screw it into the solid material or use applicable reinforcement wall 110 115 mm 325 330 ...

Page 29: ...ation or service voids the warranty 1 Electrolux AEG warrants the equipment against defective material or faulty manufacture provided it is used for domestic purposes only for a period of 36 thirty six months from the date of purchase by the original retail purchaser This warranty only applies to Electrolux and AEG large appliances 2 a In the first 6 six months from date of purchase for valid warr...

Page 30: ...be required 8 Repairs carried out under warranty have a guarantee period of 3 three months on the parts and labour supplied to repair the unit and does not extend the warranty nor does it start a new warranty Parts removed during guarantee repairs become the property of Electrolux 9 After expiry of 6 six months from the date of purchase the warranty shall be available only to the original retail p...

Page 31: ...rden Eiland 7420 Cape Town Electrolux appliances AEG appliances Telephone 00800 222 825 E mail service electrolux co za Website www electrolux co za www aeg co za 16 ENVIRONMENTAL CONCERNS Recycle the materials with the symbol Put the packaging in applicable containers to recycle it Help protect the environment and human health and to recycle waste of electrical and electronic appliances Do not di...

Page 32: ...www aeg com shop 867330242 A 432016 ...

Reviews: