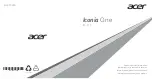
background image

Acer ICONIA

User Guide

Acer recommends...

Productivity Software

Work Great with Microsoft

®

 Office 2010

 - Express your ideas, solve problems and simplify everyday projects 

with Office 2010.

Photo editing

 - Easily edit and print your photos with Windows Live Photo Gallery. Then share them on 

Facebook, YouTube or Windows Live.

Search & Decide with Bing

 -- Find and organize the answers you need using Bing

, so you can make faster, 

more informed decisions.

Summary of Contents for ICONIA

Page 1: ...s solve problems and simplify everyday projects with Office 2010 Photo editing Easily edit and print your photos with Windows Live Photo Gallery Then share them on Facebook YouTube or Windows Live Search Decide with Bing Find and organize the answers you need using Bing so you can make faster more informed decisions ...

Page 2: ..._____________ Serial number ___________________________________ Date of purchase ________________________________ Place of purchase ________________________________ 2010 All Rights Reserved Acer ICONIA User Guide Original Issue 11 2010 ...

Page 3: ...F and comes preloaded on your computer Follow these steps to access it 1 Click on Start All Programs Documentation 2 Click on ICONIA User Guide Note Viewing the file requires Adobe Reader If Adobe Reader is not installed on your computer clicking on the user guide link will run the Adobe Reader setup program first Follow the instructions on the screen to complete the installation For instructions ...

Page 4: ... computer to magnetic fields Do not expose the computer to rain or moisture Do not spill water or any liquid on the computer Do not subject the computer to heavy shock or vibration Do not expose the computer to dust or dirt Never place objects on top of the computer Do not slam the computer display when you close it Never place the computer on uneven surfaces Taking care of your AC adapter Here ar...

Page 5: ...e the battery yourself Do not tamper with batteries Keep them away from children Dispose of used batteries according to local regulations Recycle if possible Cleaning and servicing When cleaning the computer follow these steps 1 Turn off the computer and remove the battery pack 2 Disconnect the AC adapter 3 Use a soft moist cloth Do not use liquid or aerosol cleaners If either of the following occ...

Page 6: ...e removing the power supply unit from the computer If the system has multiple sources of power disconnect power from the system by unplugging all power cords from the power supplies CAUTION for accessibility Be sure that the power outlet you plug the power cord into is easily accessible and located as close to the equipment operator as possible When you need to disconnect power to the equipment be...

Page 7: ...ithium battery pack The bottom surface areas around ventilation openings and AC adapter may get hot To avoid injury ensure they do not come in contact with your skin or body Your device and its enhancements may contain small parts Keep them out of the reach of small children Using electrical power This product should be operated from the type of power indicated on the marking label If you are not ...

Page 8: ...requirements contact an authorized reseller or service provider Product servicing Do not attempt to service this product yourself as opening or removing covers may expose you to dangerous voltage points or other risks Refer all servicing to qualified service personnel Unplug this product from the wall outlet and refer servicing to qualified service personnel when The power cord or plug is damaged ...

Page 9: ...vice Use the battery only for its intended purpose Never use any charger or battery that is damaged Do not short circuit the battery Accidental short circuiting can occur when a metallic object such as a coin clip or pen causes direct connection of the positive and negative terminals of the battery These look like metal strips on the battery This might happen for example when you carry a spare bat...

Page 10: ...tions in force in any area and always switch off your device when its use is prohibited or when it may cause interference or danger Use the device only in its normal operating positions This device meets RF exposure guidelines when used normally and it and its antenna are positioned at least 1 5 centimeters 5 8 inches away from your body refer to the figure below It should not contain metal and yo...

Page 11: ... interference occurs consult your service provider Vehicles RF signals may affect improperly installed or inadequately shielded electronic systems in motor vehicles such as electronic fuel injection systems electronic antiskid antilock braking systems electronic speed control systems and air bag systems For more information check with the manufacturer or its representative of your vehicle or any e...

Page 12: ...ir contains chemicals or particles such as grain dust or metal powders Do not switch the computer on when wireless phone use is prohibited or when it may cause interference or danger Emergency calls Warning You cannot make emergency calls through this device To make an emergency call you shall dial out through your mobile phone or other telephone call system Disposal instructions Do not throw this...

Page 13: ...o display sleep and computer sleep mode after 10 and 30 minute of inactivity respectively Wake the computer from sleep mode by pushing keyboard or moving mouse Computers will save more than 80 energy when in Sleep mode ENERGY STAR and the ENERGY STAR mark are registered U S marks Tips and information for comfortable use Computer users may complain of eyestrain and headaches after prolonged use Use...

Page 14: ...hours wearing incorrect glasses or contact lenses glare excessive room lighting poorly focused screens very small typefaces and low contrast displays could stress your eyes The following sections provide suggestions on how to reduce eyestrain Eyes Rest your eyes frequently Give your eyes regular breaks by looking away from the monitor and focusing on a distant point Blink frequently to keep your e...

Page 15: ...bits to make your computer use more relaxing and productive Take short breaks regularly and often Perform some stretching exercises Breathe fresh air as often as possible Exercise regularly and maintain a healthy body Warning We do not recommend using the computer on a couch or bed If this is unavoidable work for only short periods take breaks regularly and do some stretching exercises Note For mo...

Page 16: ...ronments xii Emergency calls xii Disposal instructions xii Mercury advisory xii ENERGY STAR xiii Tips and information for comfortable use xiii Your Acer Touchbook tour 1 Top view 2 Closed front view 3 Left view 4 Right view 4 Environment 5 Enabling wireless devices 6 Acer Ring 7 Gesture Editor 9 TouchBrowser 13 Adding a page to your Favorites 16 My Journal 17 Editing pages 18 Web Clip 19 Scrapbook...

Page 17: ...ery pack 69 Battery pack characteristics 69 Maximizing the battery s life 69 Charging the battery 70 Checking the battery level 70 Optimizing battery life 71 Battery low warning 71 Taking your computer with you 72 Disconnecting from the desktop 72 Moving around 72 Preparing the computer 72 What to bring to meetings 73 Taking the computer home 73 Preparing the computer 73 What to take with you 73 S...

Page 18: ...80 Password 80 Playing DVD movies 80 Frequently asked questions 82 Requesting service 84 International Travelers Warranty ITW 84 Before you call 84 Troubleshooting 85 Troubleshooting tips 85 Regulations and safety notices 86 FCC statement 86 Modem notices only for certain models 87 LCD pixel statement 89 Radio device regulatory notice 89 General 89 The FCC RF safety requirement 90 Canada Low power...

Page 19: ...r data The first thing you will notice is that there is no traditional keyboard or touchpad These are replaced with a virtual keyboard and touchpad so performing tasks will be different from the way you use a traditional notebook This User Guide will help you to familiarize yourself with these unique functions After you have turned on your computer you will see a standard Windows desktop on the up...

Page 20: ...n 2 Upper display screen Also called Liquid Crystal Display LCD displays computer output 3 Lower display screen Also called Liquid Crystal Display LCD displays computer output Shown with Virtual Keyboard open Please refer to Virtual Keyboard on page 45 4 Microphone Internal microphone for sound recording 1 2 3 4 ...

Page 21: ...indicator Indicates the computer s power status Battery indicator Indicates the computer s battery status 1 Charging The light shows amber when the battery is charging 2 Fully charged The light shows blue when in AC mode HDD indicator Indicates when the hard disk drive is active 1 ...

Page 22: ... adapter 3 HDMI port Supports high definition digital video connections 4 USB 2 0 ports Connect to USB 2 0 devices e g USB mouse USB camera No Icon Item Description 1 Microphone jack Accepts inputs from external microphones Headphones speaker line out jack Connects to audio line out devices e g speakers headphones 2 USB 3 0 port Connect to USB devices Supports the USB 3 0 SuperSpeed USB specificat...

Page 23: ...y lock Note Wrap the computer security lock cable around an immovable object and insert the lock into the notch turn the key to secure the lock 4 External display VGA port Connects to a display device e g external monitor LCD projector 5 Ethernet RJ 45 port Connects to an Ethernet 10 100 1000 based network 6 Power button Turns the computer on and off Temperature Operating 5 C to 35 C Non operating...

Page 24: ...computer Open Device Control from Acer Ring or press Fn the F3 button to open Device Control A red button indicates the device is off Tap ON to turn the device on A blue button indicates the device is on Tap OFF to turn the device off Tap the device name to open the Windows Control Panel to adjust the advanced settings for each device ...

Page 25: ...cription Capture Capture a part of the screen to Scrapbook to the clipboard or as an image Web Clip Select a part of a web page to paste in Scrapbook or My Journal Device Control Adjust settings for your computer please refer to Device Control on page 30 Gesture Editor Open the Gesture editor please refer to Gesture Editor on page 9 Keyboard Open Virtual Keyboard please refer to Virtual Keyboard o...

Page 26: ...that is shown when you open Acer Ring Scrapbook My Journal SocialJogger Starting from the area marked Draw a gesture here draw a gesture you have defined to perform the associated function Please refer to Gesture Editor on page 9 for information on defining your own gestures Note As long as the gesture starts within the central ring you can extend the gesture beyond the boundaries of the central r...

Page 27: ...sture Editor You can set personalized gestures to perform functions or launch programs Tap Gesture Editor on Acer Ring to see the pre defined gestures Tap either of the pre defined gestures to practice the gesture ...

Page 28: ...stures Tap Add New Gesture to add new gestures Select the action you d like to perform from the drop down menu on the left hand side of the screen Draw the gesture in the area on the right hand side of the screen When prompted enter the gesture again ...

Page 29: ...or delete the gesture Tap the gesture to select it then tap the appropriate button Tap Edit to edit a gesture You can change the action from the drop down menu in the upper left hand corner of the edit window You can edit URLs and applications directly in the text area ...

Page 30: ...English 12 You can also adjust the stroke style from the Settings page Tap the settings icon to open the settings page ...

Page 31: ...ish 13 TouchBrowser TouchBrowser is specifically designed to offer you a more comfortable web surfing experience when using touch input Open Acer Ring and tap the TouchBrowser AppCard to launch the browser ...

Page 32: ...English 14 The web content will be displayed across both screens The toolbar at the bottom of the screens gives you easy control over the open pages ...

Page 33: ...the next page in the browsing history 5 Home Open the defined home page 6 URL bar Shows the address of the current page 7 Add to favorites Add the current page to your favorites 8 Favorites Open the list of your favorites history 9 Web Clip Crop a part of the web page for use in My Journal or Scrapbook 10 Print Print the page 11 Help View the Help file 12 Switch mode Switch to browsing on a single...

Page 34: ...nglish 16 Adding a page to your Favorites To add a page to your Favorites tap the Add to Favorites icon give the page a name the page title will be used by default and select a folder to save the URL to ...

Page 35: ...ou may want to refer to later You can organize the information you wish to view from a number of sources on a single easy to view page Open Acer Ring and scroll through the AppCards to My Journal Tap the AppCard to open the application Website content is automatically updated each time you open the journal page ...

Page 36: ... can resize web clips by dragging the corners of the web clip to the size you want You can also move web clips to other pages by dragging the web clip to the tab for the page you want to move the clip to Tap the name of a tab to open Virtual Keyboard and rename the tab When you have finished tap No Item Description 1 Web clip Crop a part of the web page for use in My Journal 2 Edit Edit the conten...

Page 37: ...p tool allows you to clip parts of web pages to save them to My Journal Once you have a page open in your browser tap the Web clip icon If you re using Internet Explorer you will need to tap the Web Clip icon in the Internet Explorer toolbar ...

Page 38: ...op tap and drag on any of the circles on the corner of the crop window to expand it to include all the information you want to capture When you have finished selecting the area you want to crop tap the area to open a menu that will allow you to paste the content into My Journal ...

Page 39: ...e To delete a web clip tap the clip in My Journal and tap the trash can icon Note If the web clip comes from a site that requires a login the clip will be grayed out and a key icon will show to indicate that it requires a login Tap the clip to open the login page in My Journal Note If an Internet connection to the website is unavailable the clip will indicate that the connection is unavailable Tap...

Page 40: ... content Open Acer Ring and scroll through the AppCards to Scrapbook Tap the AppCard to open the application You can also annotate items or write reminders Icon Function Thumbnails of images in the Windows 7 Pictures library Capture tool Capture a part of the screen to Scrapbook to the clipboard or as an image ...

Page 41: ...n text Eraser tool Export tool Export the page to the clipboard for insertion into other applications or to save as an image file Delete the current page or selected image Note There is no Undo function available Shows the current page of the total pages and allows you to flip backwards or forwards through pages Add a new page View individual pages or thumbnails Tap a thumbnail to open the individ...

Page 42: ...ish Capture tool 24 Capture tool The capture tool allows you to clip parts of displayed content to save them to Scrapbook Once you have the content open on the upper screen tap the Capture icon in Scrapbook ...

Page 43: ... crop tap and drag on any of the circles on the corner of the crop window to expand it to include all the information you want to capture When you have finished selecting the area you want to crop tap the area to open a menu that will allow you to save the clip as an image you can drag and ...

Page 44: ...English Capture tool 26 drop onto the Scrapbook page save the capture as a Bitmap or Copy it to the clipboard ...

Page 45: ...l be added to the thumbnails above the scrapbook page Drag and drop the capture onto the page Tap a clip to select it then you can position it on the page Managing images in Scrapbook Note You need to tap to resize rotate or delete images on Scrapbook pages ...

Page 46: ...at the top of the screen to the scrapbook page Enlarge or shrink the picture using pinch actions or rotate the picture on the page Exporting Scrapbook pages You can export Scrapbook pages to other applications such as PowerPoint or save it as an image file on your system Tap the export icon ...

Page 47: ...glish Exporting Scrapbook pages 29 This will open a tab on the upper screen showing the exported page Drag and drop the page into the other application or to your desktop file browser to save it as a file ...

Page 48: ...ces on or off select a power scheme lock your computer turn it off or place it in Sleep mode If you have any devices plugged into a USB port or the HDMI port Device Control will show what type of device is plugged into each port If you have inserted a storage device into a USB port you may tap the USB icon to open a context menu Tap Open to view the files in Windows Explorer To safely remove the d...

Page 49: ...Video gives you an easy to use interface to view video content from your computer Tap the TouchVideo AppCard to launch TouchVideo The TouchVideo interface will open on the lower screen and show thumbnails of the video files found in your video library ...

Page 50: ...English TouchVideo 32 Tap Browse Computer to browse your computer for other video files ...

Page 51: ...shown as thumbnails Tap any thumbnail to start playing the video on the upper screen At the bottom of the lower screen a toolbar with video controls will open No Item Description 1 Progress bar Indicates the playback progress 1 2 3 4 5 6 7 8 9 ...

Page 52: ...d to launch TouchPhoto 2 Stop Stops playback 3 Previous Jumps to the previous video clip in the folder 4 Rewind Rewinds video playback 5 Pause Pauses video playback 6 Fast forward Plays the video at a faster speed 7 Next Jumps to the next video clip in the folder 8 Volume Adjust playback volume 9 Minimize Minimizes toolbar No Item Description ...

Page 53: ...English TouchPhoto 35 The interface will open on the lower screen and show thumbnails of the image files found in your image library Tap Browse Computer to browse your computer for other image files ...

Page 54: ...English TouchPhoto 36 Photos will be shown as thumbnails Tap any thumbnail to display the photo on the upper screen ...

Page 55: ...Stop Stops the slideshow playback 3 Previous Jumps to the previous photo in the slideshow 4 Pause Pauses the slideshow 5 Next Jumps to the next photo in the slideshow 6 Zoom Adjusts the zoom of the displayed photo disabled during slideshows 7 Rotate left Rotates the selected photo 90o to the left 8 Rotate right Rotates the selected photo 90o to the right 9 Minimize Minimizes the toolbar 1 2 3 4 5 ...

Page 56: ... listen to audio content saved on your computer Tap the TouchMusic AppCard to launch TouchMusic The TouchMusic interface will open on the lower screen and show thumbnails of the audio files found in your Music library When available album artwork will be displayed for the thumbnails ...

Page 57: ...English TouchMusic 39 Tap Browse Computer to browse your computer for other audio files Audio files will be shown as thumbnails Tap any thumbnail to start playing the audio file ...

Page 58: ... album and song title currently being played 3 Stop Stops playback 4 Previous Jumps to the previous audio file in the folder 5 Pause Pauses video playback 6 Next Jumps to the next video clip in the folder 7 Mute Mutes the sound 8 Volume slider Adjust playback volume 9 Shuffle Plays the audio files back in a random order 10 Repeat Repeats playback of the selected file s 11 Minimize Minimizes toolba...

Page 59: ...English 41 SocialJogger Open Acer Ring and tap the SocialJogger AppCard SocialJogger gives you one touch access to popular social networking sites Facebook YouTube and Flickr ...

Page 60: ...in wizard You can log into all three supported services from a single login wizard If you don t already have an account with the supported services you can create an account from the wizard Tap Continue to log into your account s Facebook ...

Page 61: ...lish Sharing content 43 YouTube Flickr Sharing content You can upload content to each service by tapping the Share on icon in the upper right hand corner of the page This will open a file browser above the ...

Page 62: ...ee service pages Drag and drop the content you want to share to the desired service Settings You can adjust the settings for each service by tapping the Settings icon This opens the settings window with a tab for each service ...

Page 63: ...he left hand screen hinge To close Virtual Keyboard tap the X icon 7 below in the upper right hand corner of the window WARNING Do not press down hard on the screens Doing so may damage them No Icon Function 1 Switch to between full keyboard mode and handwritten input 2 Switch XT9 text input on or off Please refer to XT9 predictive text on page 46 3 Change input method depends on the languages set...

Page 64: ...nd the XT9 logo are registered trademarks of Nuance Communications Inc or its subsidiaries in the United States of America and or other countries 4 Show or hide touchpad When the touchpad is hidden a tab appears on the left of Virtual Keyboard which allows you to move the keyboard up or down on the screen 5 Open the keyboard settings window Please refer to Keyboard settings on page 54 6 Keyboard t...

Page 65: ...at have handy control functions Use the arrows next to the toolbar to switch between the toolbars Media toolbar This toolbar contains commonly used media controls Editing toolbar This toolbar includes many commonly used functions for editing content including copy cut paste and print The keyboard button The keyboard button located on the left hand hinge can be used to perform a variety of function...

Page 66: ... display settings and touch functions will be reset Before Windows boots If your computer experiences an unexpected shutdown Windows will attempt to boot in recovery mode The keyboard button can be used to control the boot mode Press and release the button to move the cursor down to select a boot mode Press and hold the button for four seconds to perform the Enter function Other ways of entering i...

Page 67: ... 1 Switch to full keyboard mode 2 Open a menu showing input options 3 Switch between freehand input and individual characters 4 Open the keyboard settings window Please refer to Keyboard settings on page 54 5 Tap a function to view a short tutorial animation Tap Help to view the Virtual Keyboard help file 6 Close Virtual Keyboard 1 2 3 4 5 6 ...

Page 68: ...er text Enter your text in the yellow area and tap Insert to insert the text on the upper screen Handwriting actions From the toolbar at the top of the page you can view animations illustrating the actions mentioned Tap the displayed text to space the letters more widely so you can change individual letters ...

Page 69: ...English Other ways of entering information 51 If the computer fails to recognize your handwriting correctly you can draw a line through the text you wish to delete ...

Page 70: ...English Other ways of entering information 52 You can split the letters to add in another letter by drawing a vertical line between two letters ...

Page 71: ...English Other ways of entering information 53 You can also join letters by tapping the two groups of letters you d like to join ...

Page 72: ...ttings icon to open the settings window Here you can adjust the sounds the keyboard makes when you tap keys You can also change the keyboard skin Tap a skin to select it then tap Save to apply the skin and return to the keyboard You can also adjust keyboard brightness using the slider ...

Page 73: ...u can enable or disable launching the keyboard on startup and set the size you prefer for the function keys The Advanced tab allows you to run the keyboard training wizard calibrate the keyboard or restore default settings In the handwriting tab you can set the ink thickness adjust spacing and restore the defaults ...

Page 74: ...n To launch Window Manager open Acer Ring and select Window Manager please refer to Acer Ring on page 7 for more information Window Manager gives you a touch friendly interface for controlling the various windows on your computer Two additional buttons are added to the title bar of any window They provide an easy way to move windows from one screen to the other by tapping the icon on each window ...

Page 75: ...of controlling and managing your open windows Window Manager allows you to easily resize windows by tapping and dragging on the circles on each corner of the window It also allows you to easily position a window by tapping and dragging the window If you want to move the ...

Page 76: ...reens 2 Move the active window to the upper screen 3 Move the active window to the lower screen 4 Minimize Minimize the active window 5 Maximize Maximize the active window 6 Close active window Closes the active window Note This icon will close the active window Use the icons numbered 10 to close Window Manager 1 2 3 1 2 3 4 6 4 5 6 7 8 9 10 11 10 5 ...

Page 77: ...the Window List Tap this icon to view thumbnails of the open windows You can flip through the thumbnails tap a thumbnail to jump to the window 10 Close Window Manager Closes Window Manager Note There are two icons that have the same function Use either icon to close Window Manager 11 Tap and drag the corners to expand the active window No Item Description ...

Page 78: ...English Closing Window Manager 60 Closing Window Manager Important To close Window Manager tap the icons numbered 10 above ...

Page 79: ...he Intel Graphics and Media Control Panel only If you have an external display device attached to the HDMI port or VGA port you can switch the upper display screen to the external device by pressing Fn from Virtual Keyboard If you have more than one device attached press the hotkey combination until it activates the desired device Using the Intel Graphics and Media Control Panel To open the Intel ...

Page 80: ...he left and select the Second Display In the General Settings window you will need to set the display as follows Display Built in Display 2 Resolution 1366 x 768 Color Depth 32 Bit Refresh Rate 60 Hz Rotation Rotate to 180 Degrees Scaling Scale Full Screen ...

Page 81: ... maximum power conservation and maximum performance at the same time Windows handles all power saving chores for your computer Acer eRecovery Management Acer eRecovery Management is a tool to quickly restore the system You can back up restore the factory default image and reinstall applications and drivers Acer eRecovery Management consists of the following functions 1 Backup Create Factory Defaul...

Page 82: ...English 64 To use the password protection feature of Acer eRecovery Management you must first set the password The password is set by launching Acer eRecovery Management and clicking Settings ...

Page 83: ...kup page 3 Select the type of backup factory default or drivers and applications you would like to burn to disc 4 Follow the instructions on screen to complete the process Note Create a factory default image when you want to burn a bootable disc that contains your computer s entire operating system as it was delivered to you from the factory If you wish to have a disc that will allow you to browse...

Page 84: ...DVD backups You can also reinstall applications and drivers for your Acer system 1 Click on Start All Programs Acer Acer eRecovery Management 2 Switch to the Restore page by clicking Restore 3 You can choose to restore the system from a factory default image or reinstall applications and drivers 4 Follow the instructions on screen to complete the process ...

Page 85: ...arrow keys to select the Main submenu 4 Use the up and down arrow keys to select F12 Boot Menu 5 Use the F5 or F6 key to change F12 Boot Menu to Enabled 6 Tap the ESC key to enter the Exit submenu press the ENTER key to Exit Saving Changes Press the ENTER key again to select Yes The system will reboot 7 After rebooting when the Acer logo shows press the F12 key to open the Boot Menu Here you can s...

Page 86: ... arrow keys to select the IDE0 device 5 Use the F6 key to move the IDE0 device to the highest boot priority or use the F5 key to move other devices to a lower boot priority Ensure that the IDE0 device is the highest priority 6 Tap the ESC key to enter the Exit submenu press the ENTER key to Exit Saving Changes Press the ENTER key again to select Yes The system will reboot 7 When you reboot Windows...

Page 87: ...off results in a significantly faster charge time Maximizing the battery s life Like all other batteries your computer s battery will degrade over time This means that the battery s performance will diminish with time and use To maximize your battery s life you are advised to adhere to the recommendations set out below Conditioning a new battery pack Before you use a battery pack for the first tim...

Page 88: ...rging the battery to its extremes as described above Frequent use the more you use the battery the faster it will reach the end of its effective life A standard computer battery has a life span of about 300 charges Charging the battery To charge the battery first make sure that it is correctly installed in the battery bay Plug the AC adapter into the computer and connect to a mains power outlet Yo...

Page 89: ...When using battery power pay attention to the Windows power meter Warning Connect the AC adapter as soon as possible after the battery low warning appears Data will be lost if the battery becomes fully depleted and the computer shuts down When the battery low warning appears the recommended course of action depends on your situation Situation Recommended Action The AC adapter and a power outlet ar...

Page 90: ...ce desk to a meeting room Preparing the computer Before moving the computer close and latch the display cover to place it in Sleep mode You can now safely take the computer anywhere you go within the building To bring the computer out of Sleep mode open the display then press and release the power button If you are taking the computer to a client s office or a different building you may choose to ...

Page 91: ... close the display cover whenever you are not actively using the computer To resume open the display if closed then press and release the power button Taking the computer home When you are moving from your office to your home or vice versa Preparing the computer After disconnecting the computer from your desktop follow these steps to prepare the computer for the trip home Unplug any external devic...

Page 92: ... may want to purchase a second AC adapter for use at home With a second AC adapter you can avoid carrying the extra weight to and from home If you use your computer at home for significant periods of time you might also want to add an external keyboard monitor or mouse Traveling with the computer When you are moving within a larger distance for instance from your office building to a client s offi...

Page 93: ...nter driver files if you plan to use another printer Proof of purchase in case you need to show it to customs officials International Travelers Warranty passport Special considerations Follow the same special considerations as when traveling with the computer In addition these tips are useful when traveling internationally When traveling in another country check that the local AC voltage and the A...

Page 94: ... protect your computer from unauthorized access Setting these passwords creates several different levels of protection for your computer and data Supervisor Password prevents unauthorized entry into the BIOS utility Once set you must enter this password to gain access to the BIOS utility See BIOS utility on page 80 User Password secures your computer against unauthorized use Combine the use of thi...

Page 95: ...n the User Password is set and the password on boot parameter is enabled a prompt appears at boot up Type the User Password and press Enter to use the computer If you enter the password incorrectly a warning message appears Try again and press Enter Important You have three chances to enter a password If you fail to enter the password correctly after three tries the system halts Press and hold the...

Page 96: ...as you would with a desktop PC For instructions on how to connect different external devices to the computer read the following section Built in network feature The built in network feature allows you to connect your computer to an Ethernet based network To use the network feature connect an Ethernet cable from the Ethernet RJ 45 port on the chassis of the computer to a network jack or hub on your...

Page 97: ...terface is an industry supported uncompressed all digital audio video interface HDMI provides an interface between any compatible digital audio video source such as a set top box DVD player and A V receiver and a compatible digital audio and or video monitor such as a digital television DTV over a single cable Use the HDMI port on your computer to connect with high end audio and video equipment Si...

Page 98: ... at the top of the screen Find D2D Recovery at the bottom of the screen and use the F5 and F6 keys to set this value to Enabled Password To set a password on boot activate the BIOS utility then select Security from the categories listed at the top of the screen Find Password on boot and use the F5 and F6 keys to enable this feature Playing DVD movies If you wish to view DVDs on your computer you w...

Page 99: ...VD movie will automatically play after a few seconds Note To change the region code insert a DVD movie of a different region into the DVD drive Please refer to the online help for more information Region code Country or region 1 USA Canada 2 Europe Middle East South Africa Japan 3 Southeast Asia Taiwan South Korea 4 Latin America Australia New Zealand 5 Former USSR parts of Africa India 6 People s...

Page 100: ...he system Nothing appears on the screen The computer s power management system automatically blanks the screen to save power Press any key to turn the display back on If pressing a key does not turn the display back on three things might be the cause The brightness level might be too low Press Fn increase to adjust the brightness level The display device might be set to an external monitor Press t...

Page 101: ...tore the C drive with the original software content that is installed when you purchase your computer Follow the steps below to rebuild your C drive Your C drive will be reformatted and all data will be erased It is important to back up all data files before using this option Before performing a restore operation please check the BIOS settings 1 Check to see if Acer disk to disk recovery is enable...

Page 102: ... you can still get in contact with our offices worldwide Please consult www acer com Before you call Please have the following information available when you call Acer for online service and please be at your computer when you call With your support we can reduce the amount of time a call takes and help solve your problems efficiently If there are error messages or beeps reported by your computer ...

Page 103: ...rvice center for assistance Some problems may be solved using the BIOS utility Error messages Corrective action CMOS battery bad Contact your dealer or an authorized service center CMOS checksum error Contact your dealer or an authorized service center Disk boot failure Insert a system bootable disk into an external drive then press Enter to reboot Equipment configuration error Press F2 during POS...

Page 104: ...e or more of the following measures Reorient or relocate the receiving antenna Increase the separation between the device and receiver Connect the device into an outlet on a circuit different from that to which the receiver is connected Consult the dealer or an experienced radio television technician for help Notice Shielded cables All connections to other computing devices must be made using shie...

Page 105: ...practical you will be notified as soon as possible You will also be informed of your right to file a complaint with the FCC Your telephone company may make changes in its facilities equipment operations or procedures that could affect the proper functioning of your equipment If they do you will be notified in advance to give you an opportunity to maintain uninterrupted telephone service If this eq...

Page 106: ...ices 2 This equipment is not capable under all operating conditions of correct operation at the higher speeds for which it is designed Telecom will accept no responsibility should difficulties arise in such circumstances 3 Some parameters required for compliance with Telecom s Telepermit requirements are dependent on the equipment PC associated with this device The associated equipment shall be se...

Page 107: ...The LCD unit is produced with high precision manufacturing techniques Nevertheless some pixels may occasionally misfire or appear as black or red dots This has no effect on the recorded image and does not constitute a malfunction Radio device regulatory notice Note Below regulatory information is for models with wireless LAN and or Bluetooth only General To prevent radio interference to the licens...

Page 108: ...test country list The FCC RF safety requirement The radiated output power of the wireless LAN Mini PCI Card and Bluetooth card is far below the FCC radio frequency exposure limits Nevertheless the computer series shall be used in such a manner that the potential for human contact during normal operation is minimized as follows 1 Users are requested to follow the RF safety instructions on wireless ...

Page 109: ...de 6 obtainable from Health Canada s website at www hc sc gc ca rpb This device complies with RSS210 of Industry Canada This Class B digital apparatus complies with Canadian ICES 003 Issue 4 and RSS 210 No 4 Dec 2000 and No 5 Nov 2001 Cet appareil numérique de la classe B est conforme à la norme NMB 003 No 4 et CNR 210 No 4 Dec 2000 et No 5 Nov 2001 To prevent radio interference to the licensed se...

Page 110: ...nge in point to point operation LCD panel ergonomic specifications Design viewing distance 500 mm Design inclination angle 0 0 Design azimuth angle 90 0 Viewing direction range class Class IV Screen tilt angle 85 0 Design screen illuminance Illuminance level 250 250cosα lx where α 85 Color Source D65 Reflection class of LCD panel positive and negative polarity Ordinary LCD Class I Protective LCD C...

Reviews: