background image


ACER 


OPERATION MANUAL 

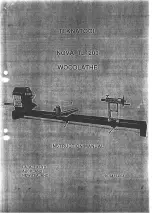
Precision Flat Bed CNC Lathe     


Model: ATL 1840E 

Taiwan: Ya-Gin Machine Tool Manufacturing, Inc. 


          No. 101, 506 Lane, Seng-Tso Road 


          Seng Karng District, Taichung City, Taiwan 


          Tel: 886-4-2520-4120      Fax: 886-4-2520-4123 

CA: Springwood Industrial, Inc. 

        2320 E. Valencia Drive 

        Fullerton, CA 92831 

        Tel: 714-871-5558              Fax: 714-871-5554 

NJ: Klim Industrial, Inc. 

        244 N. Randolphville Rd. 

        Piscataway, NJ 08854 

        Tel: 732-752-9100   


Fax: 732-752-9101 

 
Revision: 3/10/16 

Summary of Contents for ATL 1840E

Page 1: ...6 Lane Seng Tso Road Seng Karng District Taichung City Taiwan Tel 886 4 2520 4120 Fax 886 4 2520 4123 CA Springwood Industrial Inc 2320 E Valencia Drive Fullerton CA 92831 Tel 714 871 5558 Fax 714 871 5554 NJ Klim Industrial Inc 244 N Randolphville Rd Piscataway NJ 08854 Tel 732 752 9100 Fax 732 752 9101 Revision 3 10 16 ...

Page 2: ...b P 1 13 1 4 8 Safety devices P 1 14 1 4 9 Maintenance operation preparations P 1 14 1 4 10 Maintenance operation P 1 14 1 4 11 Unit operation is begun after maintenance P 1 15 1 5 Warning signs plate on the machine P 1 16 1 6 Hazard List and Solution P 1 18 2 MACHINE SPECIFICATIONS 2 1 Dimensional drawing P 2 1 2 1 1 General layout P 2 2 2 1 2 Chip Conveyor P 2 3 2 1 3 Specification P 2 4 2 2 Int...

Page 3: ...eadstock Oil P 4 1 4 1 2 Fittings P 4 2 4 2 Machine body P 4 2 4 2 1 Aligning Headstock P 4 2 4 2 2 Cross slide P 4 3 4 2 3 Saddle P 4 3 4 2 4 Aligning tailstock to spindle P 4 3 4 2 5 Adjusting belt tension of spindle p 4 4 4 2 6 Adjusting belt tension of X axis P 4 4 4 3 Electric equipment P 4 4 4 3 1 Motor P 4 4 4 3 2 Control units P 4 5 4 3 3 Wire connectors P 4 5 4 4 Simple trouble shooting P...

Page 4: ...Persons unable to read English must have this manual read and explained to them before operating or maintaining the machine Everyone working on the machine must know how to operate it safely and correctly to avoid possible injury WARNING The operator must thoroughly read and understand this manual before operating the lathe or commencing any servicing Care should be taken to follow safety rules an...

Page 5: ...1 SAFETY INSTRUCTIONS ...

Page 6: ...use of water soluble cutting coolant It is prohibited by flammable and explosive cutting coolant to cutting 7 The CNC lathe is not designed not applied in the working with flammable metalworking fluids or pyrophoric material and the use of combustible metalworking fluids NOTICE The following safety instructions are general recommendations for most common operations on a turning machine Additional ...

Page 7: ...ght in moving parts Take them off before turning the machine on Always wear safety shoes with steel toes and oil resistant soles Wear a safety helmet when working near overhead hazards If operator has long hair hair should always be tucked under a cap or tied back and up 8 Turning machine are designed to be run by one person Persons other than the designated operator should stay out of the machine...

Page 8: ...om a concentric support more than 10 times of its diameter Doing so can cause the bar to bend or break When any bar is extended a large sign should be placed to warn people to stay away from the area 22 If your turning machine has a bar feeder interfaced to it keep yourself and others away from the exit end of the bar feeder when the machine running 1 1 1 Safety instructions for work holding 1 Nev...

Page 9: ... Remember chucking a work piece safely involves many variables If you have the slightest doubt regarding the safety of your set up for a job consult with your supervisor 4 Never operate spindle mounted accessories over their rated speed If the chuck or accessory is not supplied by original maker verify the safe operating speed with the manufacturer 5 Always be sure the chuck the chuck or accessory...

Page 10: ...ker switch 3 Then the interlocking doors front door magazine door can be opened 1 2 MAINTENANCE SAFETY INSTRUCTION WARNING High voltage is used to power the machine only authorized electricians should correct any electrical component failure Disconnect main power and lock in off position before attempting any repair Tag disconnect switch DO NOT START 1 Read and understand safety instructions for m...

Page 11: ...w 1 Connect a single conductor to its grounding terminal This will avoid possible serious accidents resulting from ground currents which might otherwise flow in the NC machine if a peripheral device should malfunction 2 Be careful when using concrete reinforcing rods as grounding points These reinforcing rods often are used to ground equipment because they usually offer a resistance to ground of l...

Page 12: ... of nominal frequency 3 Ambient temperature 0 to 45 32 to 113 4 Relative humidity Less than 80 Temperature changes should not cause condensation 5 Atmosphere Free from excessive dust acid fumes corrosive gases and salt 6 It should be avoided to expose the machine to direct sunlight or heat rays which can change the environmental temperature 7 Avoid exposing the NC machine to abnormal vibration If ...

Page 13: ...ng to look for it 2 Before replacing a fuse switch off the machine 3 Provide sufficient working space to avoid hazardous To prevent accidents all floors should be dry and clean 4 Water or oil can make floors slippery and hazardous To prevent accidents all floors should be dry and clean 5 Before operating switches always check that they are the right ones 6 Never touch a switch accidentally 7 Workb...

Page 14: ...erstood Every function and operating should completely clear 2 Use safety shoes which are not damaged by oil safety goggles with side covers safe clothes and other safety protection 3 Close all electric cabinet doors operating cover fully guarding door before switching machine on CAUTION 1 The power cable form the factory feeder switch to the machine main circuit breaker should have a sufficient s...

Page 15: ...ence of proper lubrication 4 Check safety covers and safety devices for proper operation 5 Check belt tensions Replace any set of belts that has become stretched with a fresh matching set 1 4 3 Warm up 1 Warm up machine especially the spindle and feed shaft by running them for 10 to 20 minutes at about half or one third the maximum speed in the automatic operation mode 2 This automatic operation p...

Page 16: ...ol make a trial run 1 4 5 Operation WARNING 1 Do not work with long hair that can be caught by the machine Tie it up at the back out of the way 2 Do not operate switches with gloves on This could cause malfunctions etc 3 Whenever a heavy work piece must be moved two or more persons should always work together if there is any risk involved 4 Only trained qualified workers should operate forklift tr...

Page 17: ...uard can t be opened under automatic operation model 2 When performing heavy duty machining carefully prevent hips from being accumulated since hot chips can catch fire 1 4 6 To interrupt machine WARNING When leaving the machine temporarily after completing a job turn off the power switch on the operation panel and the main circuit breaker 1 When leaving the machine temporarily after completing a ...

Page 18: ...s 5 Check coolant hydraulic oil and lubricant for contamination Change them if they are seriously contaminated 6 Check coolant hydraulic oil and lubricant levels Add if necessary 7 Before leaving the machine at the end of the shift turn off the power switch on the operating panel machine main circuit breaker and factory feeder switch in that order 8 Clean the oil pan filter 9 Do not clean machine ...

Page 19: ...uction manual 2 Thoroughly read the whole maintenance manual and fully understand the principles constructions and precautions involved 1 4 10 Maintenance operation DANGER 1 Those not engaged in the maintenance work should not operate the main circuit breaker or the control power ON switch on the operating panel For this purpose Do not touch the switch maintenance operation in progress or similar ...

Page 20: ... case please confirm whether the three color light bulb is normal or not Three color light represent Red represents Exception alarm malfunction Yellow represents End processing Information provided Green represents processing 1 4 11 Unit operation is begun after maintenance WARNING 1 Arrange things in order around the section to receive the maintenance including working environments Wipe water and...

Page 21: ...6 1 5 WARNING SIGNS PLATE ON THE MACHINE Safety related information which must be strictly observed by all machine operators is given on warning signs plate These warning signs plate are attached to the machine ...

Page 22: ...Page 1 17 ...

Page 23: ...rator if he touches it unconsciously Fit a protection Headstock Side Guard to cover the whole set of transmission system and prevent an operator from touching it directly Chain Transmission on Chip Conveyor The power of Chip conveyor is transmitted by China When Chip Conveyor is working the rotating Chain could cause hurt to an operator if he touches it unconsciously Fit a protection cover and fas...

Page 24: ...2 MACHINE SPECIFICATIONS ...

Page 25: ...Page 2 1 2 MACHINE SPECIFICATIONS 2 1 Dimensional drawing ...

Page 26: ...2 SPINDLE 12 APRON 03 ELECTRIC POWER BOX 13 BALL SCREW OF X AXIS 04 HEAD STOCK 14 SERVO MOTOR OF X AXIS 05 CHUCK 15 FOUNDATION STAND 06 SPLASH GUARD 16 SPLASH CHIP PAN 07 BED 17 X AXIS HANDWELL 08 BALL SCREW OF Z AXIS 18 Z AXIS HANDWELL 09 CONTROL PANEL 19 CUTTING FLUID TANK 10 MONITOR 20 FOUNDATION BOLT ...

Page 27: ...Page 2 3 2 1 2 Chip Conveyor ...

Page 28: ...ongitudinal travel Z axis 350 mm 550 mm 800 mm Ball screw Dia X pitch X Φ25 x P5 mm Z Φ40 x P10 mm TAILSTOCK Spindle dia 58 mm Spindle travel 150 mm Taper in spindle MT 4 MOTOR Spindle motor 7 5HP 10HP opt X axis drive motor 6 3 NM Pitch 5mm 1 1 Z axis drive motor 6 3 NM Pitch 10mm 1 2 Coolant pump motor 1 6 HP X Z FEEDS X axis rapid travel 5 m min Z axis rapid travel 7 m min MACHINE WEIGHT N W Ap...

Page 29: ...TURRET MODEL L max 4 Way Tool post ATL 1820E 300 ATL 1830E 500 ATL 1840E 800 8 Station Turret ATL 1820E 260 ATL 1830E 460 ATL 1840E 710 Unit mm TURRET MODEL LT D max Dt max 4 Way Tool post ATL 18X0E 230 Dia 230 Dia 460 8 Station Turret 230 Dia 230 Dia 460 ...

Page 30: ...nd button ON 09 Press emergency stop button to stop machine 10 Learn safety rules 11 Simple trouble shooting 12 Maintenance 2 3 2 Check list for maintenance ITEM JOB Interval 01 Clean machine do not use air compressor Weekly 02 Check electrical circuit connection Every time before operation 03 Replace coolant ant clean coolant tank 3 months 04 Clean motor Annually 05 Check Slide x axis Annually 06...

Page 31: ...3 INSTALLATION ...

Page 32: ...equired form machine to wall and objects or between machines to ensure easy preparation cleaning and maintenance of machine as well as easy opening of the door of electric cabinet With special torque resistant capability at the machine base this machine requires no particular foundation Just provide 6 150mm thick of concrete on the floor and leave space for component for leveling Do not use wood f...

Page 33: ...big as shown in Figure for setting foundation bolts Place the bolts in the holes then fill the holes with cement Lift the machine on the bolts after the cement has turned into solid concrete and then fix the bolts with screw nuts ATL 1820E 1830E ATL 1840E ...

Page 34: ...3 1 2 Layout floor plan Following is a top view drawing ...

Page 35: ...r when its voltage is different from power voltage and contact electric technician for preparation 3 3 Unpacking Remove the top cover of wooden case first and then the plates on four sides Carefully take out fittings at first if necessary Remove the set screws used for holding the machine on the base Disassembling packing crate and remove skids as possible to avoid damaging the machine If the mach...

Page 36: ...ng of required is as same as the crane 3 Some Tools for lifting machine Wrap the straps under the ribs as shown in Figure and then lift the machine in the slowest speed of crane NOTICE 1 Machine must be always kept balanced during lifting 2 Place protection material on any part of the machine that might be touched by straps 3 Please apply for suitable Stacker lift Spreader according to the strengt...

Page 37: ...eways if the coating still exists Be cautions while selecting a suitable cleaning agent WD 40 applied with a clean brush will soften the protective coating The protective coating can then be removed with clean rags NOTICE 1 Do not use gasoline or any other flammable solution to clean the machine 2 Clean and lubricate all the exposed ways of table and saddle Drive the table saddle to one end of tra...

Page 38: ...re is only one leveling available then use it on both directions alternately Adjust the six leveling screws bolts 1 located the bottom of the machine base as shown in below until the machine is leveled with 0 02mm 1000mm 0 001 4ft in both directions Suggestion For the newly installed machine check its once every week If the foundation is rigid enough then you may level the machine once per month 3...

Page 39: ...lubricated centralize the mounting together with proper spare parts of piping to apply lubricants automatically by means of this machine The oil feeding machine provided oil feeding times with precision to improve lubricating efficiency and lower cost 2 Starting this machine is on OFF it can avoided your re actuated this machine too much feeding oil 3 For the adjustment of the dispose volume set t...

Page 40: ...sition for the selected discharge amount Remark Prior to the first operation push coercive pumping switch by hand in order to fill up the pipe with oil 3 5 2 Lubrication system This system adopts automatic intermission lubricant supply which includes metering Valves for proportional distribution and includes an alarm for low fluid level warning Still please check the fluid level before operation a...

Page 41: ...ype of pump Spindle rotation On either direction will activate the pump to supply lubricant 3 5 4 Lubrication on tailstock Bed width 350mm there are two oil ball on the tailstock Please add 10 drops of recommended lubricant to them Respectively every day before operating to ensure the smoothness of Ways ...

Page 42: ... the chuck on It would be easier to fit chuck on when the Back plate is already well fit on machine 3 7 Tailstock center loading unloading To unload the center just hold the center and back the tail spindle Please wipe the taper of the center clean before loading it to the tail spindle 3 8 Coolant While choosing coolant for this machine please ensure the material of the coolant excludes material o...

Page 43: ...4 MAINTENANCE ...

Page 44: ...e lubricant please refer to Figure 4 1 and follow the steps below 1 The recommended lubricant is Shell Telus 32 or Mobil DTE 24 2 Prepare a large container at the front side of the headstock 3 Turn off the lathe and the spindle Disconnect the escape hose from the lubricant tank and then connect to the container 4 Turn on the lathe and the spindle The old lubricant will flow into the container inst...

Page 45: ... of operation After that re adjust every six months to one year to keep the machine in best accuracy 4 2 1 Aligning headstock lf taper appears on turning work piece and convex on rounding adjust the parallel of headstock by following steps 1 Insert gauge bar in the spindle bore Attach the base of test indicator to the tool post Apply the stylus of the indicator to the outer diameter of the bar Mov...

Page 46: ...ve the slide back and forth to a satisfied smoothness 6 Re assemble the cover 2 4 2 2 4 2 3 4 2 3 Saddle lf the gibs between saddle and bed become loose it will affect the accuracy of saddle travel Check and adjust them every six months according to the following steps 1 Use flat head screw driver to loosen the adjust screw 1 2 as shown as Fig about 1 2 circle CCW 2 Appropriately tighten adjust sc...

Page 47: ...ust the adjusting screw 2 to fine the alignment 4 2 4 4 2 5 4 2 5 Adjusting belt tension of spindle The main spindle torque which depends on the motor power transmitted through the belt the operator must check the V belt s tension frequently by adjusting screw if it becomes loosen 4 2 6 Adjusting belt tension of x axis The new belt tension of X axis should be 2 9mm elastic length when pressed by 1...

Page 48: ...oil into headstock Ump path clogged Remove the object that clogs the pump outlet Rails on bed turn black Automatic lubrication system out of lubricant Add lubricant Inappropriate oil properties Immediately replace the oil Oil tube clogged Replace tube or clear the clogged object Cylindrical machined into conical shape Spindle head slick Please refer Chapter 3 10 1 to adjust the accuracy Inaccurate...

Page 49: ...chip disposal box advance and remove the chip clearly Provide three buckets with about each of 30 liters capacity placed on the back of machine 4 Disconnect the hose at the rejection side of pump form the position where conjunction with aluminum conduits Take this hose free side into bucket and turn on the power of pump Pump out the coolant from water tank until empty 5 Disconnect the hose at the ...

Page 50: ...nd inspection work turn the power switch off 5 When working inside the electric control cabinet or repairing the machine set the power switch to the OFF position and lock it 6 Do not use air to clean the machine This may cause dust or sand particles to cover the bearing or slide ways 7 Use only lubricating oils which are recommended by In order to operate machine correctly and make the most of mac...

Page 51: ...ear 3 Cautions when Replenishing Oil a Always use the same oil jug for the same oil Never use a jug used for different brand oil b Never remove the filter from the filter port when supplying oil c If oil other than specified by original maker used mistakenly or different brands of oil are mixed Clean the tank and piping immediately 4 Disposing Waste Oil Disposing factory waste without legal permis...

Page 52: ...for external piping cables and coating intact all doors closed etc b Check the shop floor around the machine for the hazards from such as coolant hydraulic oil lubricating oil and obstacles c Make sure that the turret is not at the travel end in the x axis direction 9 After Turning On the Power a Listen to the sound of the hydraulic unit when it is operating b Make sure that the cooling fan in the...

Page 53: ...eakage is found take necessary measures 11 Chuck the coolant hoses and coolant tanks and remove all foreign matter if any 12 Check the amount of coolant and replenish if necessary 13 Check to be sure that the indicator lights on the operation panel correctly turn on or flicker Weekly 50 H Maintenance 1 Carry out daily maintenance 2 Check the spindle front end tool holders and other attachment for ...

Page 54: ... machine 3 Change the hydraulic oil in the hydraulic power unit and the lubricant for the spindle head and the table Before supplying new hydraulic oil or lubricant clean the inside of the tanks 4 Clean all the motors 5 Check the bearing in the motor for noise Replace the bearings If necessary 6 Visually check the electrical devices and reply panel 7 Check each indicator and the voltmeter if it is...

Page 55: ...5 CHUCK ...

Page 56: ...the workpiece 3 Main spindle motor speeds rpm couldn t be over the Max speed of the Chuck 4 Spindle cannot start if door is open Cover chuck periphery for the lathe without door WARNING We cannot assume responsibility for damage or accidents caused by misuse of the chuck through noncompliance with the safety instructions 1 Secure clamp bolts with specified torque 2 Never clamp another chuck with t...

Page 57: ...sed two thousand times Or every six month and lubricate it with grease When disassembling A D type scroll chuck take off pinion before Removing the cover 4 Used the jaw as low as possible Accuracy and function decrease 5 When the extension of workpiece is long support it with tailstock center or follow rest 6 Set jaw correctly for increasing accuracy 7 Don t apply extreme start and stop without cl...

Page 58: ...180 2000 SK 9 Ø 11 Ø 220 Ø 70 Ø 210 2000 SK 10 Ø 12 Ø 260 Ø 80 Ø 250 1800 SK 12 Ø 15 Ø 300 Ø 90 Ø 290 1800 SK 16 Ø 30 Ø 380 Ø 110 Ø 360 1500 500 20 Ø 25 Ø 280 Ø 150 Ø 500 800 630 25 Ø 25 Ø 350 Ø 170 Ø 630 600 800 32 Ø 70 Ø400 Ø 200 Ø 800 500 5 3 INSTALLATIION 1 Adapter mounting accuracy is influenced to the chuck Accordingly finish the adapter run out and face run out within 0 005mm after mounting...

Page 59: ...and face run out are within 0 02mm target 0 01mm or less 4 If chuck run out accuracy is over 0 02mm loosen the mounting bolts to shift chuck position 120 and tighten the boles again with the same way 5 4 MAINTENANCE AND INSPECTION 1 Clean engagement part in the chuck body and jaw 2 Lubricate in ball cap and the engagement part in the chuck body and jaw 1 or 2 times a day 3 If sward or foreign matt...

Page 60: ...force is excessively high Calculate the cutting force and check whether the force coincides with chuck specifications Speed is excessively Reduce speed to level where required clamping force can be obtained Oil for slide part and rotary part is run out Lubricate from the ball cap and make the clamp unclamp of jaw without clamping the work Poor accuracy The chuck periphery is run out Check to see t...

Page 61: ...s information please refer to its supplied control manuals to find the correct part number and specification And please contact the original control manufacturer for the ordering instructions Trouble shooting on the control Please contact control manufacturer s service department they can get your question solved and get you going quickly Any other question please contact our service department Th...

Page 62: ...chanical Drawings Parts Breakdown List Note When ordering parts please be prepared with 1 Machine model serial number 2 Item number 3 Part number and description 4 Year of Production 5 Voltage horsepower 6 Quantity ...

Page 63: ...Page 7 2 CONTENTS PARTS LIST 7 1 HEADSTOCK _ 18TT SPINDLE BORE 58mm 2 Page 7 3 7 2 BED Z AXIS TRANSMISSION Page 7 8 7 3 CARRIAGE AND TOOLPOST Page 7 10 7 4 TAILSTOCK Page 7 13 ...

Page 64: ...Page 7 3 7 1 HEADSTOCK 1 HEADSTOCK _ 18 SPINDLE BORE 58mm 2 ...

Page 65: ...Page 7 4 18 SPINDLE BORE 58mm 2 ...

Page 66: ... 1 011 18HT 011 SHAFT 1 012 18HT 012 COVER 1 013 18HT 013 GEAR 1 014 18HT 014 GEAR 1 015 18HT 015 GEAR 1 016 18HT 016 TOOTH SHAFT 1 017 18HT 017 COVER 1 018 18HT 018 SHAFT 1 019 18HT 019 GEAR 1 020 18HT 020 GEAR 1 021 18HB 015 COVER 1 022 18HT 022 1 SHAFT 1 023 18HT 023 GEAR 1 024 18HB 020 POSITIONING BASE 1 025 18HB 019 BLOCK 1 026 18HB 021 BEVEL GEAR 1 027 18HT 027 SHAFT 1 028 18HA 044 CAM 1 029...

Page 67: ...NG 6004ZZ 3 047 BEARING 6005 3 048 BEARING 6007 1 049 BEARING 6008 3 050 BEARING 6015Z 1 051 BEARING 6206 3 052 BEARING 6304 1 053 BEARING 6305 1 054 BEARING 6908 1 055 BEARING 32016XJ 2 056 OIL SEAL 40 68 7 1 057 OIL SEAL 25 38 7 2 058 OIL SEAL 30 55 10 1 059 O RING P41 1 060 O RING P52 1 061 O RING G55 2 062 O RING G65 3 063 O RING P18 1 064 O RING G120 1 065 O RING G170 1 066 C LOCKER S40 2 067...

Page 68: ...Page 7 7 7 1 2 MAIN SPINDLE TRANSMISSION PARTS LIST OF MAIN SPINDLE TRANS No PARTS NO DESCRIPTION Q TY NOTE 001 PULLEY 1 002 V BELT 4 003 MOTOR 1 004 SCREW 1 005 MOTOR BASE 1 006 SCREW 1 ...

Page 69: ...Page 7 8 7 2 BED Z AXIS TRANSMISSION ...

Page 70: ...7 25CB 007 BRG COVER 1 008 25CB 008 COLLAR 3 009 LOCK NUT M35 P1 5 1 010 25CB 010 SNAP COVER 1 011 25CB 011 1 PUELLY 1 013 25CB 013 BRG HOUSING 1 014 25CB 014 BRG COVER 1 015 25CS 015 MOTOR BASE 1 015A 33B 015 A MOTOR BRACKET 1 016 25CB 016 LOCK NUT 1 023 25B 023 PAD BLOCK 1 023A 33B 023A MOTOR BASE 1 027 33B 027 ADJUSTING SCREW 2 040 25B 040 SHAFT 1 042 25B 042 PUELLY 1 081 BEARING 3062 4 082 PAC...

Page 71: ...Page 7 10 7 3 CARRIAGE CROSS SLIDE ...

Page 72: ...8 1 TRANSMITTING BLOCK 1 008 2 25CS 008 2 TRANSMITTING BLOCK 1 009 18ST 009 BRG BASE 1 010 25CS 010 BRG COVER 1 011 18ST 011 COVER 1 012 25CS 012 PULLEY 1 013 25CS 013 SCREW NUT 1 014 18ST 014 COVER 1 015 25CS 015 MOTOR PLATE 1 016 MOTOR 1 018 25CB 018 BLOCK 3 020 25CS 020 WIPER 1 021 25CB 021 PULLEY 1 022 25CS 037 NUT 2 023 25CS 023 WIPER 1 024 18ST 024 PLATE 1 025 18ST 025 COVER 1 026 25S 024 1 ...

Page 73: ...062 CAP SCREW M8 30 4 063 CAP SCREW M8 45 4 064 CAP SCREW M6 15 12 065 CAP SCREW M6 30 4 066 CAP SCREW M6 10 2 067 SET SCREW M8 35 1 068 NUT M8 P1 25 1 069 SCREW M5 10 19 070 SCREW M8 25 2 071 SCREW M510 12 072 BEARING 6003 2 073 KEY 8 7 25 1 074 BEARING 2047 1 075 C LOCKER S17 1 076 SET SCREW M5 5 2 077 CAP SCREW M14 70 4 078 WASHER M5 3 ...

Page 74: ...Page 7 13 7 4 TAILSTOCK MANUAL TAILSTOCK _ 18 ...

Page 75: ... 012 25T 012 LOCKING LEVER 1 013 18T 013 CLAMPING BOLT 1 014 18T 014 CLAMPING BOLT 1 015 25T 015 1 HOLDING DOWN PLATE 2 016 25T 016 STOP PIN 2 017 25T 017 NIPPING NUT 1 018 25T 018 2 HANDLE 1 020 25T 020 WIPER 2 022 25T 022 WIPER 2 023 25A 010 HAND WHEEL 1 024 25S 024 1 ADJUSTMENT BOLTS 2 025 25A 057 HANDLE 1 034 25T 034 GIB 1 039 25T 039 1 FIXING SCREW 1 060 SET SCREW M8 35 1 061 CAP SCREW M6 20 ...

Page 76: ...RTS LIST OF 18 MANUAL TAILSTOCK Rev 2015 03 12 ITEM PARTS NO DESCRIPTION Q TY NOTE 068 WASHER M10 1 069 WASHER M12 2 070 OIL SEAL 72 58 9 1 071 KEY 6 6 40 1 072 STEEL BALL Ø6 2 073 SPRING 6mm 2 074 OIL STUFF 5 8 1 ...

Reviews: