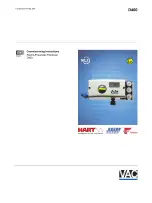
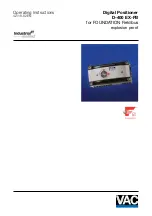
TZID-C
QUICK-START
Valve Positioner
Brief Operating Instructions for TZID-C
Commissioning
1. Turn on the air supply to the positioner. Check all tubing and remedy any leaks.
2. Apply the 4...20 mA analog input signal to the positioner, obs & - polarity.
3. Check for proper mounting: refer to instruction manual if needed.
•
Open front dust cover from positioner to access the local control keys.
•
Press and hold
MODE
.
•
Additionally briefly press
until mode
1.3 MAN_SENS
is displayed.
•
Release
MODE
.
•
Press
to move the actuator to its mechanical limit stops in both directions, and note the
values.
•
The angle of rotation on the display is indicated in degrees. Recommended positions of limit stops:
¾
> -28° and < +28° for linear actuators
¾
> -57° and < +57° for rotary actuators
•
Adjust the mounting position of the positioner in relation to the actuator if required.
4. Select the appropriate Configuration procedure below and continue with
Step 5
…
Configuration With Software Rev 2.XX and higher
(see other side for Software Rev 1.1 and lower)
5.
Run the standard autoadjustment function using either the linear or rotary procedure as follows:
Note: the actuator moves during autoadjust; take necessary precautions & take valve out of service.
For linear actuators:
1
- Press and hold
MODE
until
ADJ_LIN
is displayed, then release.
- Press
MODE
again and hold it down until the
3
to
0
countdown finishes.
- Then release
MODE
.
Standard autoadjustment starts.
For rotary actuators:
1
- Press and hold
ENTER
until
ADJ_ROT
is displayed, then release.
- Press
ENTER
again and hold it down until the
3
to
0
countdown finishes.
- Then release
ENTER
.
Standard autoadjustment is started.
When the autoadjustment function is finished
successfully
, the parameter settings are
automatically
saved
and the positioner returns to Control Fixed, operating mode 1.1. To change operating mode, see Selecting the
Operating Mode section on next page.
If standard autoadjustment should fail, the procedure is automatically interrupted, and an error code is indicated.
In this case press and hold
for approx. 3 seconds. The positioner returns to mode
1.3
MAN_SENS
(manual adjustment within sensor range). Check the assembly for proper mounting and, if required, readjust it.
Repeat the standard autoadjustment function.
6.
If required: Adjust the dead band and tolerance band
This step is only necessary for critical actuators, e.g. very small ones. Usually, it can be skipped.
Copyright 2006 ABB, All Rights Reserved [May, 2006]
PN25114
ABB