background image

Commissioning Instruction CI/EDP300-EN Rev. C 

PositionMaster EDP300 

Digital Positioner   


Summary of Contents for PositionMaster EDP300

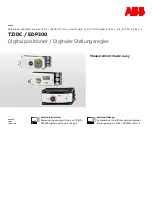
Page 1: ...Commissioning Instruction CI EDP300 EN Rev C PositionMaster EDP300 Digital Positioner...

Page 2: ...Additional documentation on PositionMaster EDP300 is available to download free of charge at www abb com positioners Alternatively simply scan this code Manufacturer ABB Automation Products GmbH Indus...

Page 3: ...Electrical connection to the EDP300 remote sensor 19 6 4 3 Electrical data for inputs and outputs 19 6 4 4 Connection on the device 21 6 4 5 Connection to device EDP300 Control Unit with EDP300 Remot...

Page 4: ...uctions are structured as follows DANGER The signal word DANGER indicates an imminent danger Failure to observe this information will result in death or severe injury WARNING The signal word WARNING i...

Page 5: ...only by persons whose training has included instructions on different types of protection and installation techniques concerned rules and regulations as well as general principles of zoning The perso...

Page 6: ...or fully depressurized ensure that there is no possibility of a hazardous atmosphere getting into the pneumatic system or that any hazardous atmosphere is removed prior to compression by taking suitab...

Page 7: ...ith proximity switch1 Terminals Limit 1 51 52 Limit 2 41 42 Temperature class T1 T4 Temperature class T6 In accordance with type examination certificate PTB 00 ATEX 2049X 1 No IECEx approval 2 5 2 Typ...

Page 8: ...perator must strictly observe the applicable national regulations with regard to installation function tests repairs and maintenance of electrical devices e g NEC CEC NOTICE Observe the device s appli...

Page 9: ...EDP300 fully several times 3 4 Temperature data NOTICE Legibility of the display is guaranteed at an ambient temperature of 20 70 C At 20 C and lower legibility can become limited Legibility can be c...

Page 10: ...t UAI Terminals 21 22 Temperature class T1 T4 Temperature class T6 Ui 30 V Ui 28 V Ii 320 mA Ii 320 mA Pi 1 W Pi 0 8 W Ci 11 3 nF Li 150 H Module for digital feedback SW1 SW2 Terminals SW 1 41 42 SW 2...

Page 11: ...ed are examples The device identification plates affixed to the device can differ from this representation Change from one to two columns 5 Transport 5 1 Inspection Check the devices immediately after...

Page 12: ...is being operated on a cylinder for reasons associated with linearity you should run the Auto Adjust function for rotary actuators see chapter Start Auto Adjust function on page 31 A EDP300 control un...

Page 13: ...e of rotary actuators The usable span is 90 which must be entirely within the measuring range but does not necessarily need to run symmetrically to the longitudinal axis NOTICE During installation mak...

Page 14: ...used for the mount bracket 5 Secure the mount bracket 1 with screws 2 and washers 3 using the relevant tap holes on the positioner housing Tighten the screws as evenly as possible to ensure subsequen...

Page 15: ...commended range for linear actuators 30 30 minimum range 25 NOTICE After mounting check whether the positioner is operating within the sensor range Position of actuator bolt The actuator bolt for movi...

Page 16: ...n actuators For mounting on part turn actuators in accordance with VDI VDE 3845 the following attachment kit is available Fig 15 Components of attachment kit Adapter 1 with spring 5 Four screws M6 4 f...

Page 17: ...t be taken into account when determining the adapter position on the feedback shaft 1 For this purpose the feedback shaft can be adjusted manually so that the adapter 3 can be attached in the correct...

Page 18: ...res for them Change from two to one column 6 4 1 Electrical connection to positioner EDP300 Control Unit Fig 19 Electrical connection EDP300 A Basic device B Options C EDP Remote Sensor Connection rem...

Page 19: ...lly explosive atmospheres note the additional data in chapter Use in potentially explosive atmospheres according to ATEX and IECEx on page 5 and in chapter Use in potentially explosive atmospheres in...

Page 20: ...n function1 When the 24 V DC signal is interrupted the I P module executes the respective safety function depending on the mechanical construction The positioner output 1 is depressurized and the valv...

Page 21: ...25 1 5 mm2 AWG 23 AWG 17 Flexible with wire end sleeve with plastic sleeve 0 14 0 75 mm2 AWG 26 AWG 20 Multi wire connection capacity two wire with the same cross section Rigid flexible wires 0 14 0...

Page 22: ...rol Unit housing 1 and remote position sensor EDP300 Remote Sensor housing 2 while following the instructions below The EDP300 Remote Sensor and the EDP300 Control Unit are adjusted to each other Ensu...

Page 23: ...of 10 m 33 ft must be used for connection purposes Route the cable into the terminal compartment through the EMC cable glands Ensure that the shielding is secured correctly in the EMC cable glands Con...

Page 24: ...with the 24 V DC signal terminal 85 86 interrupted 6 5 1 Installing the mechanical position indicator 1 Loosen the screws for the housing cover and remove it 2 Attach the extension shaft to the feedba...

Page 25: ...the desired position 3 Attach the housing cover and screw it onto the housing Tighten the screws so that they are hand tight 4 Attach the symbol label to mark the minimum and maximum valve positions o...

Page 26: ...ntent must meet the requirements of Class 3 according to DIN ISO 8573 1 NOTICE Damage to components Contamination on the air pipe and positioner can damage components Dust splinters and any other part...

Page 27: ...imensions of 12 x 1 75 mm The level of supply air pressure required to apply the actuating force must be adjusted in line with the output pressure in the actuator The working range for the positioner...

Page 28: ...the end positions and Auto Adjust is then carried out With large actuators it can occur that the time for automatic adjustment is significantly than in smaller actuators 7 3 1 Moving to end positions...

Page 29: ...s which enable the device to be operated with the housing cover open 8 2 1 Menu navigation 2 5 Menu 3 4 5 Exit Select Fig 27 LCD display 1 Operating buttons for menu navigation 2 Menu name display 3 M...

Page 30: ...not be changed on this level Operating modes menu In the operating modes menu the Auto Adjust function can be started for commissioning purposes You can also change the operating modes and switch to t...

Page 31: ...NOTICE Auto Adjust does not always result in optimum control conditions When Auto Adjust is started via shortcut keys the position of the valve is determined automatically 9 Maintenance The positione...

Page 32: ...rable zone 0 100 Configurable dead zone 0 1 10 Resolution AD conversion 16 000 steps Sampling frequency 20 ms Ambient temperature effect 0 5 for each 10 K Influence of vibration 1 to 10 g and 80 Hz 1...

Page 33: ...y Address Contact person Telephone Fax E Mail Device details Typ Serial no Reason for the return description of the defect Was this device used in conjunction with substances which pose a threat or ri...

Page 34: ...34 CI EDP300 EN Rev C PositionMaster EDP300 12 2 Control Drawing 901305...

Page 35: ...PositionMaster EDP300 CI EDP300 EN Rev C 35...

Page 36: ...36 CI EDP300 EN Rev C PositionMaster EDP300...

Page 37: ...PositionMaster EDP300 CI EDP300 EN Rev C 37...

Page 38: ...38 CI EDP300 EN Rev C PositionMaster EDP300...

Page 39: ...PositionMaster EDP300 CI EDP300 EN Rev C 39...

Page 40: ...positioners Note We reserve the right to make technical changes or modify the contents of this document without prior notice With regard to purchase orders the agreed particulars shall prevail ABB do...

Reviews: