Operating instruction
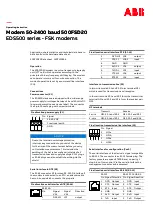
Modem 50-2400 baud 500FSD20
EDS500 series - FSK modems
Operating instruction
Modem 50-2400 baud 500FSD20
EDS500 series - FSK modems
Application, characteristics and technical data have to
be taken from the hardware data sheet:
1KGT150986
Operation
The 500FSD20 modem is a voice-frequency telegraphy
unit (VFT unit) which operates according to the
principle of binary frequency shift keying. The modem
can operate in two- and four-wire connection. The
mode of operation is set by a command line interface
(CLI).
Connections
Power connector (X1)
The EDS500 devices are equipped with a wide range
power supply for voltages between 24 and 60 Volts DC
(power consumption see device label). The connector
is a 3-pin Phoenix plug with screw terminals.
Pin allocation power supply (X1)
Pin Signal
1
24-60 V DC
2
Functional earth
1
2
3
3
GND
ADVICE
Due to the internal overvoltage protection,
interrupt any connection to ground of the device
for the time of the measurement before you carry
out isolation measurements. This includes the
earthing of the hat rail as well as all shields of all
transmission lines and supply feedings. RJ-12 plugs
or RJ-45 plugs can also establish earthing via the
shield.
Serial interface to DTE (X2)
The RJ-45 connector X2 forms an RS-232-D interface. If
the modem is connected to an RTU, an adapter cable
has to be used which connects the pin pairs.
Pin allocation serial interface DTE (RJ-45)
RS-232-D
Pin
Signal
V.24
Signal
V.28
Direction
8
1
1
DSR M1
107
output
Pin allocation serial interface DTE (RJ-45)
2
DCD M5
109
output
3
DTR S1
108.2
input
4
GND
GND
-
5
RxD C2
104
output
6
TxD D1
103
input
7
CTS M2
106
output
8
RTS S2
105
input
Interface to transmission line (X3)
In two-wire mode X3-1 and X3-2 form terminal NF1
which is used for transmission and reception.
In four-wire mode X3-1 and X3-2 form the transmitter
terminal NF1 and X3-3 and X3-4 form the receiver pair
NF2.
NF terminals
Transmit
Receive
2-wire
NF1: X3-1 and X3-2
NF1: X3-1 and X3-2
4-wire
NF1: X3-1 and X3-2
NF2: X3-3 and X3-4
Pin allocation transmission line interface (X3)
Pin Signal
1
NF1a
2
NF1b
3
NF2a
4
3
2
1
4
NF2b
Serial interface for configuration (Con0)
The serial interface of the device is signal compatible
to RS-232. The connector is an RJ-12 female plug. The
factory presets are speed 57600 Baud, no parity, 1
stop bit, no flow control. Via the serial interface the
management console can be accessed .
Pin allocation serial interface RS-232 (RJ-12)
RS-232
RS-232 PC SUB-D9
Pin Signal Direction Pin Signal Direction
1
DCD Output
1
DCD Input
2
CTS
Output
8
CTS
Input
3
RTS
Input
7
RTS
Output
4
GND -
5
GND -
5
RxD
Output
2
RxD
Input
6
1
6
TxD
Input
3
TxD
Output


