ABB AMS 500, User Manual
The ABB AMS 500 user manual is a comprehensive guide designed to help you easily operate and troubleshoot your AMS 500 product. This manual is available for free download on our website, allowing you to access it anytime and anywhere. Get the most out of your ABB AMS 500 with this essential manual.
Share
Download


Reviews:
No comments
Related manuals for AMS 500
iPF710 - imagePROGRAF Color Inkjet Printer
Brand: Canon Pages: 238

image Prograf iPF780 Series
Brand: Canon Pages: 326
1040 Series
Brand: CalComp Pages: 4
EXPERT 24 LX
Brand: GCC Technologies Pages: 140
632
Brand: Wang Pages: 139
Expert Pro Series
Brand: GCC Technologies Pages: 58
FC8600-100
Brand: GRAPHTEC Pages: 152
SPL-450
Brand: Sekonic Pages: 28
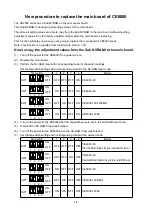
CE6000 SERIES
Brand: GRAPHTEC Pages: 4
J5-160-P
Brand: GCC Technologies Pages: 66
S CLASS
Brand: Summa Pages: 89
GD-188
Brand: Furuno Pages: 201

FP?8000 XL
Brand: Mega Pages: 27
Craft ROBO CC200
Brand: GRAPHTEC Pages: 44
Enduracut
Brand: SignWarehouse.com Pages: 24

J5 Series
Brand: GCC Technologies Pages: 59
CG-100AR
Brand: MIMAKI Pages: 184

axidraw
Brand: Evil Mad Scientist Pages: 39


