background image

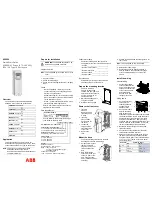
ACH580-01 PxR, UL Type 1/12

Frame R3/R4

Base drive replacement instructions

Purpose or Scope

The following are the instructions for replacing an ACH580-01 UL Type 1 (Frames R3 & R4) 
drive in PxR enclosures.

Equipment required*:


– Replacement drive (see note below)


– T20 bit


– T25 bit


– T30 bit


– PZ2 bit


– PZ3 bit


– Torque wrench


– Zip ties

Basic overview of steps


– Back-up drive parameters (if you can)


– Remove power and verify after 5 minutes


– Remove covers


– Disconnect all wiring


– Remove drive


– Prepare replacement drive


– Remove conduit assembly


– Install in reverse order


– Check connections


– Power drive


– Reprogram and test

Notes and cautions

CAUTION!

 Review complete safety and electrical considerations prior 

to replacing the drive. See ACH580 IOM (3AXD50000049127).

CAUTION! 

Two people are recommended for this job. The drive is 

heavy and can fall, causing property damage and injury.

NOTE: 

UL Type 12 drives require a UL Type 12 replacement drive,  

UL Type 1 drives are not allowed as substitutes for UL Type 12. 

* Not all of these tools are needed for each frame size.

Summary of Contents for ACH580-01 PxR R3

Page 1: ...nutes Remove covers Disconnect all wiring Remove drive Prepare replacement drive Remove conduit assembly Install in reverse order Check connections Power drive Reprogram and test Notes and cautions CAUTION Review complete safety and electrical considerations prior to replacing the drive See ACH580 IOM 3AXD50000049127 CAUTION Two people are recommended for this job The drive is heavy and can fall c...

Page 2: ... screws securing the enclosure cover 3 UL Type 1 Using a T20 bit loosen one 1 M4x16 screws securing the drive cover and remove cover UL Type 12 R3 Frame Using a T20 bit loosen four 4 M4x16 screws securing the drive cover and remove cover UL Type 12 R4 Frame Using a T20 bit loosen six 6 M4x16 screws securing the drive cover and remove cover Recycle drive cover 4 Perform voltage check to confirm no ...

Page 3: ...nd wire from the drive 6 R3 Frame Using a T20 bit loosen and remove four 4 K40x12 screws Remove conduit assembly R4 Frame Using a T25 bit loosen and remove four 4 M5x16 screws Remove conduit assembly 7 Using a T25 bit loosen and remove two 2 M5x25 screws A Using a T25 bit loosen two 2 M5x25 screws B 8 Using a T30 bit loosen the two 2 bottom M6 screws securing the drive four 4 turns of the screw NO...

Page 4: ... two 2 M6 screws securing the drive Carefully lift the drive out of channel 10 Lift enclosure and slide the drive out of the channel 11 Unpack the replacement drive UL Type 12 UL Type 12 drives require a UL Type 12 replacement drive UL Type 1 are not allowed as substitutes for UL Type 12 Using a T20 bit loosen screws securing the cover UL Type 12 Recycle the hood that was included in the box ...

Page 5: ...it assembly and hardware 13 CAUTION Use two people to install the drive Lift the enclosure and slide the drive mounting holes over the bottom two 2 screws and slide drive in place 14 Using a T30 bit replace the two 2 M6 screws that were removed earlier Torque all four 4 mounting screws to 27 in lb 3 Nm UL Type 12 Reinstall grommets that were removed earlier 15 Secure the mounting plate using the t...

Page 6: ... R3 Frame Using a PZ3 bit torque to 14 in lb 1 5 Nm R4 Frame Using a PZ3 bit torque to 27 in lb 3 Nm 18 Connect the input wires from fuse block to the Input Terminals of the drive Yellow U1 to L1 Black V1 to L2 Red W1 to L3 F3 Frame Using a PZ2 bit torque to 31 in lb 3 5 Nm R4 Frame Using a T20 bit torque to 35 in lb 4 Nm 19 Place the top of the drive cover on first then press down on the bottom R...

Page 7: ...e and secure using two 2 M4x16 screws that were removed earlier Using a T20 bit torque to 14 in lb 1 5 Nm UL Type 12 Reinstall the hood to drive 21 Power and reprogram the drive 22 Test and verify drive operation and motor direction 23 Back up and save parameters to the keypad prior to putting the drive back into service ...

Reviews: